Create A Connection To ServiceNow In Power Automate

Power Automate can connect to ServiceNow to get records and perform other CRUD operations (create, read, update, delete). The connection must be made through a Service Account having the appropriate security roles to access database tables and perform web api requests. This guide will show you how to setup the ServiceNow service account and make it interact with Power Automate.
Table of Contents
• Introduction: ServiceNow List Records Automation
• Change ServiceNow User Role To Admin
• Create A ServiceNow Service Account
• Set A Password For The Service Account
• Add Security Roles To The ServiceNow Service Account
• Get The ServiceNow Instance Name
• Setup A Connection To ServiceNow In Power Automate
• Run The Flow To Connect To ServiceNow
• Alternate Method: Connect Power Automate To ServiceNow Using OAuth2
Introduction: ServiceNow List Records Automation
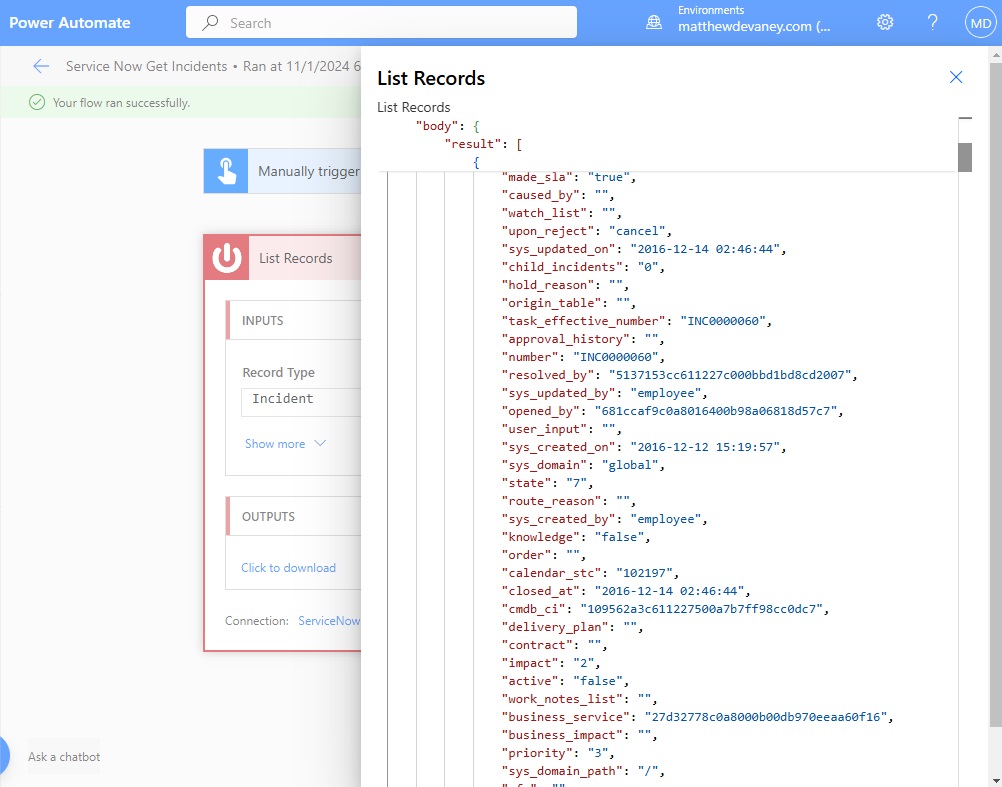
A Power Automate flow is used to list the records in a ServiceNow table. The connection is setup by choosing Basic Authentication and inputting an Instance, Username and Password.
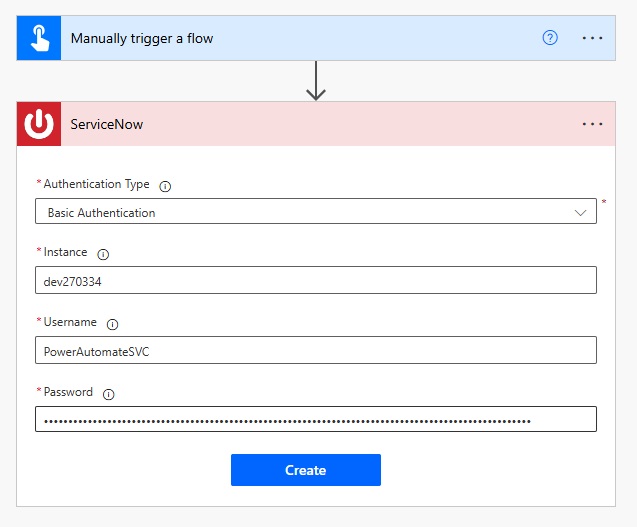
Then the flow is able to retrieve a list of records from the Incident table.

Change ServiceNow User Role To Admin
To setup a service account in ServiceNow our user must be an Admin. To check for the admin role go to developer.servicenow.com and click on the avatar icon in the top right corner.
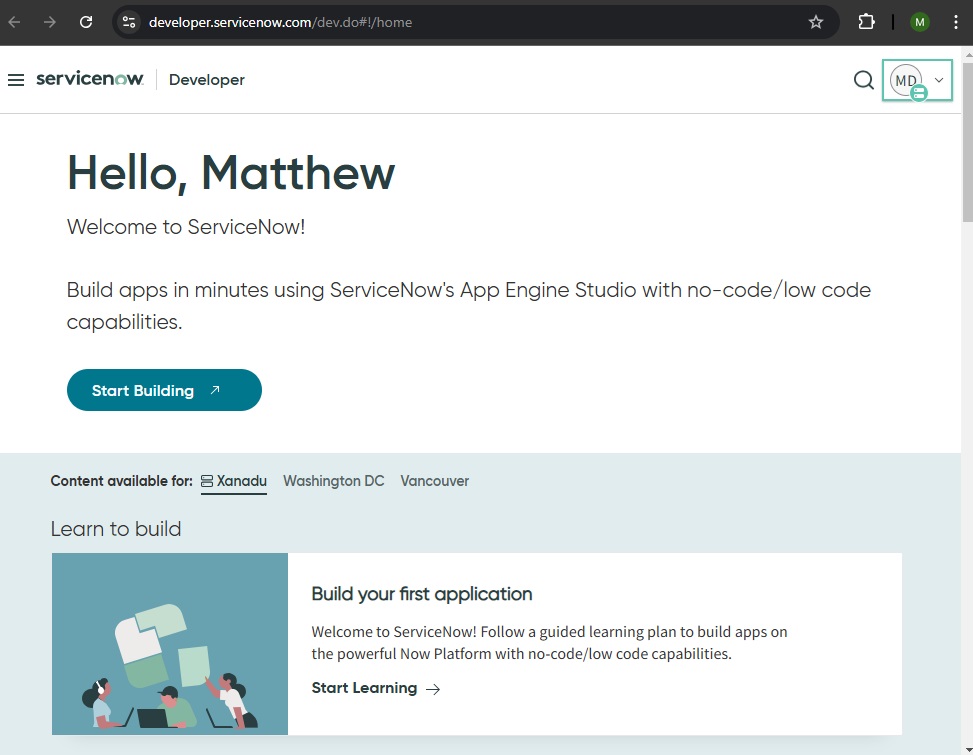
Select Change User Role.
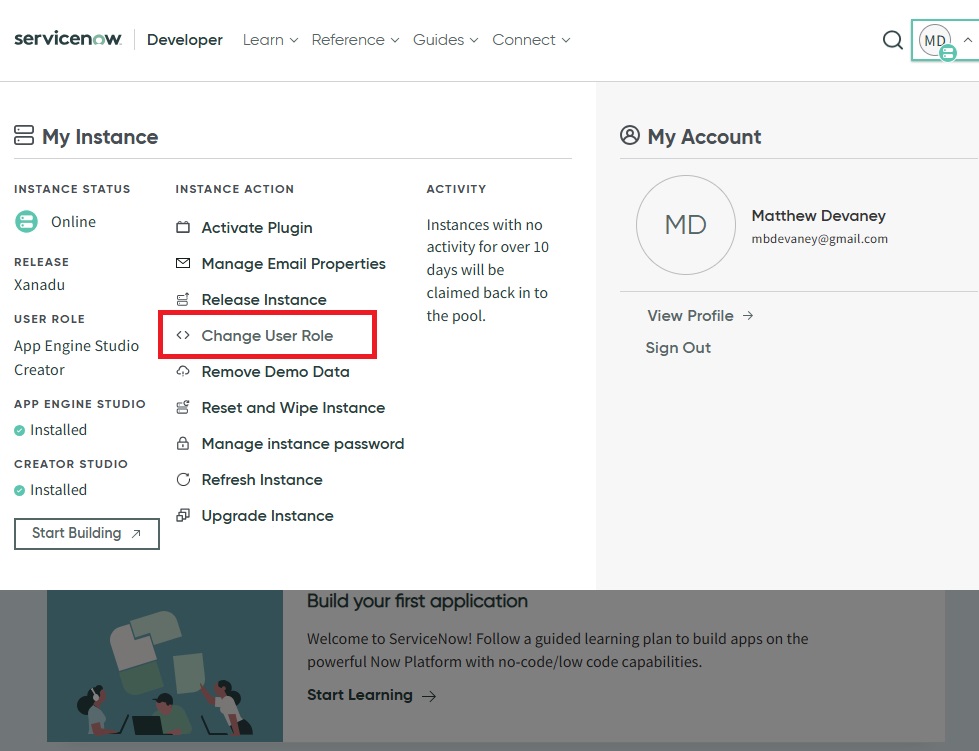
Set the user role to Admin and select Change User Role if the User is not already an admin.
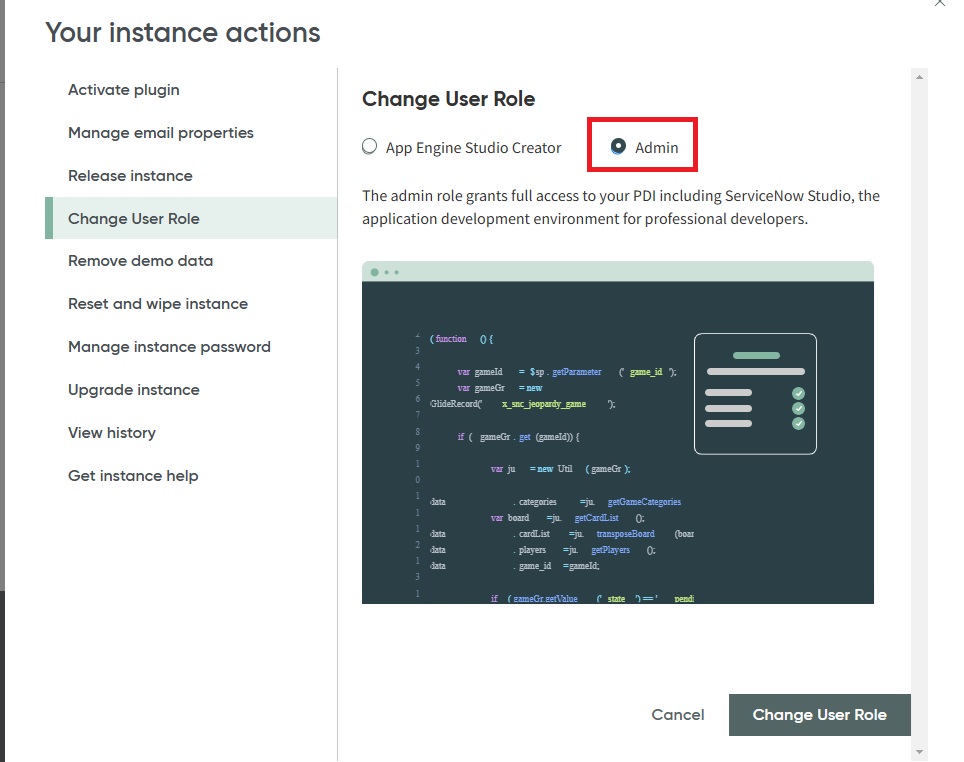
Create A ServiceNow Service Account
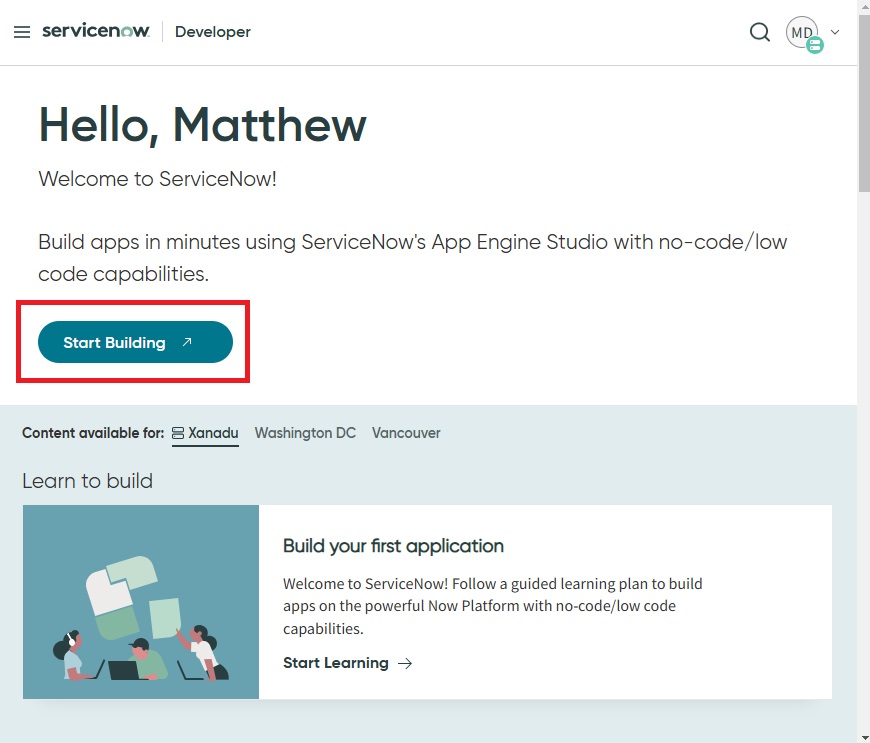
Now that our account has the Admin role we can create a Service Account to use in Power Automate. Press the Start Building button to go to the ServiceNow Creator Studio. Alternately, a connection to ServiceNow can also be made using OAuth2.
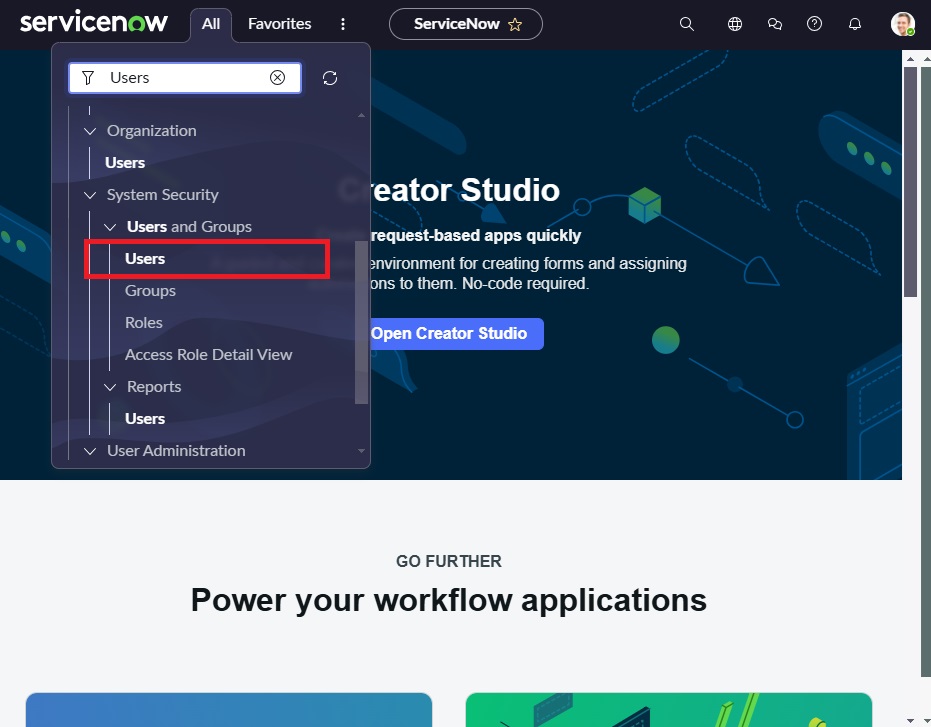
Select Users within the All tab on the top navigation.
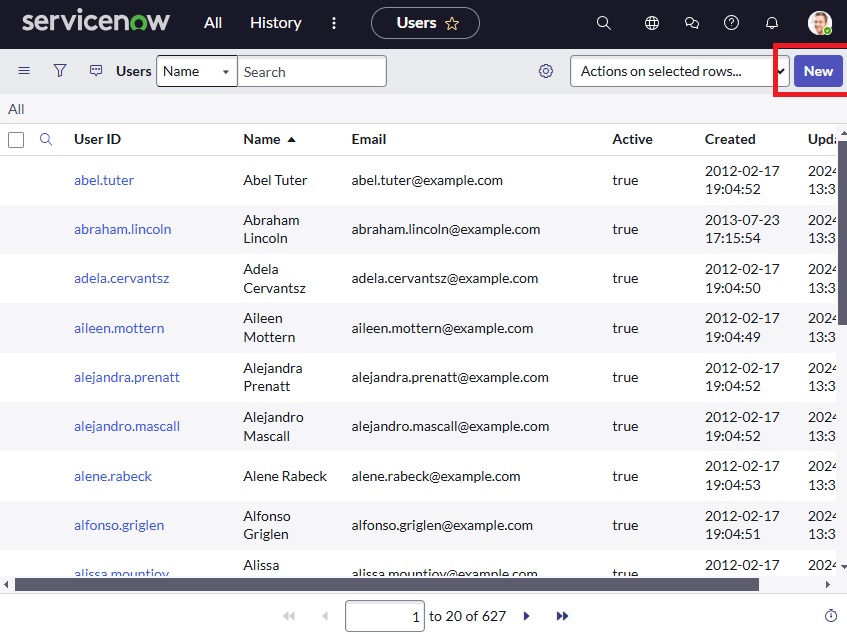
Press the New button to create a new User.
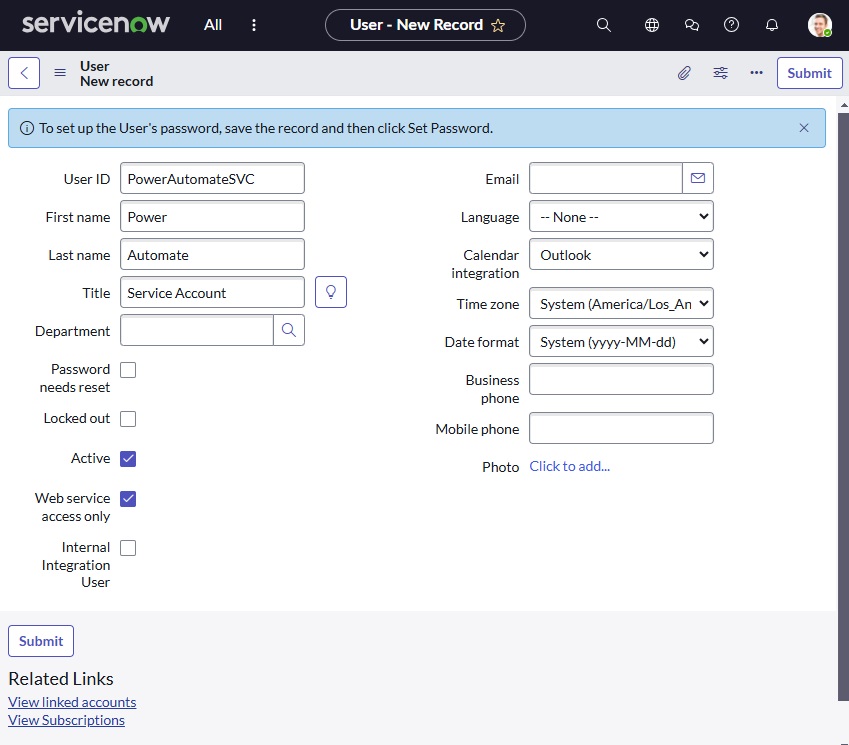
Input the following values for the new User then press the Submit button:
- User ID: PowerAutomateSVC
- First name: Power
- Last name: Automate
- Web Service Only: Yes
Set A Password For The Service Account
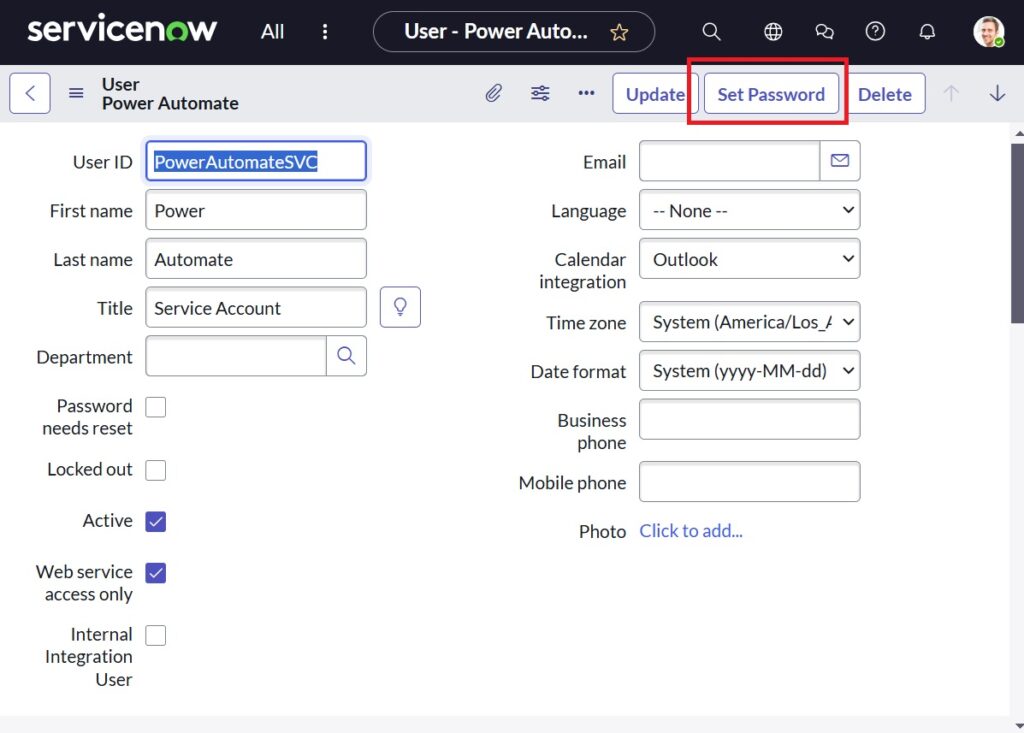
After the new User account is submitted a password can be created. Reopen the PowerAutomateSVC user account and select the Set Password button.
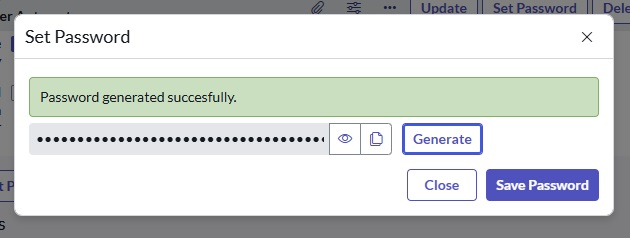
Generate a password, copy it to another location for use in the Power Automate flow and press save password.
Add Security Roles To The ServiceNow Service Account
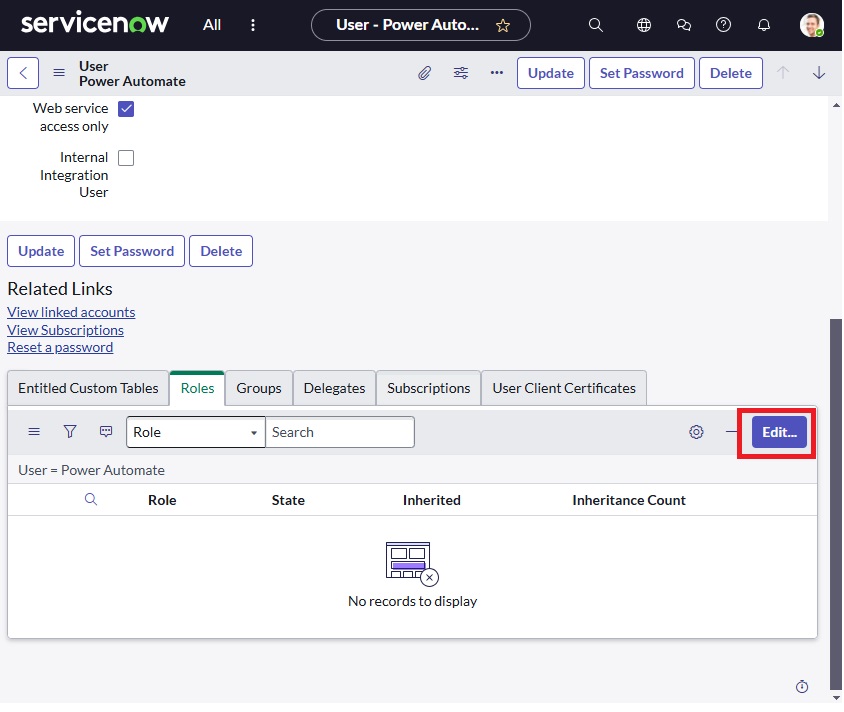
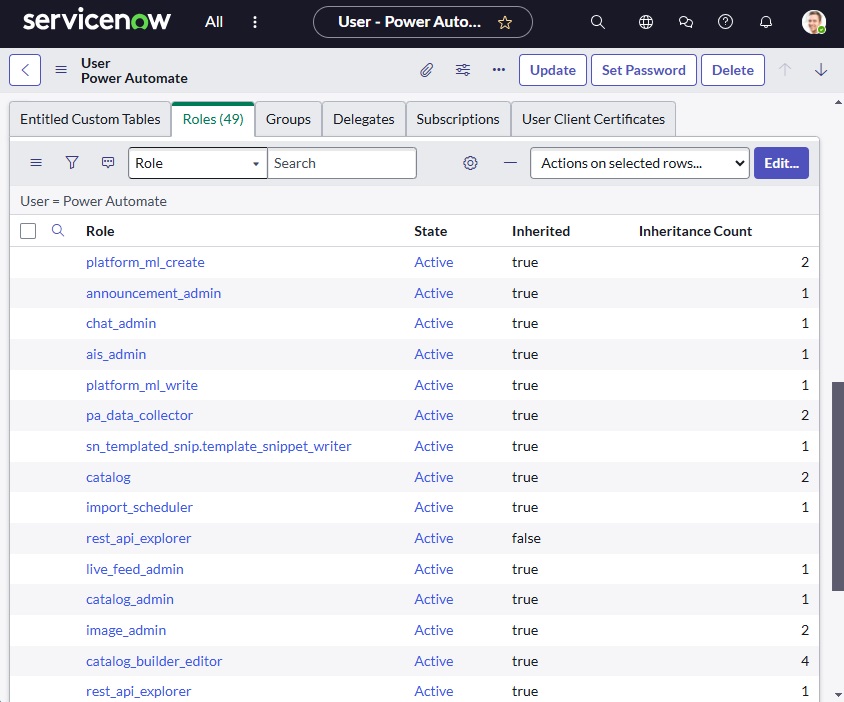
To give Power Automate access to tables in the ServiceNow database we must grant the Service Account by assigning user roles. Click the Edit button within the Roles tab.
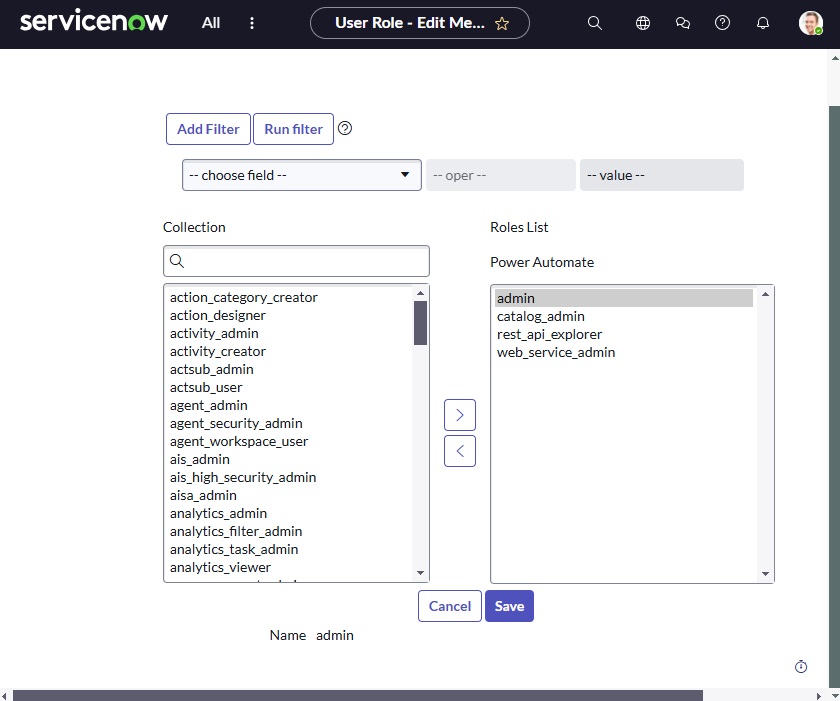
Assign the following roles and press save:
- admin
- catalog_admin
- rest_api_explorer
- web_service_admin
The Service Account will now have many roles added to the User even though we only selected 4 roles.
Get The ServiceNow Instance Name
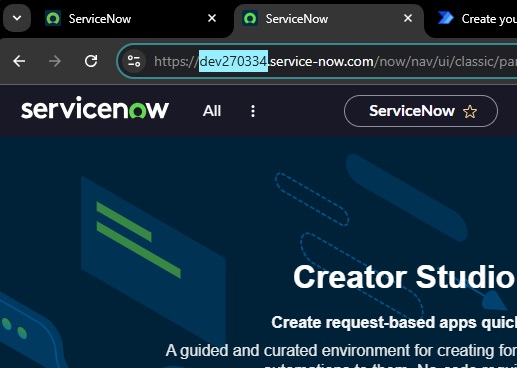
The ServiceNow instance name is needed to connect from Power Automate. Obtain the instance name by copying the subdomain from the web browser while logged into the instance.
Example: https://dev270334.service-now.com
Setup A Connection To ServiceNow In Power Automate
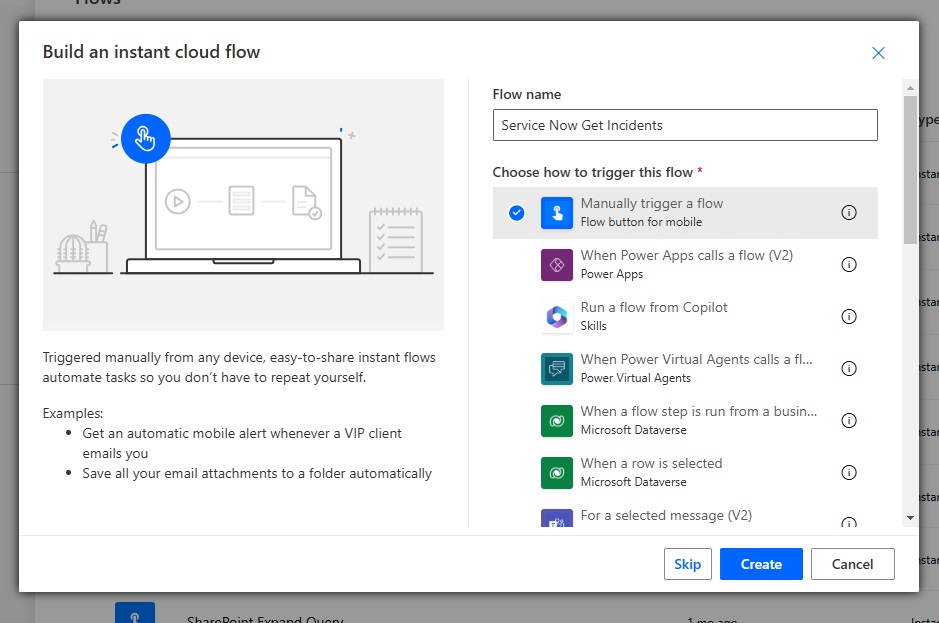
The Service Account is now configured for ServiceNow so we can use it to create a connection in a Power Automate flow. Create a new Instant flow named ServiceNow Get Incidents.
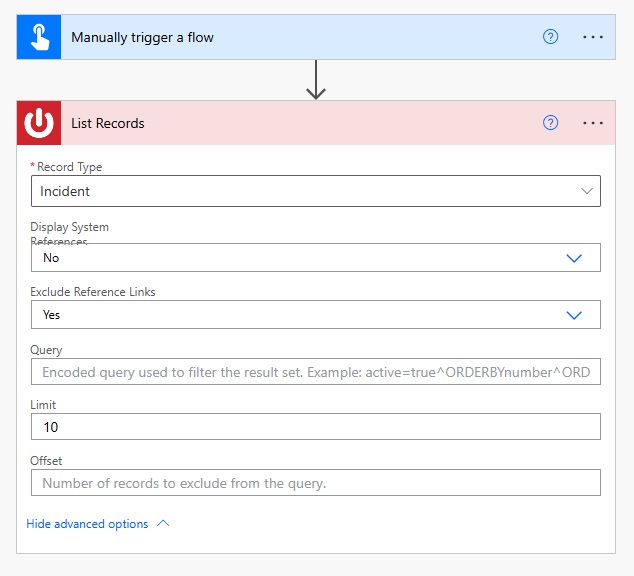
Add A ServiceNow – List Records action to the flow and use the following connection setup details:
- Authentication Type: Basic Authentication
- Instance: dev270334
- Username: PowerAutomateSVC
- Password: <service account password>

Choose the Record Type Incident and set the limit to 10.
Run The Flow To Connect To ServiceNow
We’re done. Test the flow to ensure it can connect to ServiceNow.

The ServiceNow – List Records action
Alternate Method: Connect Power Automate To ServiceNow Using OAuth2
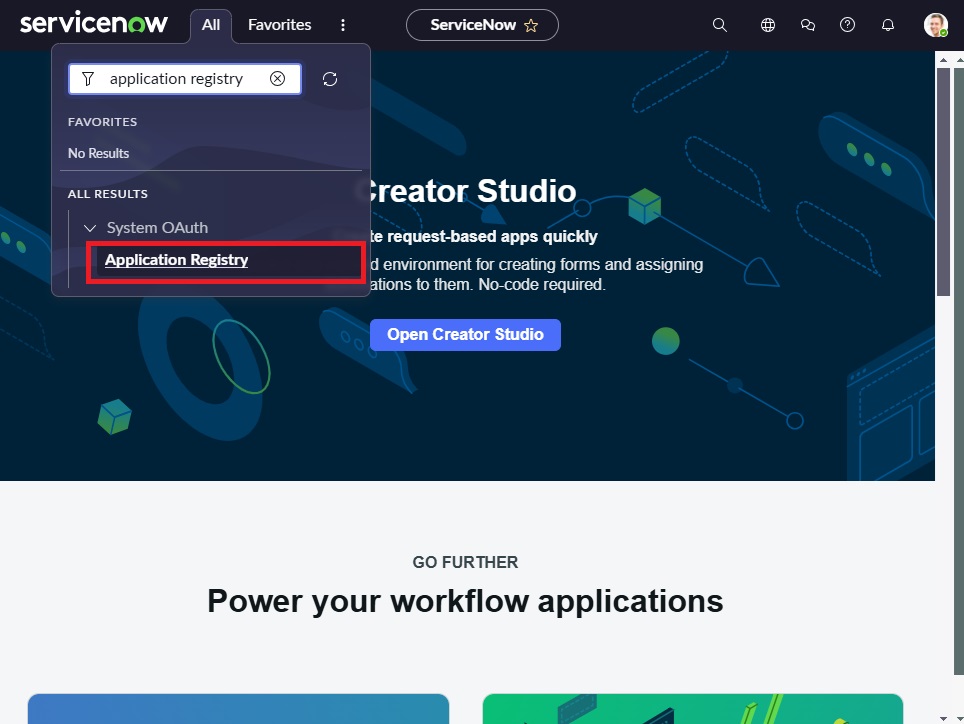
Another method to create a connection to ServiceNow is by using OAuth2 to generate a client Id and secret. On the ServiceNow creator studio landing page go to the Application Registry menu.
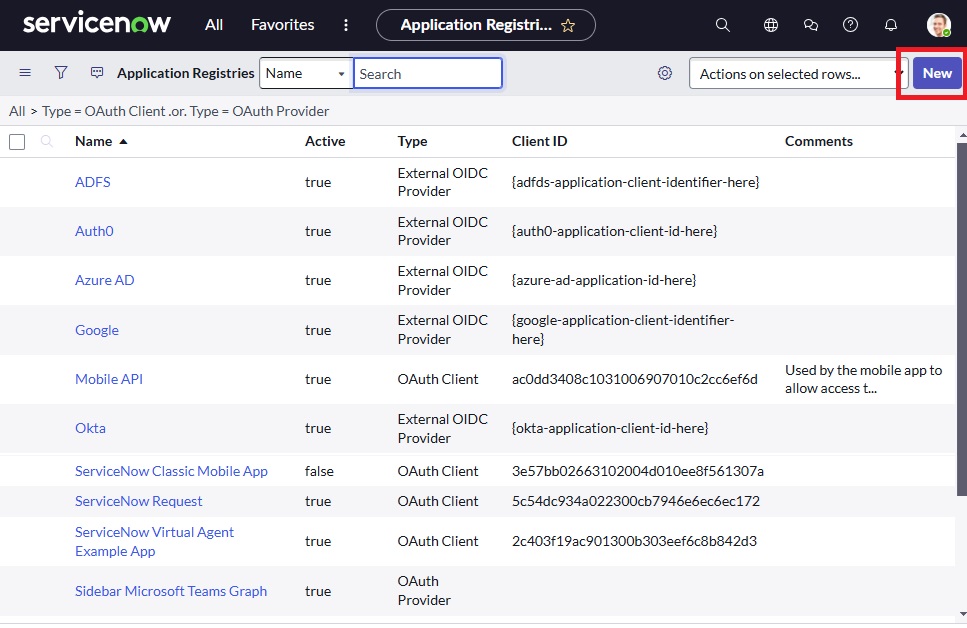
Create a new OAuth2 application registry.
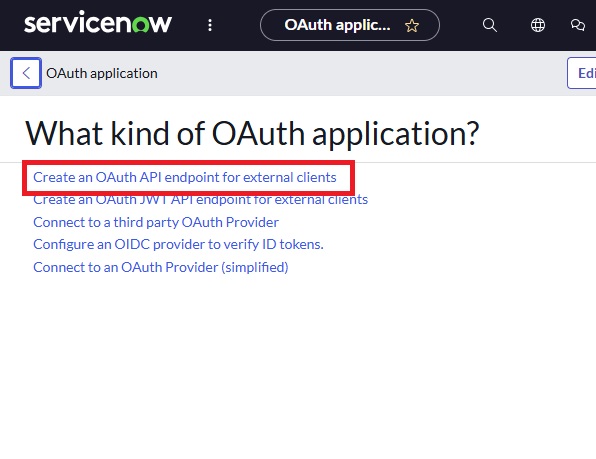
Select Create an OAuth API endpoint for external clients.
Name the application registry PowerPlatformServiceAccount. Copy the Client ID and Secret to a temporary location for use in setting up the Power Automate connection.
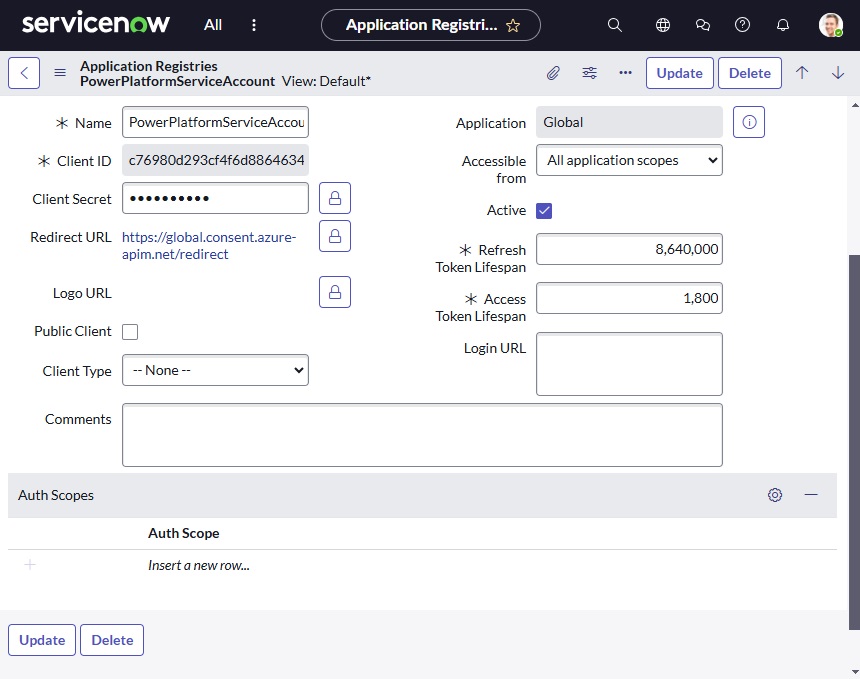
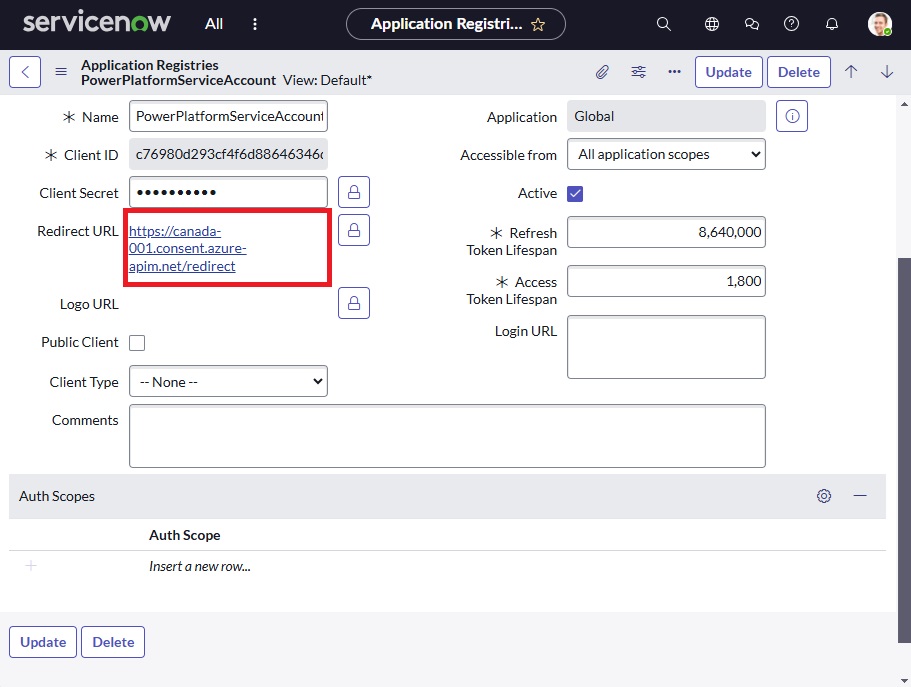
Use this for the Redirect URL. It is the redirect URL for the United States. If you are in another region you may need a different redirect URL.
https://global.consent.azure-apim.net/redirect
Go to Power Automate and add a new connection to any ServiceNow action. Use the following connection setup details:
- Authentication Type: Basic Authentication
- Instance name: Dev270334
- Client Id: <client id from ServiceNow>
- Client Secret: <client secret from ServiceNow>
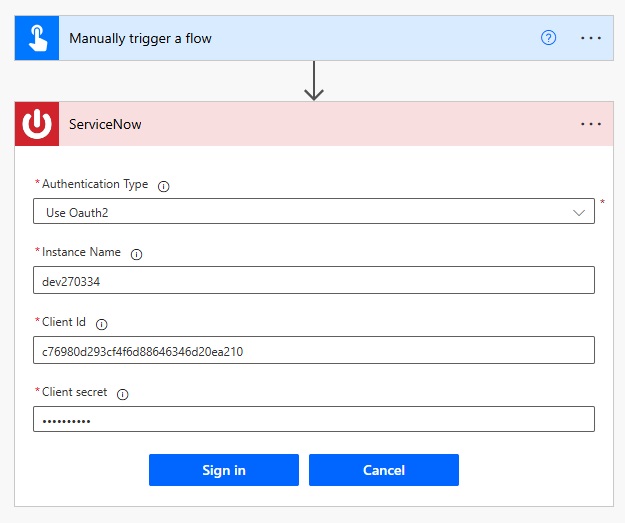
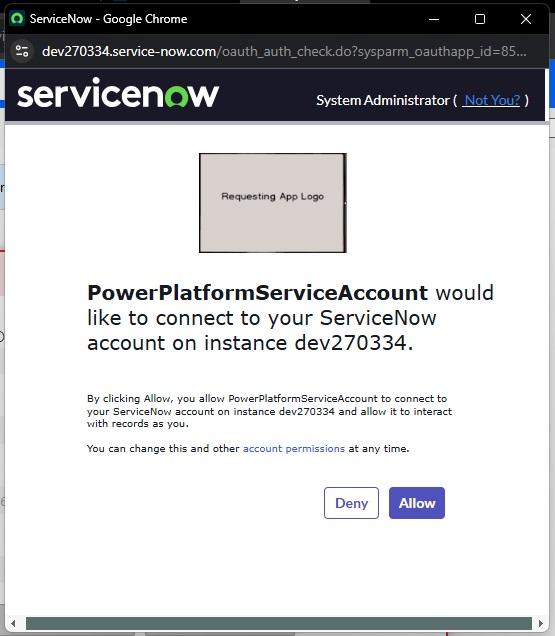
When the ServiceNow consent dialog appears select allow. The connection to Power Automate using OAuth2 will successfully connect.
If you see the message Invalid redirect_uri then it means an Redirect URL was entered in ServiceNow. Most likely you will need to replace the subdomain global with the subdomain found in the dialog’s address bar.
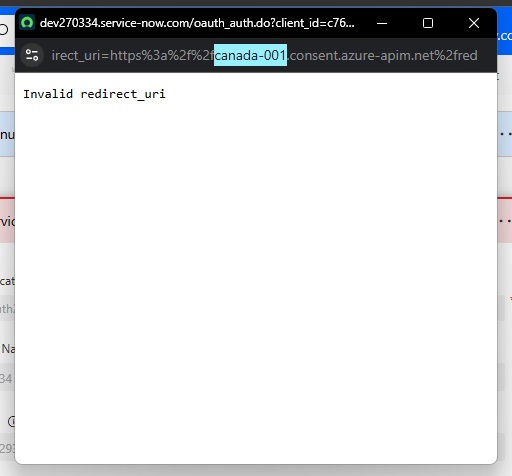
For example, as a Canadian I changed “https://global.consent.azure-apim.net/redirect” to “https://canada-001.consent.azure-apim.net/redirect” and the redirect was successful.
Did You Enjoy This Article? 😺
Subscribe to get new Power Apps & Power Automate articles sent to your inbox each week for FREE
Questions?
If you have any questions or feedback about Create A Connection To ServiceNow In Power Automate please leave a message in the comments section below. You can post using your email address and are not required to create an account to join the discussion.


Great article! Typo alert:
You forgot to change global to canada-001
Greg,
I appreciate you sending this note. The article is now updated.
Hi Matthew, did you see this before? “Missing code_challenge parameter in the request”
We resolved this, we found issues into the permissions from ServiceNOW, thanks.
Eduardo,
I would love it if you can share what solved the issue. Others will look at the post and want to see your solution 🙂
Mattew,
Our Sys ServiceNow Admin, identify that some privilegues for the admin user did not have it the correct roles into the environments, after adding the specific roles, the admin user was able to connect without issues in ServiceNow.
The tip for changing “global” to “unitedstates” was just what I needed.
Great tip as usual Mathew!
Great article, thank you Matthew