Power Apps & SharePoint List Relationships

Every app I build with SharePoint uses data from multiple related lists. There are just too many benefits to ignore: smaller storage size, improved data accuracy, and excellent flexibility when building new features and doing reporting. If you haven’t yet built an app this way yet you must give it a try. I’ll make a believer out of you!
In this article I will show you how to make Power Apps that take advantage of SharePoint list relationships.
Table of Contents:
Introduction: Reserve A Vehicle App
SharePoint Lists & One-To-Many Relationships
Select A Vehicle
Reservation Form
Showing Related Reservations
Adding A New Reservation
Edit An Existing Reservation
Resetting The Form
Deleting A Reservation
Introduction: Reserve A Vehicle App
The Reserve A Vehicle App is used by employees of a company to book a truck for travel purposes. An employee opens the app, selects a vehicle from the list, chooses the reservation date range and submits the request. Existing reservations can be edited or deleted.
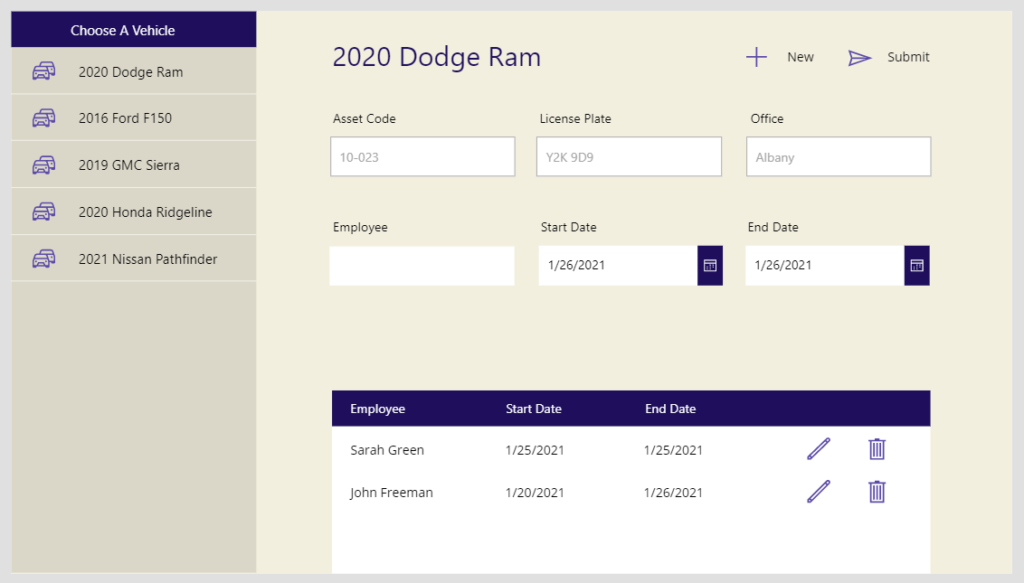
SharePoint Lists & One-To-Many Relationships
Create a SharePoint list called Company Vehicles with the columns shown below. Every column should have the type single line of text other than ID. The ID column is automatically included in every SharePoint list and the number is automatically assigned. You can find the list item ID numbers by clicking on the column options and choosing Show/Hide.
| ID | YearMakeModel | AssetCode | LicensePlate | Office |
| 1 | 2020 Dodge Ram | 10-023 | Y2K 9D9 | Albany |
| 2 | 2016 Ford F150 | 10-034 | Q9T 9T5 | Albany |
| 3 | 2019 GMC Sierra | 10-122 | A7I 0Z5 | Fargo |
| 4 | 2020 Honda Ridgeline | 10-021 | J9B 1P8 | Schaumberg |
| 5 | 2021 Nissan Pathfinder | 10-301 | Q7K 7L7 | Schaumberg |
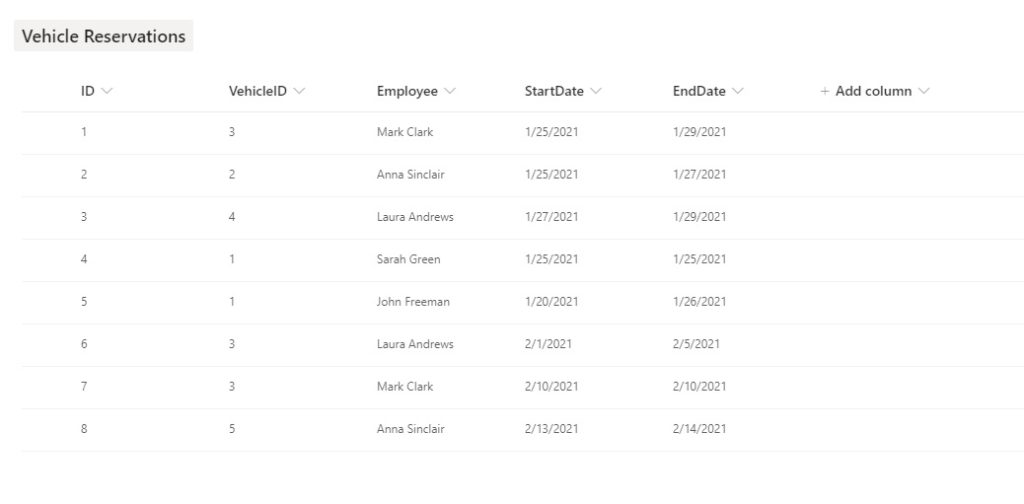
Then create a 2nd SharePoint list called Vehicle Reservations with the following column types:
- VehicleID (Number)
- Employee (Single line of text)
- StartDate (Date)
- EndDate (Date)
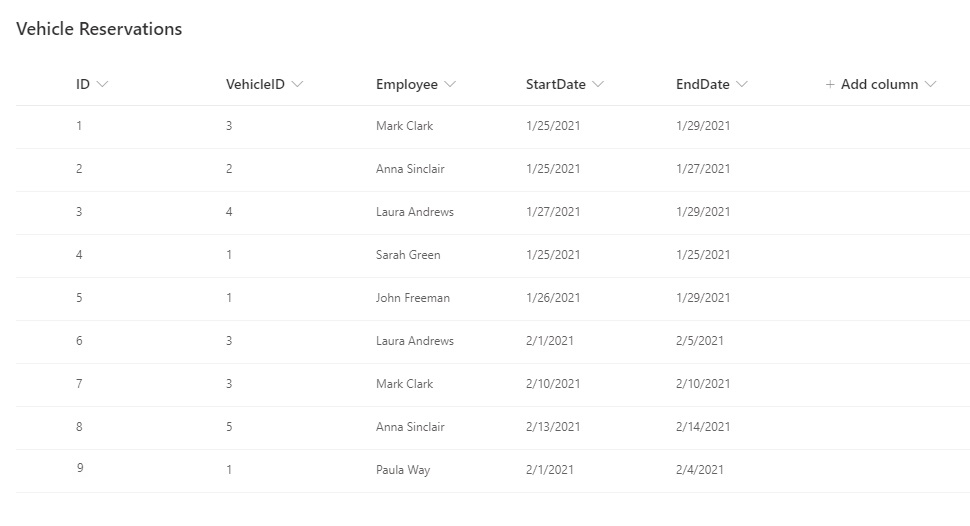
| ID | VehicleID | Employee | StartDate | EndDate |
| 1 | 3 | Mark Clark | 1/25/2021 | 1/29/20201 |
| 2 | 2 | Anna Sinclair | 1/25/2021 | 1/27/2021 |
| 3 | 4 | Laura Andrews | 1/27/2021 | 1/29/2021 |
| 4 | 1 | Sarah Green | 1/25/2021 | 1/25/2021 |
| 5 | 1 | John Freeman | 1/26/2021 | 1/27/2021 |
| 6 | 3 | Laura Andrews | 2/1/2021 | 2/5/2021 |
| 7 | 3 | Mark Clark | 2/10/2021 | 2/10/2021 |
| 8 | 5 | Anna Sinclair | 2/13/2021 | 2/14/2021 |
The Company Vehicles and the Vehicle Reservations lists have a one-to-many relationship. Every company vehicle has one or more reservations. Notice that the VehicleID column in the Vehicle Reservations list corresponds to an ID in the Company Vehicles list. This is how we will define the relationship between both tables.
Select A Vehicle
An employee selects a vehicle from the list they would like to reserve.
Open Power Apps Studio and create a new tablet app from blank. Insert a vertical gallery on the screen and choose company vehicles as the datasource.
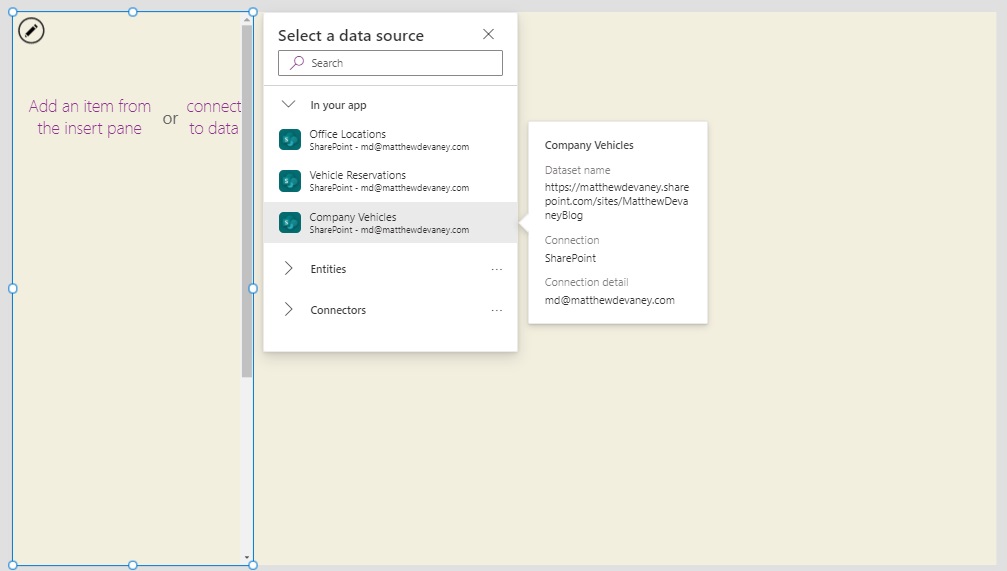
Change the gallery layout to Title and set the Title field to YearMakeModel.
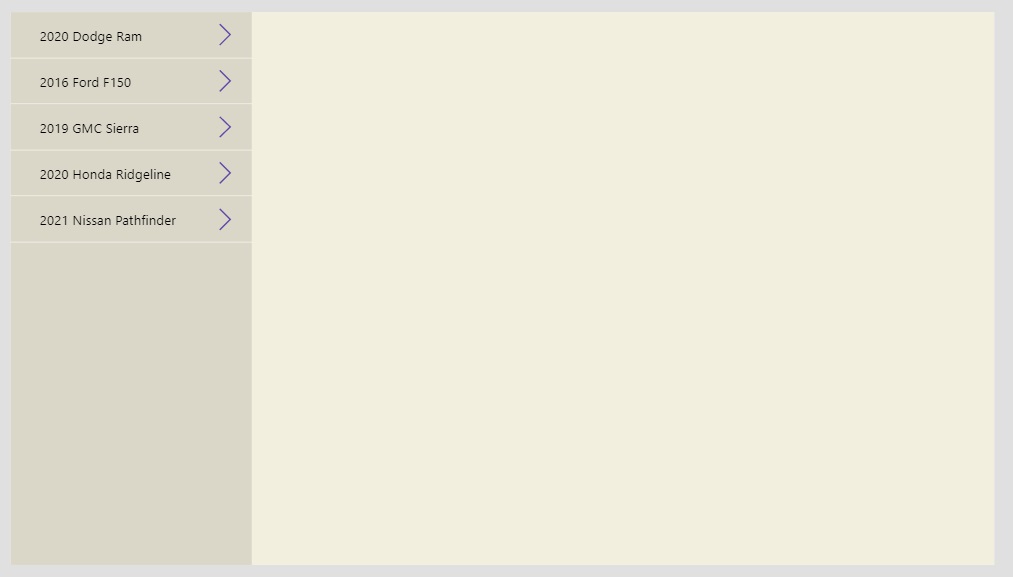
Then reposition the right-chevron icon to the left-side of the label showing YearMakeModel and change the Icon property to Icon.Cars. To complete the menu make a new label and place it above the gallery with the title “Choose A Vehicle.”
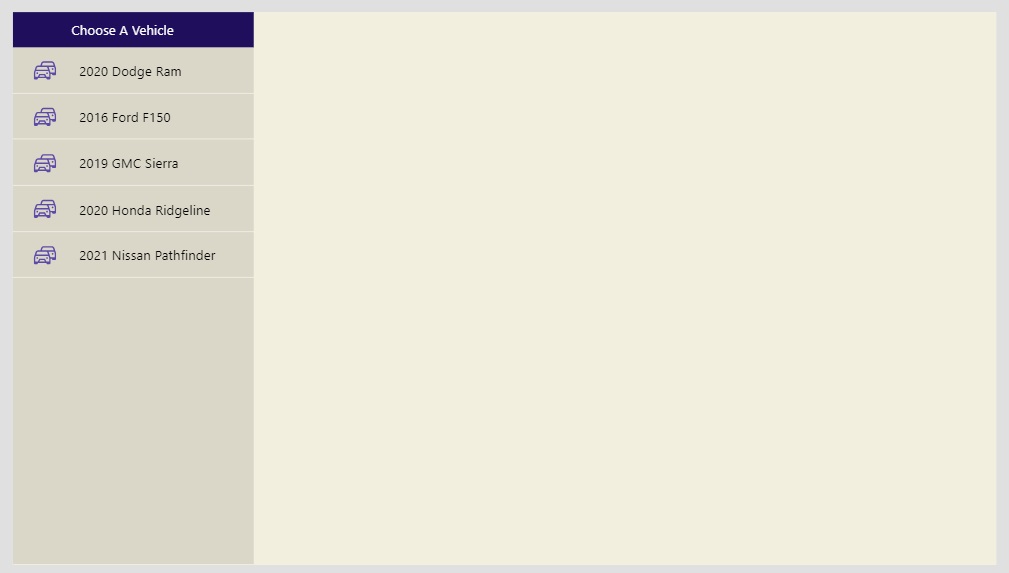
Now the employee can select a truck.
Reservation Form
After choosing a vehicle the employee fills-in their name and picks the reservation date range.
We will start by creating a label that will display the chosen vehicle’s YearMakeModel information once clicked.
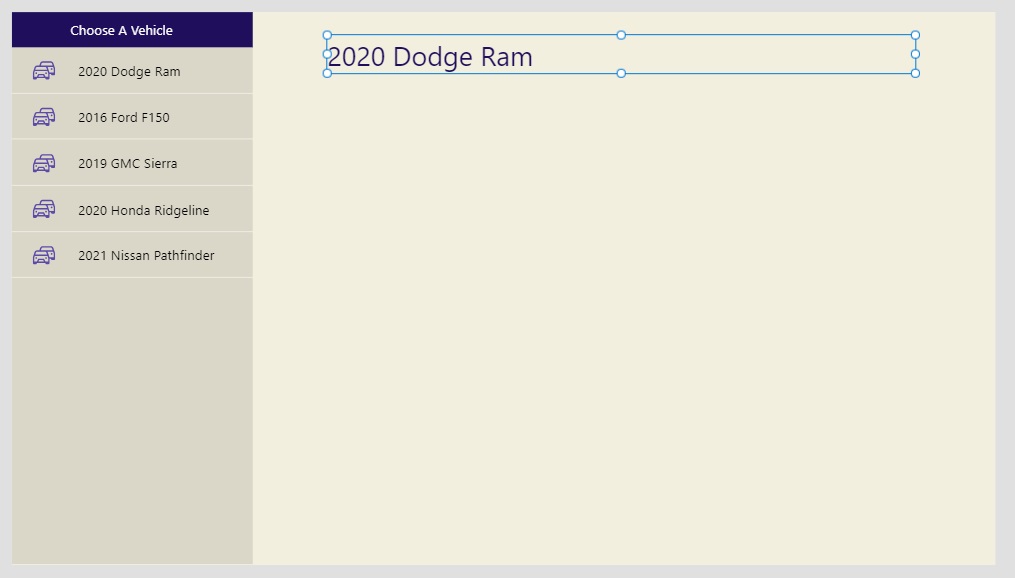
Put this code in the Text property of the Title label.
gal_ChooseAVehicle.Selected.YearMakeModel
Next, add 3 sets of labels & text input fields: Asset Code, License Plate, Office.
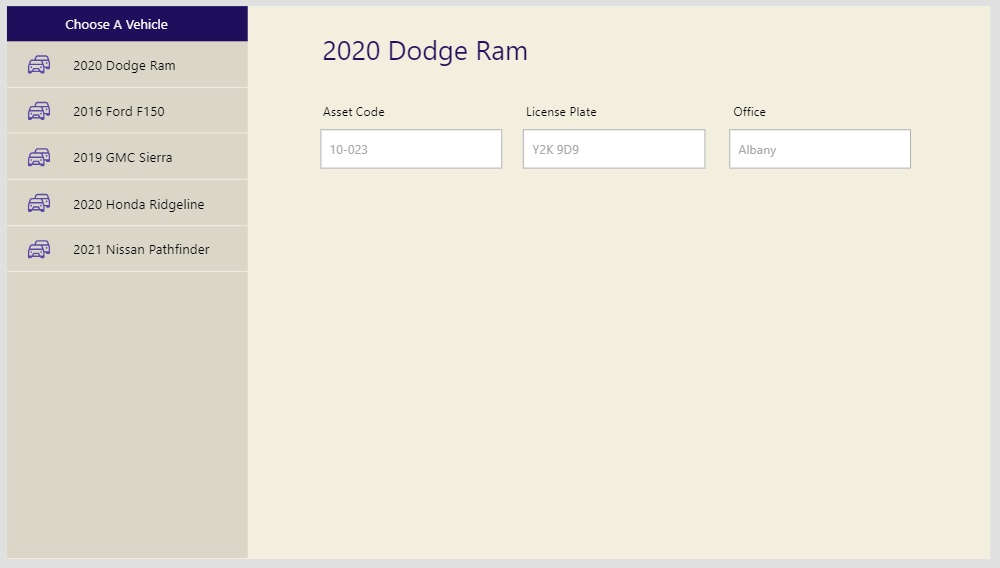
Use this code in the Default property of the respective text inputs to show values for the selected vehicle.
// Asset Code
gal_ChooseAVehicle.Selected.AssetCode

// License Plate
gal_ChooseAVehicle.Selected.LicensePlate

// Office
gal_ChooseAVehicle.Selected.Office
These fields are for display purposes only. We don’t want the employee to edit them. To prevent this set the DisplayMode property of the text inputs to:
DisplayMode.Disabled
The next 3 fields will be fillable by the employee: Employee, Start Date, End Date. Employee is a text input and Start Date/End Date is a date picker.
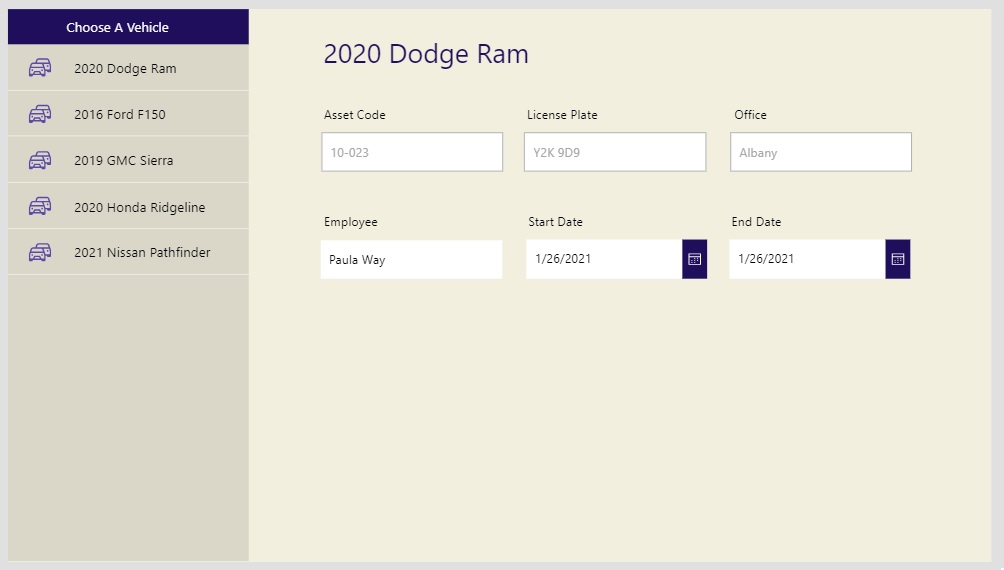
Set the Default property of the Employee text input to blank.
Blank()
Then set the Default property of the Start Date and End Date date pickers to today.
Today()
Showing Related Reservations
With the vehicle reservation form now created we can move onto our first part of the app that makes use of the SharePoint list relationships: a gallery showing all related reservations for a vehicle.
Insert a blank gallery at the bottom of main canvas area with the datasource Vehicle Reservations.
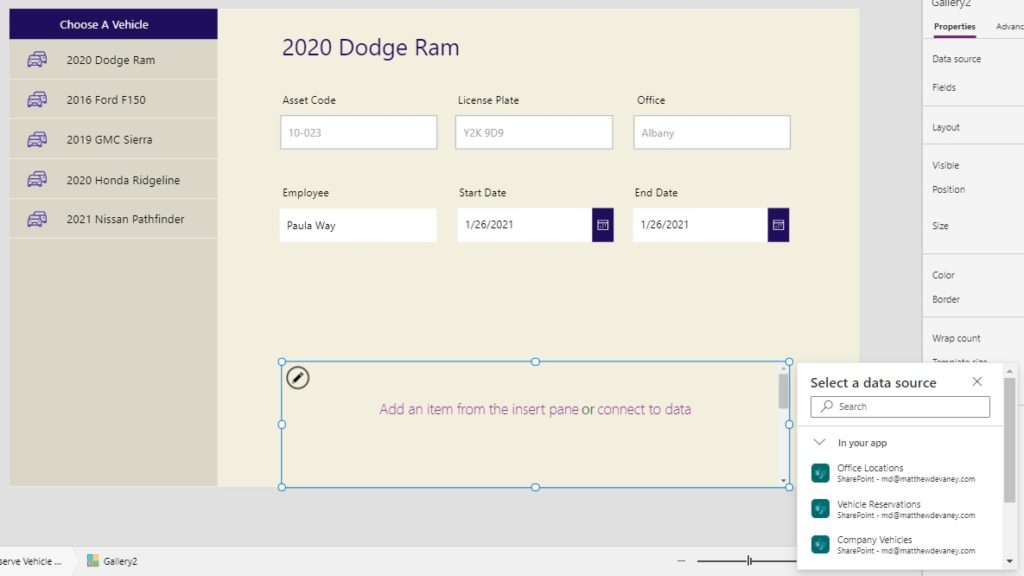
Write this code in the Items property of the gallery to filter it by the currently selected vehicle.
Filter('Vehicle Reservations', VehicleID = gal_ChooseAVehicle.Selected.ID)
Put three labels in the gallery to show Employee, Start Date and End Date.
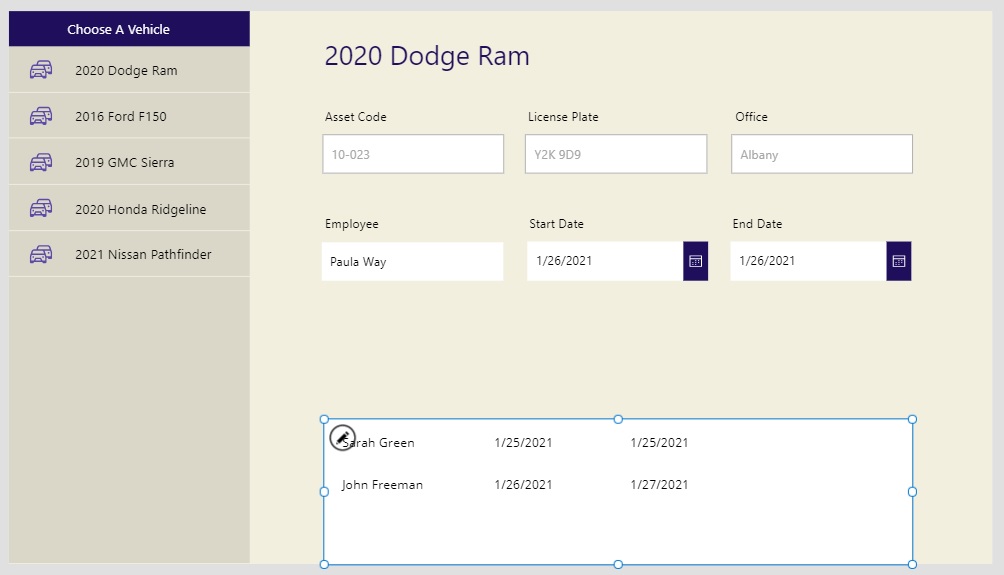
Use this code in the Text property of the respective labels to display values for the reservation.
// Employee
ThisItem.Employee

// Start Date
ThisItem.StartDate

// End Date
ThisItem.EndDate
To complete the design place a label above the gallery with column names to act as the header.
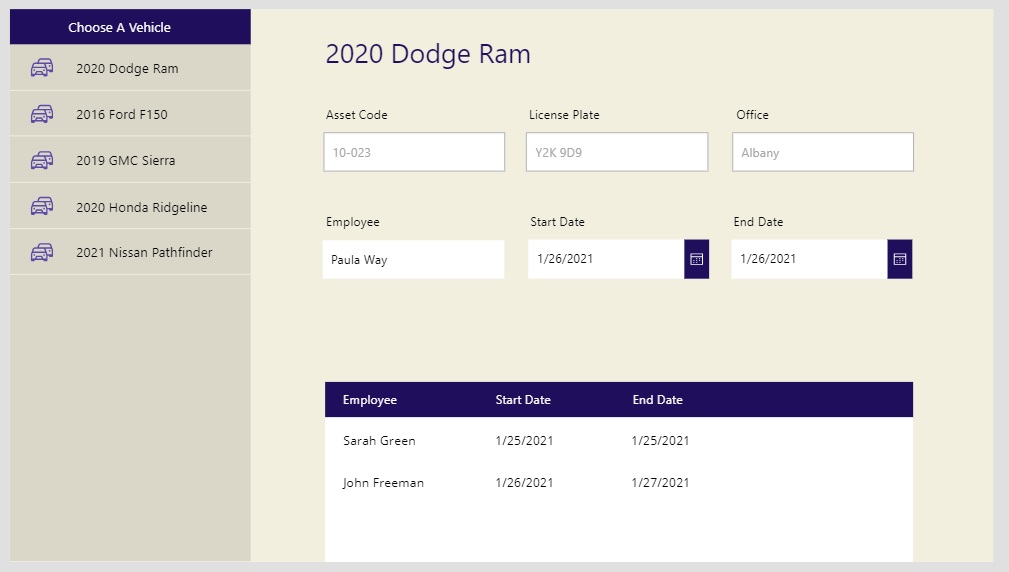
The Book A Vehicle App is now showing related data from two different tables at once.
Adding A New Reservation
An employee completes the reservation form then clicks submit to record the booking.
Insert a Send icon and a label with the text “Submit” onto the screen.
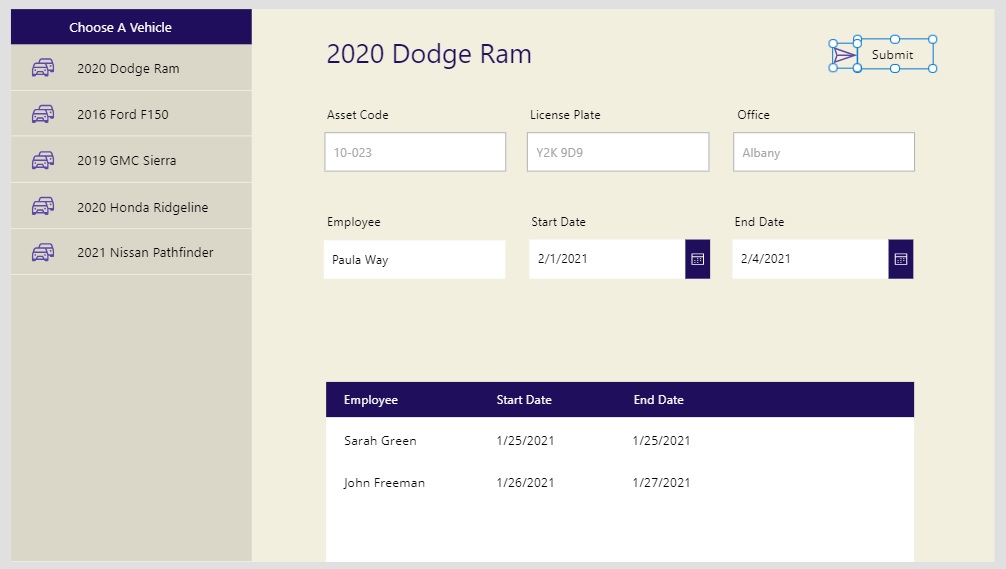
Use this code in the OnSelect property of both the icon and label to save the reservation data to SharePoint.
// create a new record
Patch(
   'Vehicle Reservations',
   Defaults('Vehicle Reservations'),
   {
       // relationship field
       VehicleID: gal_ChooseAVehicle.Selected.ID,

       // other fields
       Employee: txt_Employee.Text,
       StartDate: dte_StartDate.SelectedDate,
       EndDate: dte_EndDate.SelectedDate
    }
);
// reset controls
Reset(txt_Employee);
Reset(dte_StartDate);
Reset(dte_EndDate);
Test the form. When we click submit the reservation now shows in the current bookings gallery…
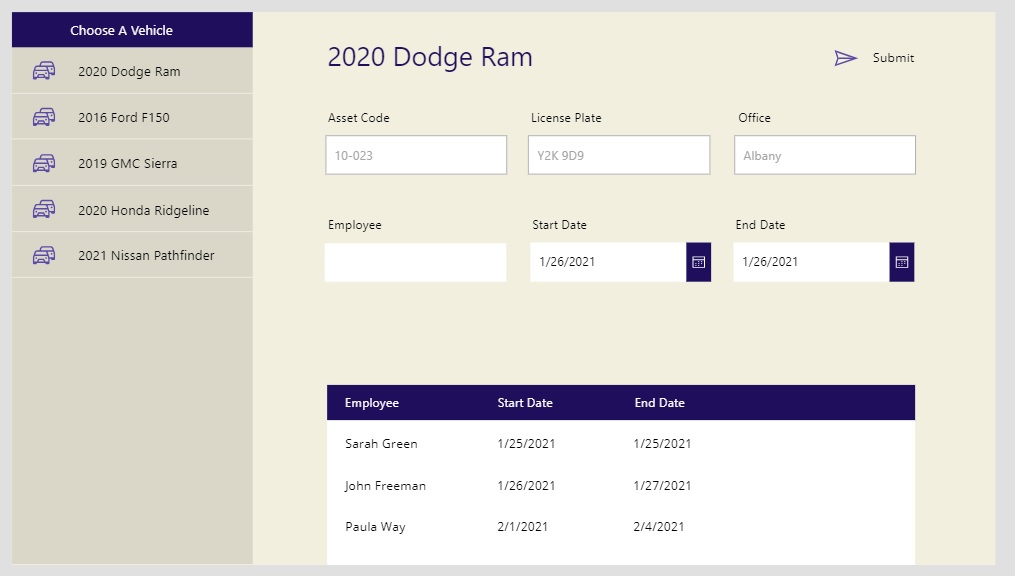
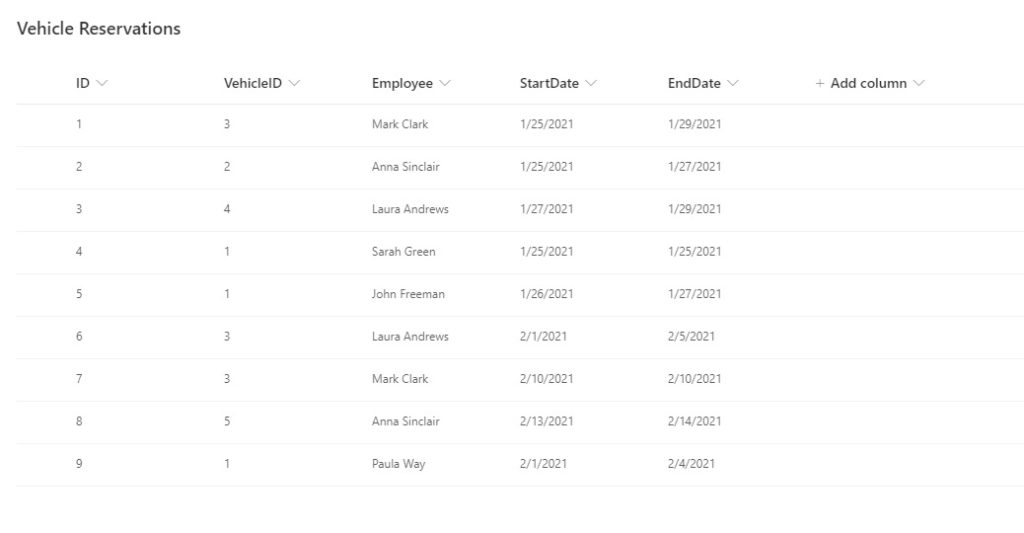
…and also appears in the SharePoint list. Notice how the is recorded as a number.
Edit An Existing Reservation
Employee can edit an existing reservation to change the date.
Place a new Edit icon in the gallery. When the employee clicks the icon the row will become selected.
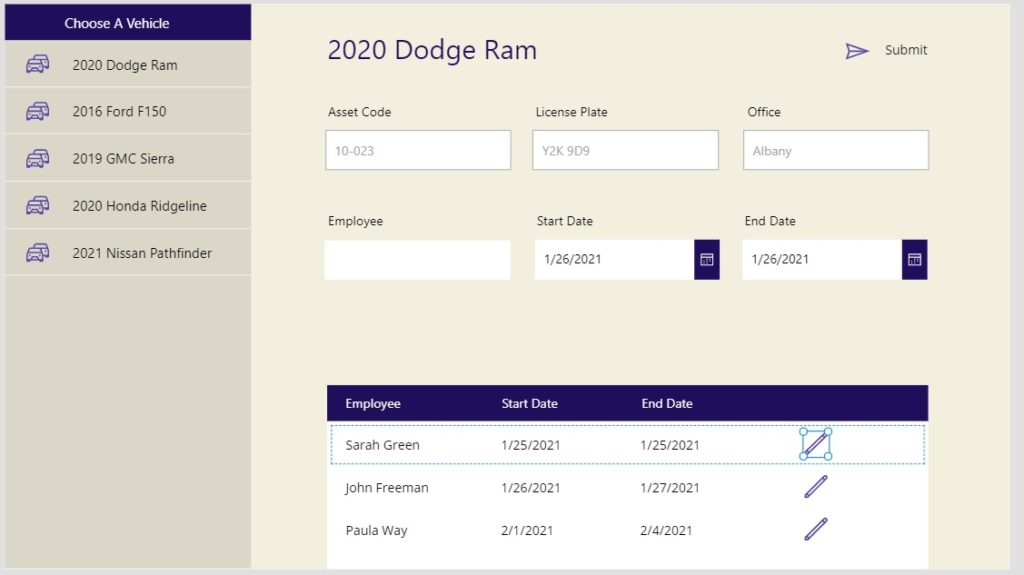
When the gallery is reset we do not want it to not have a row selected. Use this code in the Default property of the gallery.
Defaults('Vehicle Reservations')
We will need to change some code in the date pickers to show the selected reservation’s values.
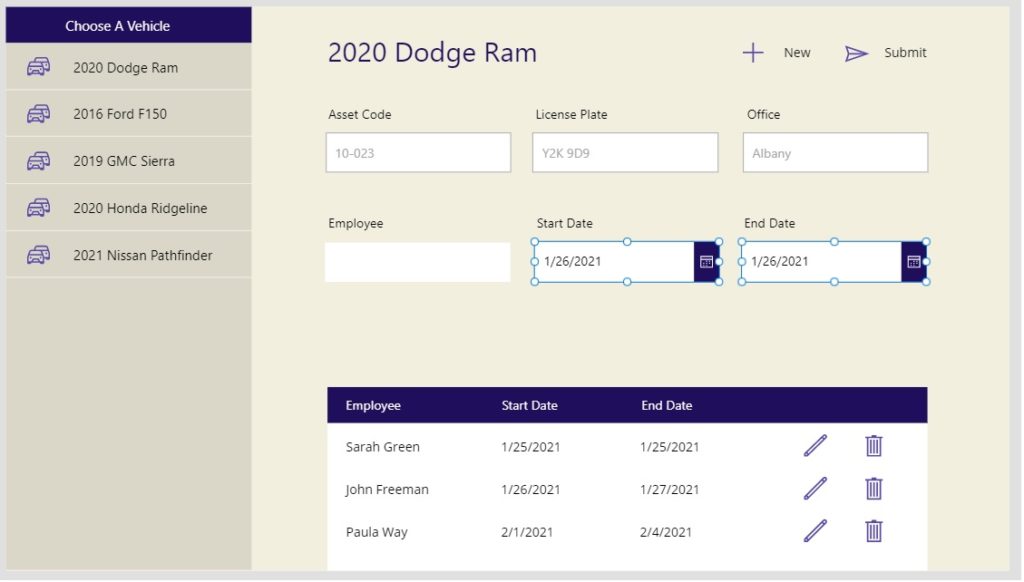
Use this code in the Default property of the Employee text field…
gal_CurrentBookings.Selected.Employee
…and put this code in the DefaultDate property of the Start Time and End Time date pickers respectively.
Coalesce(gal_CurrentBookings.Selected.StartDate, Today())Coalesce(gal_CurrentBookings.Selected.EndDate, Today())
We will also need to update the code in the OnSelect property of the submit icon and label to accommodate both new and edited records.
// create a new record
Patch(
   'Vehicle Reservations',
   /* new code block */
   Coalesce(
       LookUp(
           'Vehicle Reservations',
           ID=gal_CurrentBookings.Selected.ID
       ),
       Defaults('Vehicle Reservations')
   ),
   /* end block */
   {
       // relationship field
       VehicleID: gal_ChooseAVehicle.Selected.ID,

       // other fields
       Employee: txt_Employee.Text,
       StartDate: dte_StartDate.SelectedDate,
       EndDate: dte_EndDate.SelectedDate
    }
);
// reset controls
Reset(txt_Employee);
Reset(dte_StartDate);
Reset(dte_EndDate);
Reset(gal_CurrentBookings); //<-- new code
Test the editing feature by clicking on the edit icon for a record, changing the date and clicking Submit.
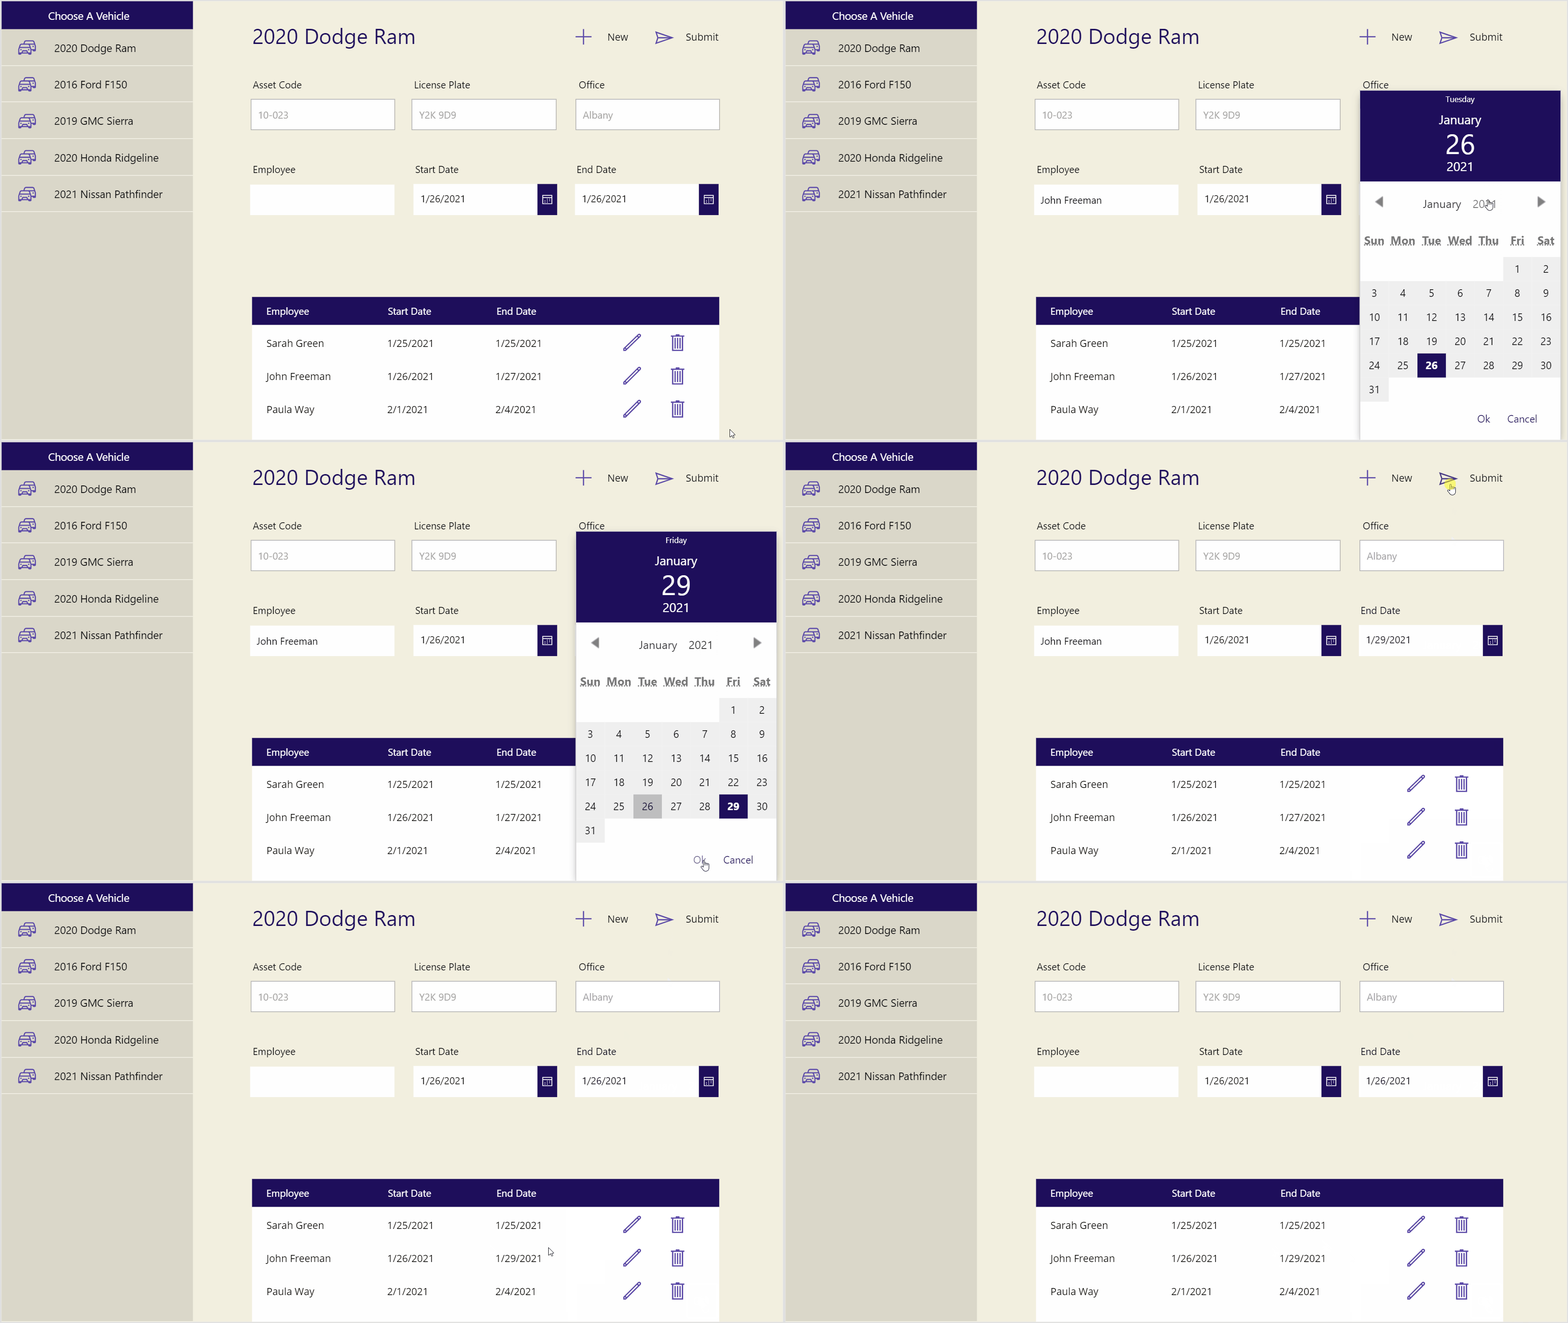
The edited record will appear changed in both the app and SharePoint.
Resetting The Form
If the employee has selected a record but decided they want to create a new record instead we need to give them the ability to do it. Fortunately, this is quite easy. Insert a new Add icon and label beside the submit icon.
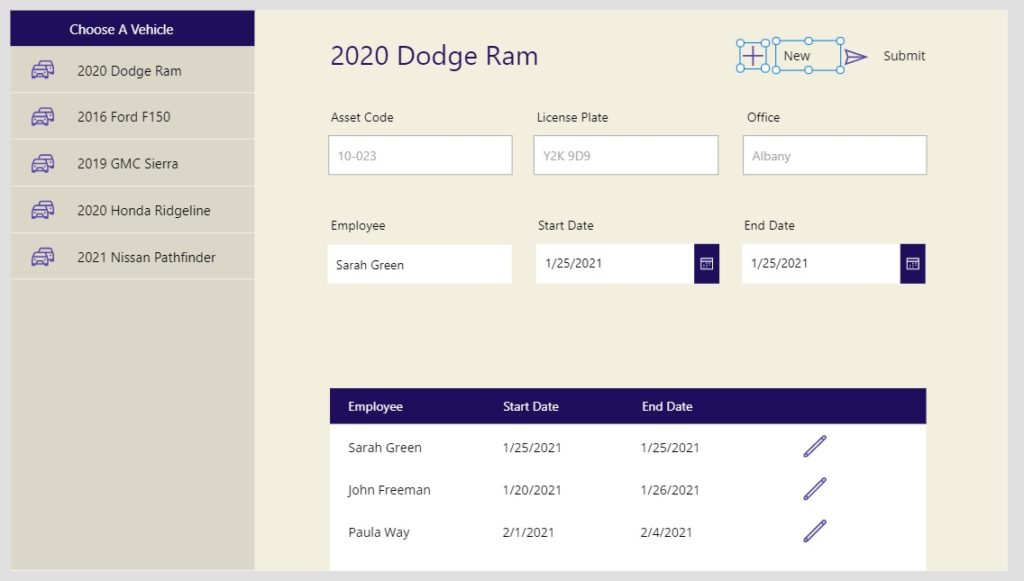
Simply put this code in the OnSelect property of the New icon…
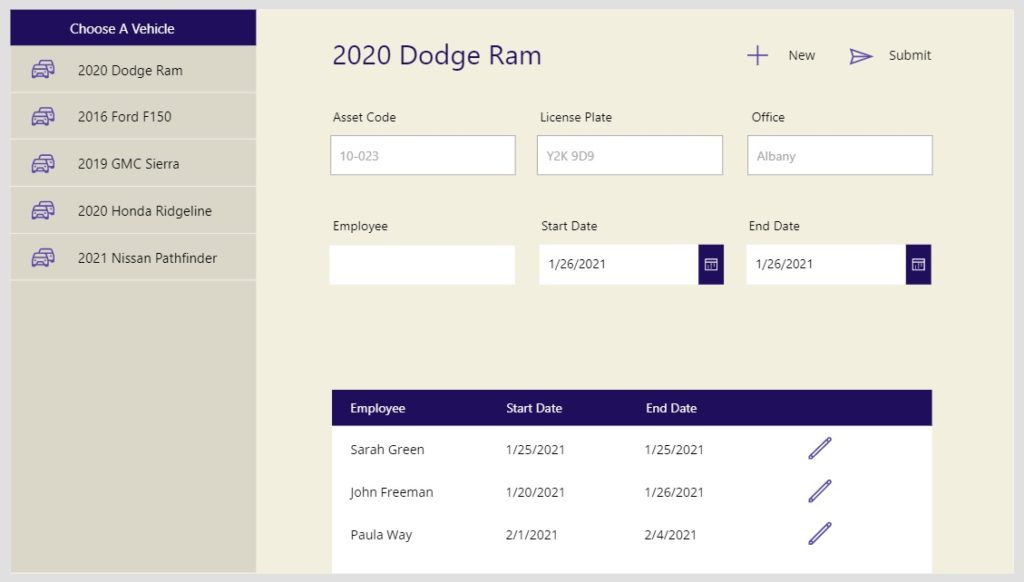
Reset(gal_CurrentBookings)
…and when you click it the Employee and Start/End Date fields will revert to their default values.
Deleting A Reservation
Finally, an employee can delete reservation by clicking the delete icon beside it.
Put a Trash icon into the gallery…
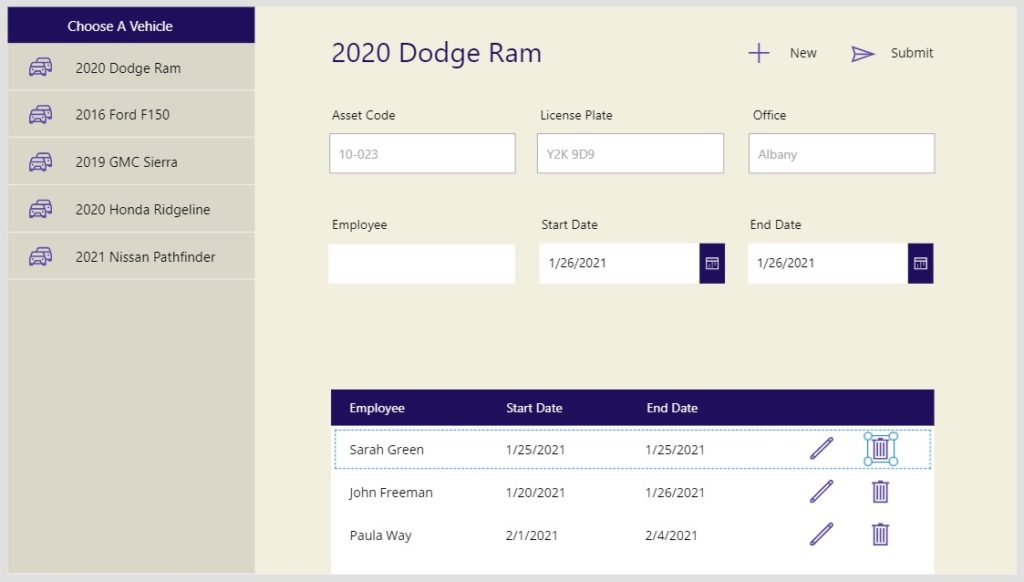
…and write the follwong code in the OnSelect property.
Remove(
    'Vehicle Reservations',
    LookUp('Vehicle Reservations',
    ID=ThisItem.ID)
)
Click delete on the record you created for the earlier testing.

it will be removed from the app and from SharePoint.
Did You Enjoy This Article? 😺
Subscribe to get new Power Apps articles sent to your inbox each week for FREE
Questions?
If you have any questions or feedback about Power Apps & SharePoint List Relationships please leave a message in the comments section below. You can post using your email address and are not required to create an account to join the discussion.





Haha, that’s really slick Matthew! Thanks for sharing.
Well explained Sir!
Very nice! Thank you for posting this article Matthew. The parent/child relationship is a very helpful concept to learn.
When I create new lists on my SharePoint I don’t get an ID column, I get a Title column. Is this a SharePoint site/list setting?
The ID column is hide. Follow this in sharepoint… Select title, after columns configurations, then you can choose change name or show/ hide columns
Charls,
This an excellent comment. I will revise my article to include this information.
I had to follow instructions from here (https://www.c-sharpcorner.com/article/how-to-remove-title-as-mandatory-field-from-sharepoint-list/)
Looks like a weird “feature” of SharePoint.
I think there’s a missing section here – to add the below code to the Default of txt_Employee
Coalesce(gal_CurrentBookings.Selected.Employee, Blank())
Harjit,
That’s a very good catch. Thank you for reporting it. I have made an update to the article.
I try my hardest to make each article 100% error-free but its readers like you who help polish my work to perfection.
Hi Matt,
Nice Article.
Can you please help me with the point “Reservation Form” ?
I’m unable to get it to work , would appreciate if you could elaborate that point a little more
Vivek,
Are you asking what a reservation form is? A reservation form is filled out by someone who wants to reserve the use of a car.
Hi Matt,
Thank you for replying.
I got it to work finally , the issue was that I was not pasting the formula to the correct location i.e. the text property in our scenario 🙂
Thank you so much for creating this exercise. Is there a way to add multiple reservations at once? Maybe it would work as a collection? For example, on the Dodge Ram, Sarah wants it this week, John wants it next week, and Ann wants it next month. Can I do these all in one transaction without having to Submit between each one?
Jennifer,
Great idea. Yes, you can do this and its a better user-experience! Here are two links that you can use as inspiration for your approach.
Power Apps Excel-Style Editable Table (Me):
https://www.matthewdevaney.com/power-apps-excel-style-editable-table-part-1/
Power Apps Editable Table/Gallery like Excel (Reza Dorrani)
https://www.youtube.com/watch?v=8I0Pt_8I6k8
Hi there, Thank you for sharing this useful information, As you have create this so my issue now is that how to get the form for approval maybe by manager after you submitted with the notification, once approved how to create another form for doing the pre-check inspection and post check inspection like damage, miles and ect of the vehicle, secondly, is it possible to also add the status of each vehicle like if is available or inuse, or went for service. finally when the process is done meaning the driver has return the car how to submit and get all the record stored in one place. thank you
Sibusiso,
I’m sorry, but the goal of this article was not to build a complete end-to-end solution. Only to demonstrate the basics of building an app with SharePoint list relationships. For further support on building new features I suggest you make an attempt yourself and then post your question in the Power Apps forums including what you’ve tried so far. The members of the Power Apps forums have been very helpful for me in the past.
Power Apps forums link:
https://powerusers.microsoft.com/t5/Power-Apps-Community/ct-p/PowerApps1
Yes i understand but for me seems to be more interesting and i real wish to use it .
Can you help here , where the gallery gal_CurrentBookings is created because
i just saw it from this code Coalesce(gal_CurrentBookings.Selected.StartDate, Today())
As a column with UniqueKey, is it possible to use other SharePoint column than ID ?
Ciro,
Yes, you can create your own unique key. It’s not the typical way of doing things, but it’s possible. I’d suggest using a randomly generated GUID as a unique key.
Matthew, didn’t work for me.
I have two lists:
Master (columns: ID, RecId*, Title) * my unique id column
Detail (columns: ID, Master, Title).
I manually created records in MASTER and DETAIL and deleted them to test if the relationship was working. Everything went as planned. Records in DETAIL were automatically excluded after deletions in MASTER.
But this code didn’t work in my test (notified as: error when use Patch function):
Patch(Master; Defaults(Master); {RecId:150; Title:”Jonas”});;
Patch(Detail; Defaults(Detail);
{ Title: “bla bla bla”;
Master: {Id:150; Value:”Jonas”}
}
);;
Any clue to fix this ?
Happy new year !!!
Ciro,
What error message did you receive?
Network error when using Patch function.
Field ‘Master_x003a_x0020_Title’ is mandatory.
Ciro,
There’s your answer. Provide a value for the field: Master_x003a_x0020_Title.
Matthew, Master_x003a_x0020_Title was provided:
Patch(Detail; Defaults(Detail);
{ Title: “bla bla bla”;
Master: {Id:150; Value:”Jonas”}
}
);;
Ciro,
I think the Title field in your Master table needs a value. Maybe try…
Patch(Detail; Defaults(Detail);
{
Master_x003a_x0020_Title: “bla bla bla”;
Master: {Id:150; Title: “bla bla bla”; Value:”Jonas”}
}
);;
Matthew,
The error message was due to an extra column from column Master in the Detail list.
I removed this column and now the following error message is appearing:
Network error when using patch function. The requested operation is invalid.
Any clue ?
Hello Mateo, excelent blog!!!
I have a question. If you want sort vehicle reservations by name of employee, what would you do?
I have a similar app and I’m trying use Sort + LookUp Formula but I have a warning delegation, I don’t understand why because both are delegable.
Any idea?
CMolina,
Please share a screenshot of the non-delegable function with blue underlines.
I would like to pull from one SP list which stores information that will pre-populate a SP form(read only) and then user adds status/comments/ratings.. read only data and new data is to be published to a new sp list. Any ideas would be appreciated.
Hey Matt,
Ok, In the Showing Related Reservations part, the 2 different Items are showing on one scrolling line. (screenshot attached). How do I get each record to display on another line?
Great work as always. Thanks so much for sharing your findings so brilliantly.
In addition, I would be interested how to filter the parent list by properies of the child list or even by the fact if a child for a given parent exists or not.
So, for example to filter the model gallery to the models that haven’t been reserved yet.