How To Add A Blank Value To A Dropdown List In Power Apps

Power Apps makers can design a dropdown that starts with a blank value by setting the AllowEmptySelection property to true. But after enabling AllowEmptySelection the confusing part is once a user clicks to view the dropdown list there is no blank option at the top of the list. Yes, the user can click on the selected option to return the dropdown to a blank state but nobody expects it to work that way. In this article I will show you how to add a blank value to a dropdown list in Power Apps.
Table Of Contents:
• Introduction: The Expense Report App
• Setup A SharePoint List For Expense Reports
• Create A New Canvas App In Power Apps Studio
• Add An Edit Form To Capture Expense Report Data
• Create A SharePoint List For Dropdown Values
• Insert A Dropdown Control For Expense Category
• Add A Blank Value To The Category Dropdown
• Make The Currency Dropdown With A Blank Option At The Top
• Submit The Expense Report Form
• Test The Expense Report App
Introduction: The Expense Report App
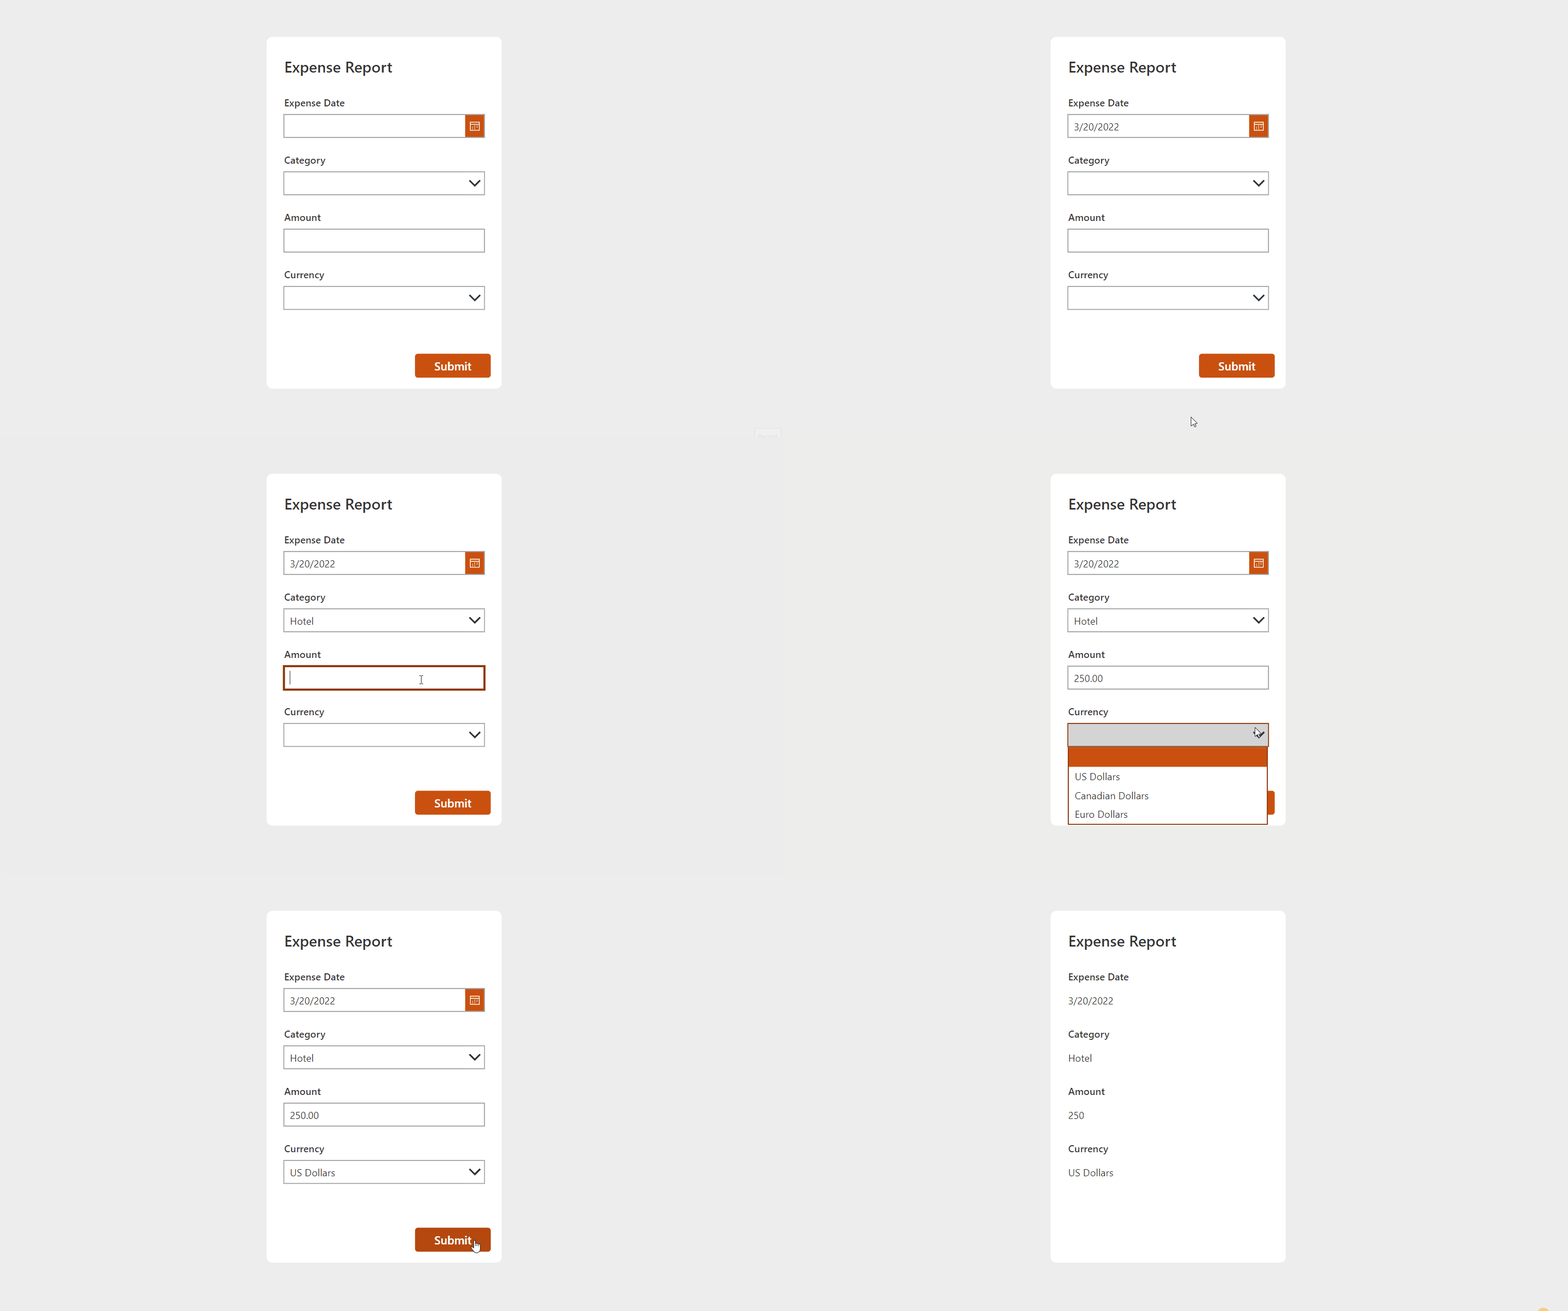
The Expense Report app is used by Salespeople at a manufacturing firm to submit their travel expenses. Each travel expense entry requires the Salesperson to select a category from a dropdown (Flight, Hotel, Gas, Meals) as well as a currency (US Dollars, Canadian Dollars, Euro Dollars).
Setup A SharePoint List For Expense Reports
Create a new SharePoint list called Expense Reports with the following columns:
- ExpenseDate (single-line text)
- Category (single-line text)
- Amount (number)
- Currency (single-line text)
In our apps we will be making dropdowns for the columns Category and Currency. Notice that they have the data type single-line text as opposed to choices. The choices data type is often used with a combobox control because it returns a record. A dropdown control handles primitive data types such as text, numbers, dates and yes/no value.
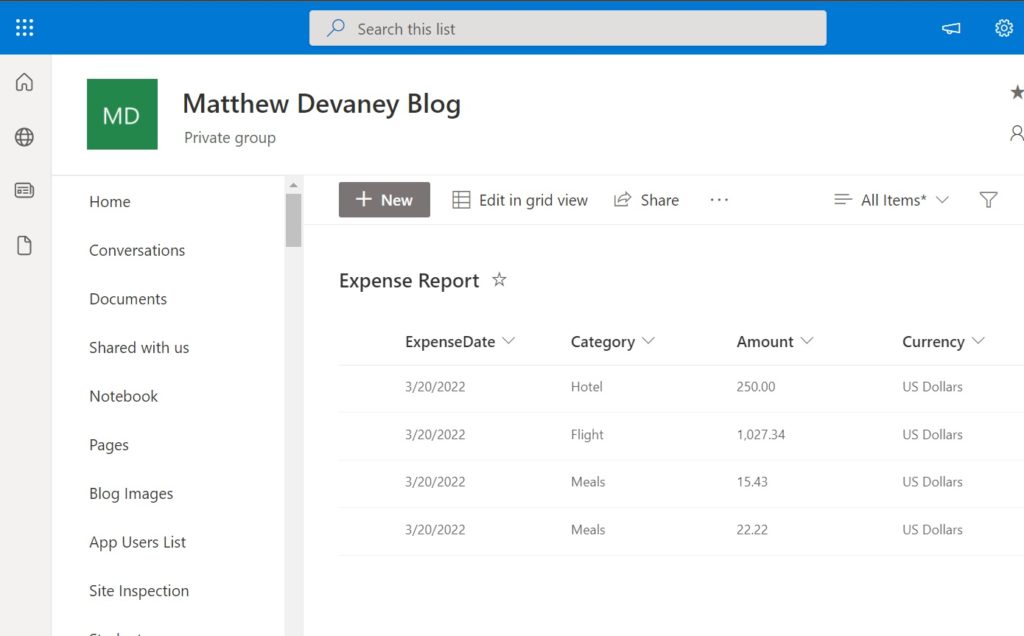
The screenshot below shows how the Expense Reports list will look after a few expenses have been input.
Create A New Canvas App In Power Apps Studio
Open Power Apps Studio and create a new app from blank. Then insert a new button onto screen. We will use the button as a card and place our expense report form on top of it.
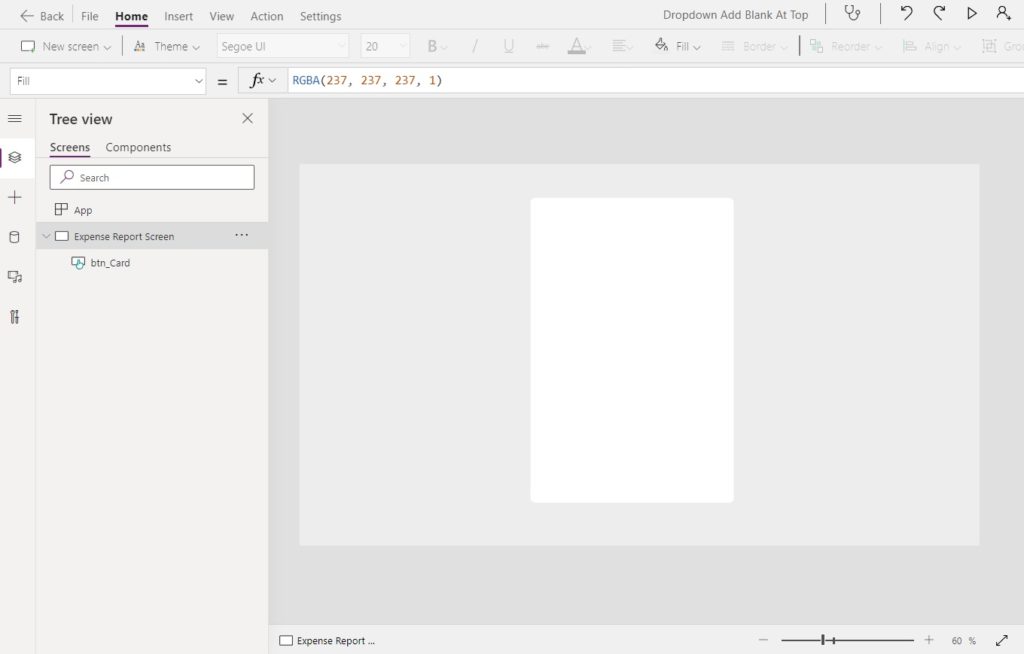
Use these values in each property of the button to make it match the style of the screenshot above. We change the DisplayMode of the button to View so that the button cannot be pressed.
DisplayMode: DisplayMode.View
Fill: White
Height: 400
Width: 500
X: (App.Width-Self.Width)/2
Y: (App.Height-Self.Height)/2
Also, use this code in the Fill property of the screen to change it to a light gray color.
RGBA(237, 237, 237, 1)
Now’s let’s create a title. Create a new label and position it at the top of the card.
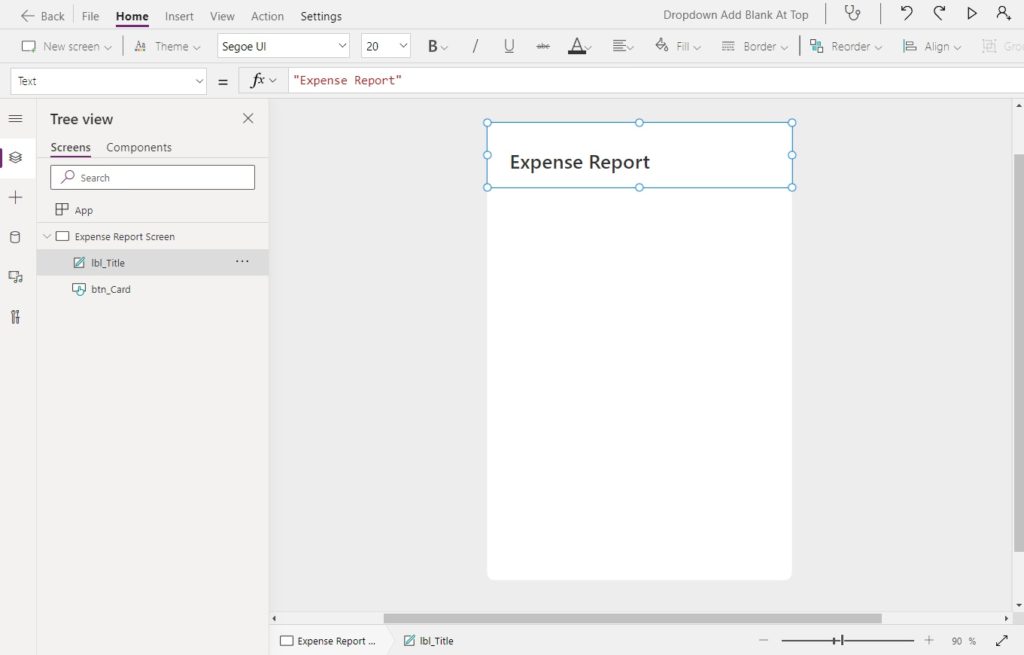
Fill-in the label with these properties to achieve the same look and feel as the screenshot above.
Font: 'Segoe UI'.Font
FontWeight: FontWeight.Semibold
PaddingLeft: 30
Size: 20
Add An Edit Form To Capture Expense Report Data
Salespeople input each travel expense into a form to record its transaction date, category, amount and currency. Before adding the form we must connect the Expense Report SharePoint list to our app. Go to the Data menu, select Add Data, then add the Expense Report list.
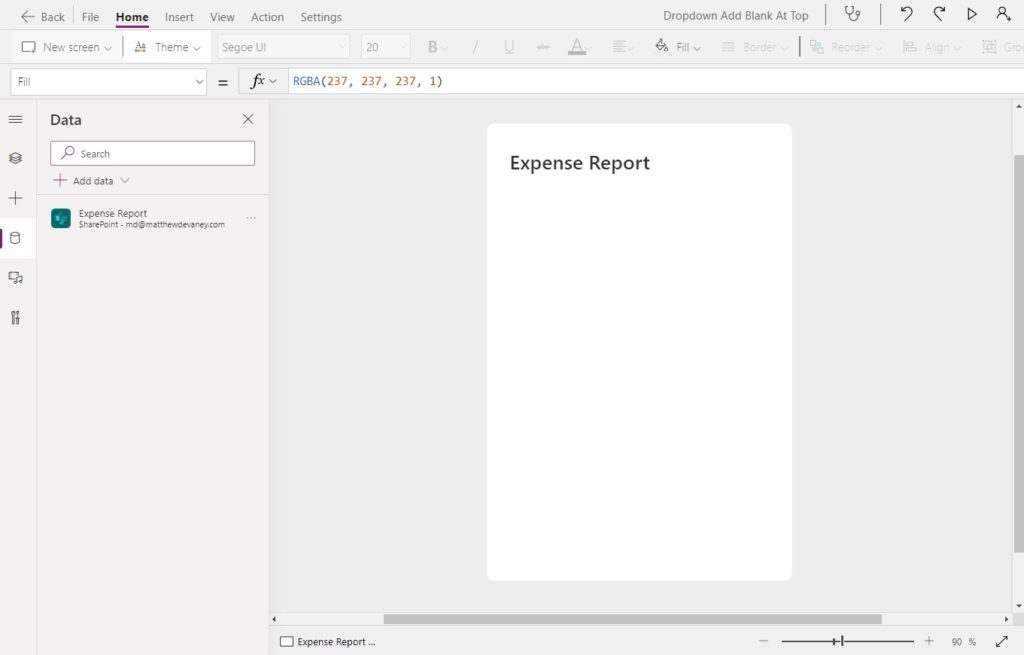
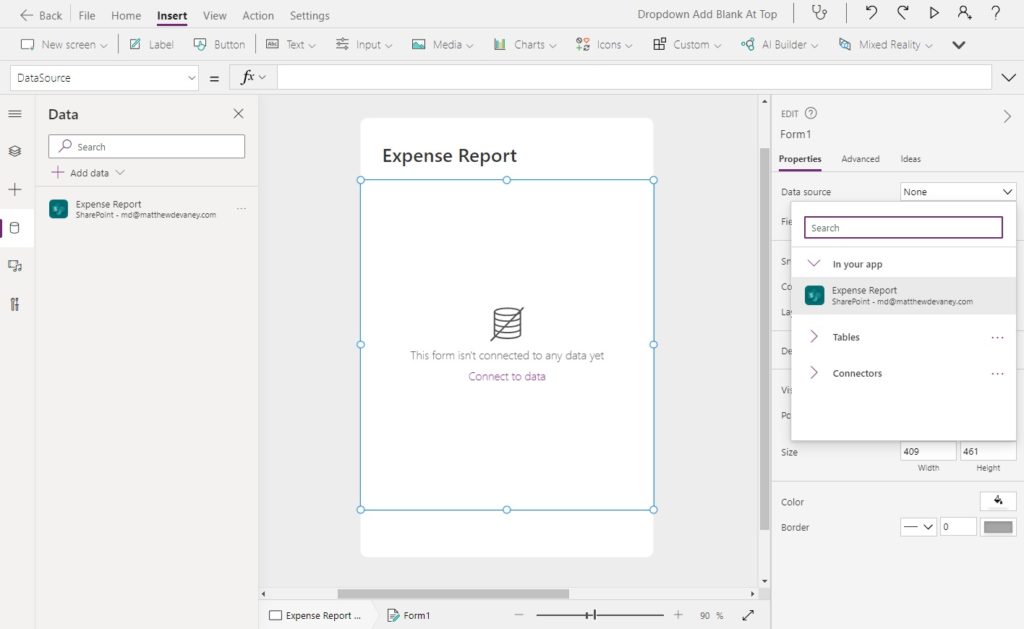
Insert an Edit form onto the screen and put it directly below the title. Choose Expense Report as the datasource.
Arrange the form fields in a single vertical column in the order: Expense Date, Category, Amount, Currency.
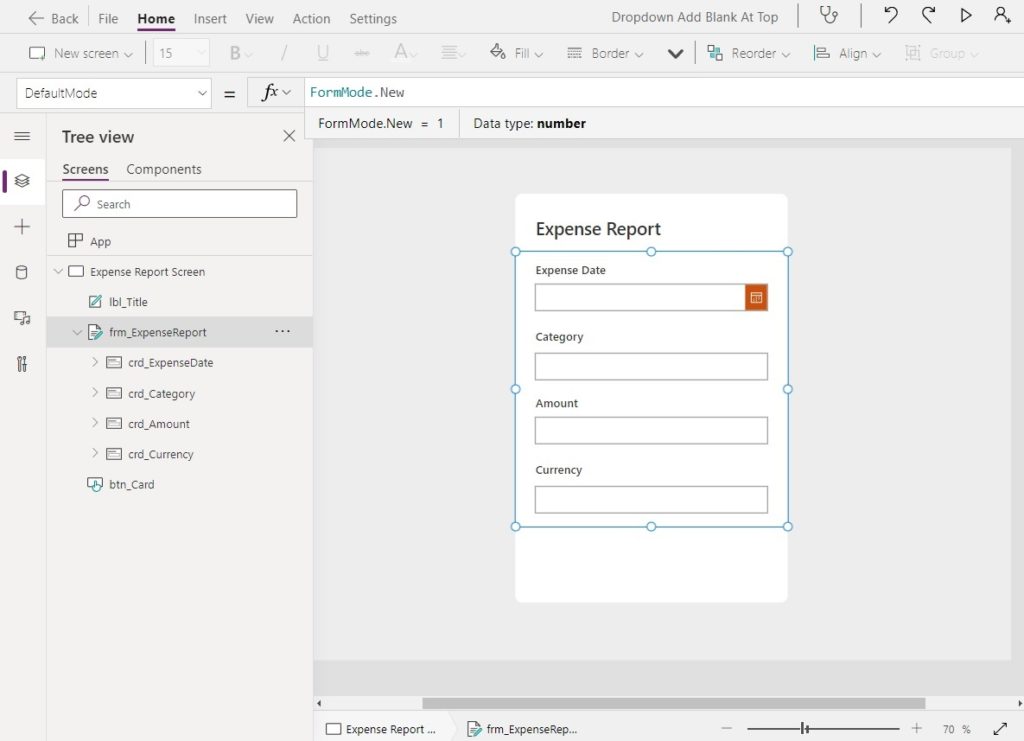
Then change the DefaultMode property to New so a record will be created when the form is submitted.
FormMode.New
Create A SharePoint List For Dropdown Values
When we create dropdowns for the Category & Currency fields we need a way to supply a list of values. We could hardcode the values but every time those values change it would be necessary to re-code and publish the app. A better way to do it is by making a SharePoint list to store all of the dropdown list values for our app.
Make a new SharePoint list called Dropdown Values with the following columns:
- DDType (single-line text)
- DDValue (single-line text)
Load the Dropdown Values list with this data:
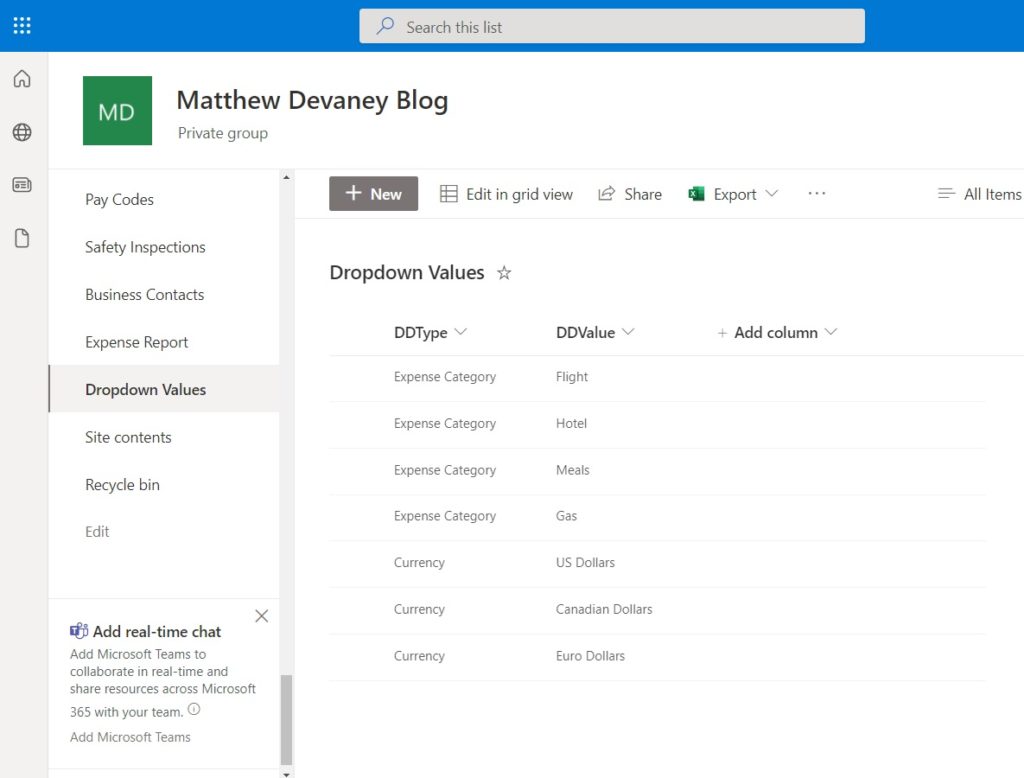
| DDType | DDValue |
| Expense Category | Flight |
| Expense Category | Hotel |
| Expense Category | Gas |
| Expense Category | Meals |
| Currency | US Dollars |
| Currency | Canadian Dollars |
| Currency | Euro Dollars |
The completed dropdown list should look like the screenshot below.
Insert A Dropdown Control For Expense Category
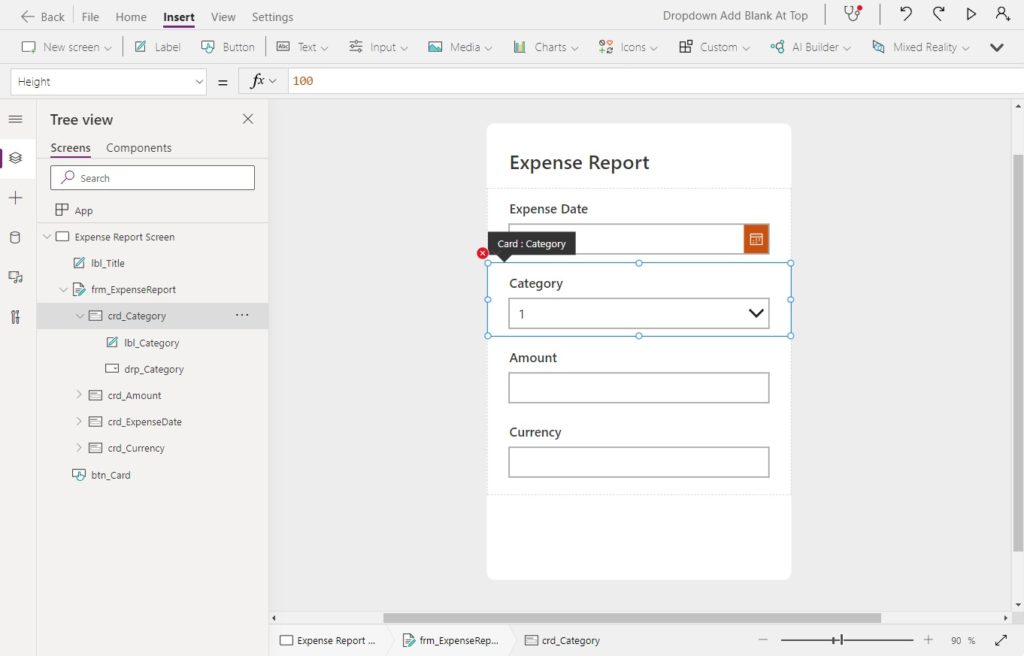
The category field appears in the form with a text input by default. We must delete the text input and create a new dropdown in its place. After doing this red error badge shows beside the Category card. We will take care of this in a moment but ignore it for now.
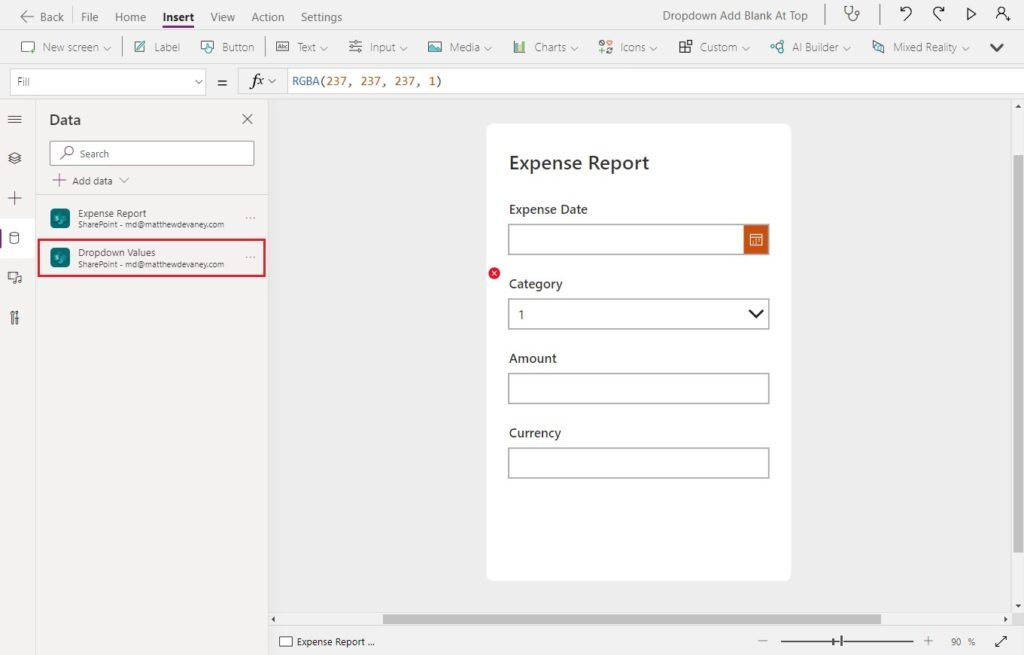
Connect the Dropdown Values SharePoint list to the app.
Next we will load the Category dropdown with a list values.
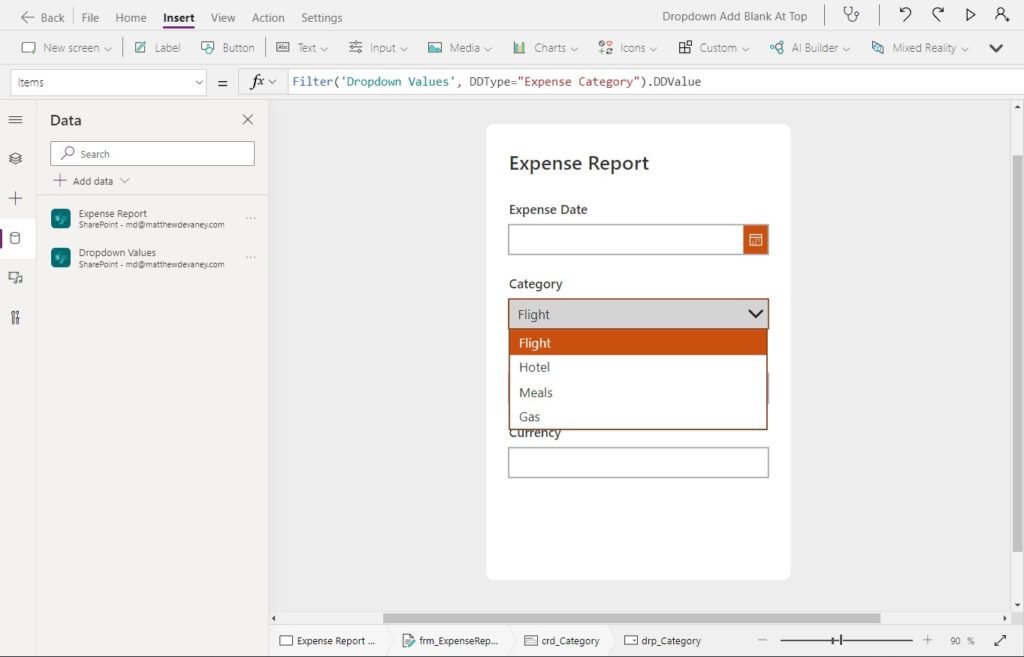
Use this code in the Items property of the dropdown to retrieve values from the Dropdown Values SharePoint list.
Filter('Dropdown Values', DDType="Expense Category").DDValue
Now its time to address the red error badge. It appeared because the Update value of the Category card references a text input field we deleted.
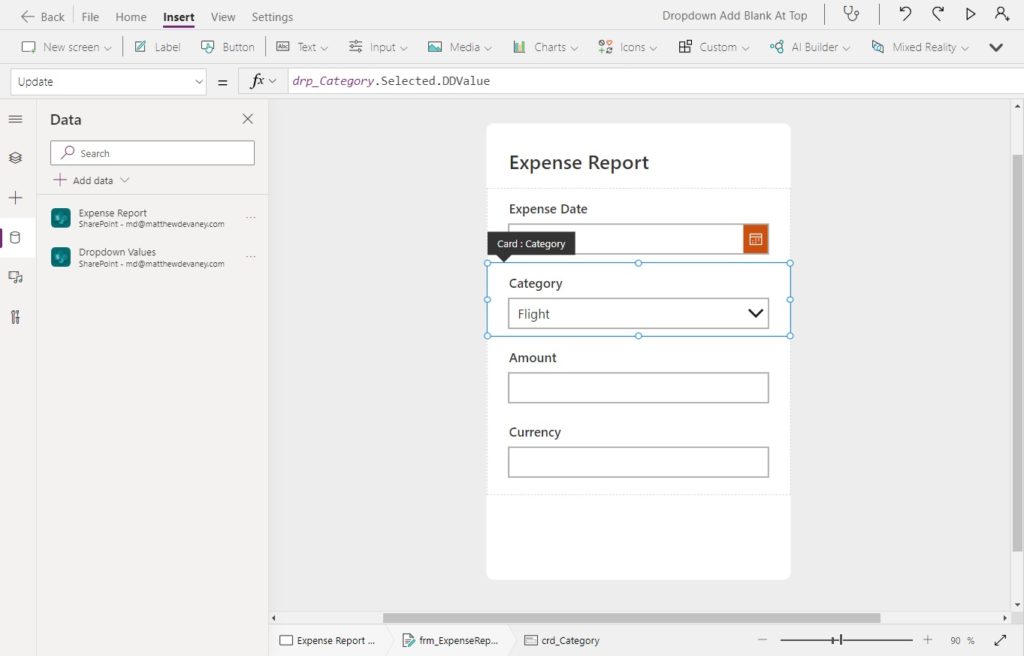
Change the Update property of the Category card to reference the newly created dropdown control instead.
drp_Category.Selected.DDValue
We also need to make two more edits to the Category card properties for the form to function properly.
Default: Parent.Default
DisplayMode: Parent.DisplayMode
Add A Blank Value To The Category Dropdown
Now we will update our dropdown’s code to add a blank value at the top of the list.
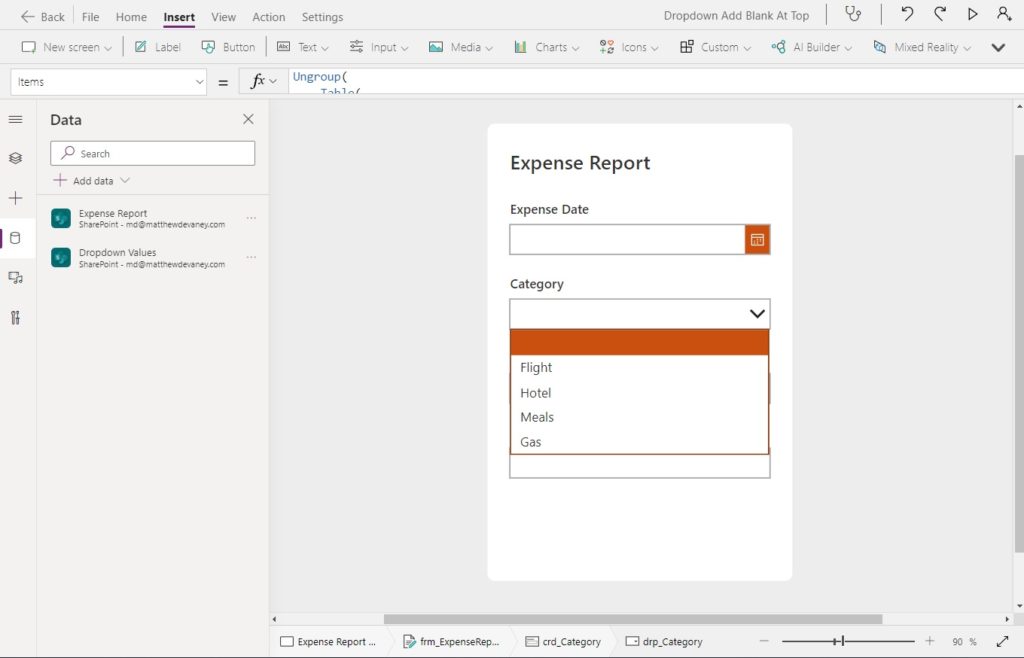
Use this code in the Items property of the dropdown. The other alternative would have been to use the Collect function to load a list of values but this is better because we don’t need to temporarily store the values in a variable.
Ungroup(
    Table(
        {myMenuOptions: Table({DDValue: Blank()})},
        {myMenuOptions: Filter('Dropdown Values', DDType="Expense Category").DDValue}
    ),
    "myMenuOptions"
)
Make The Currency Dropdown With A Blank Option At The Top
Let’s repeat the same steps we used to create the Category dropdown for the Currency field. Remove the Currency text input and insert a dropdown in its place.
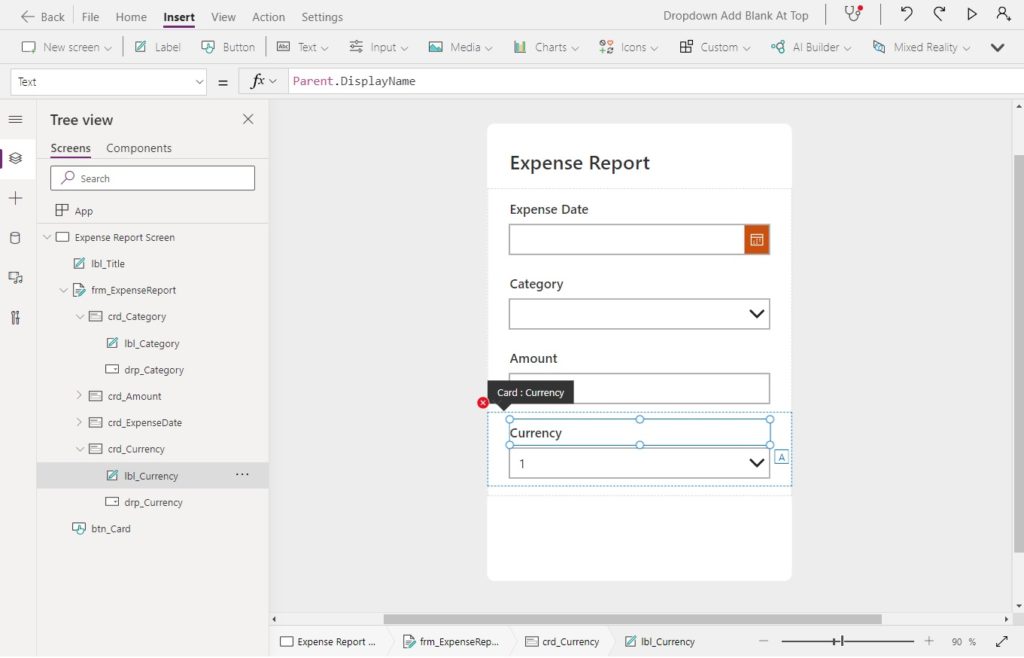
Load the Currency dropdown with a list of values.
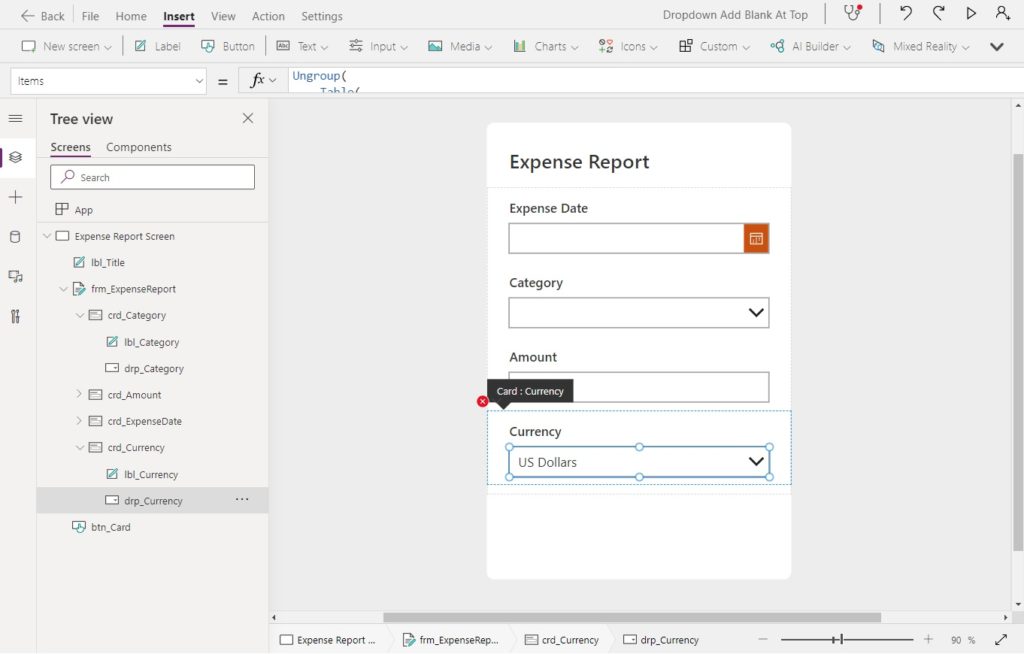
Use this code in the Items property of the Currency dropdown to retrieve values from the SharePoint list and add a blank option to the top.
Ungroup(
    Table(
        {myMenuOptions: Table({DDValue: Blank()})},
        {myMenuOptions: Filter('Dropdown Values', DDType="Currency").DDValue}
    ),
    "myMenuOptions"
)
Change the Update property of the Currency card to point to the new dropdown.
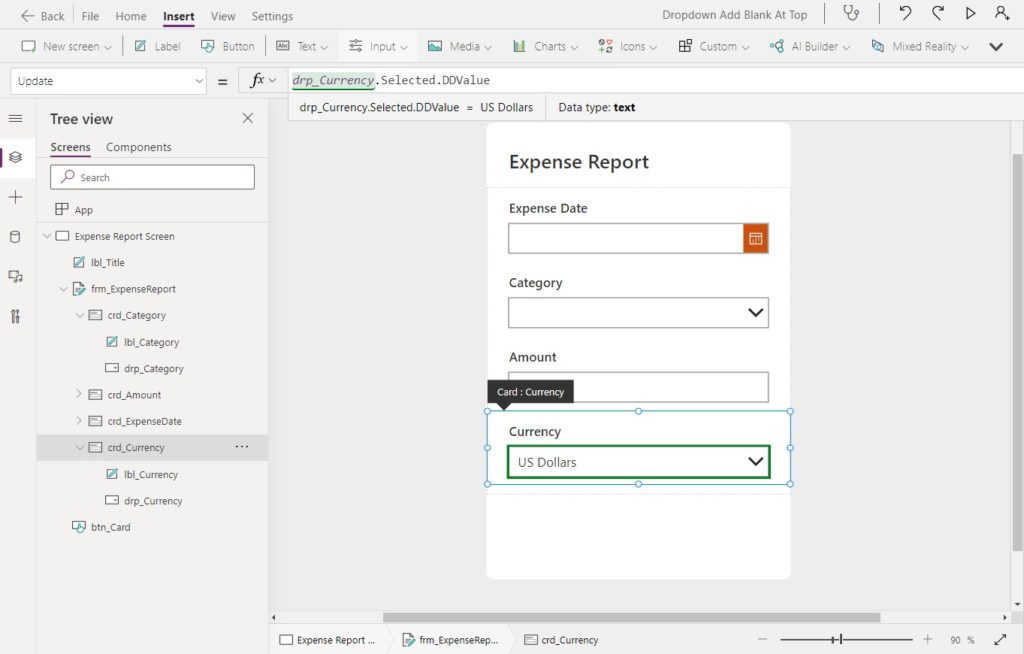
Use this code in the Update property of the card.
drp_Currency.Selected.DDValue
Then use this code in the Default and DisplayMode properties of the Currency card.
Default: Parent.Default
DisplayMode: Parent.DisplayMode
Submit The Expense Report Form
Once the Expense Report form is filled-in the salesperson clicks the submit button to save data entered to the SharePoint list. Insert a new button with the text Submit and place it on the bottom right-hand corner of the form.
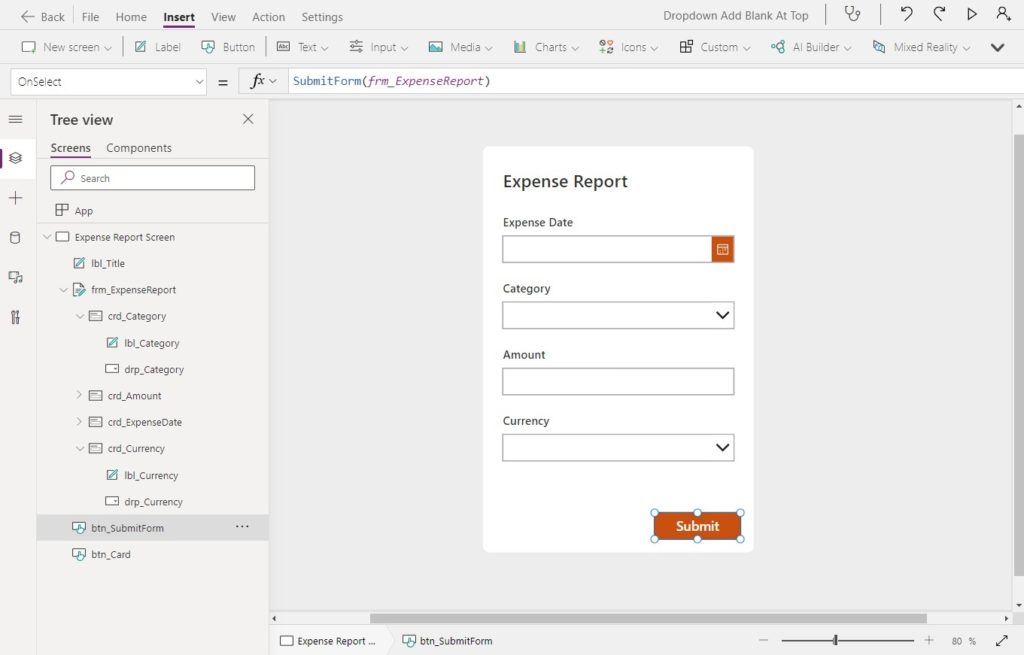
Use this code in the OnSelect property to submit the form.
SubmitForm(frm_ExpenseReport)
We want the button to disappear after the form is submitted to prevent duplicate submissions.
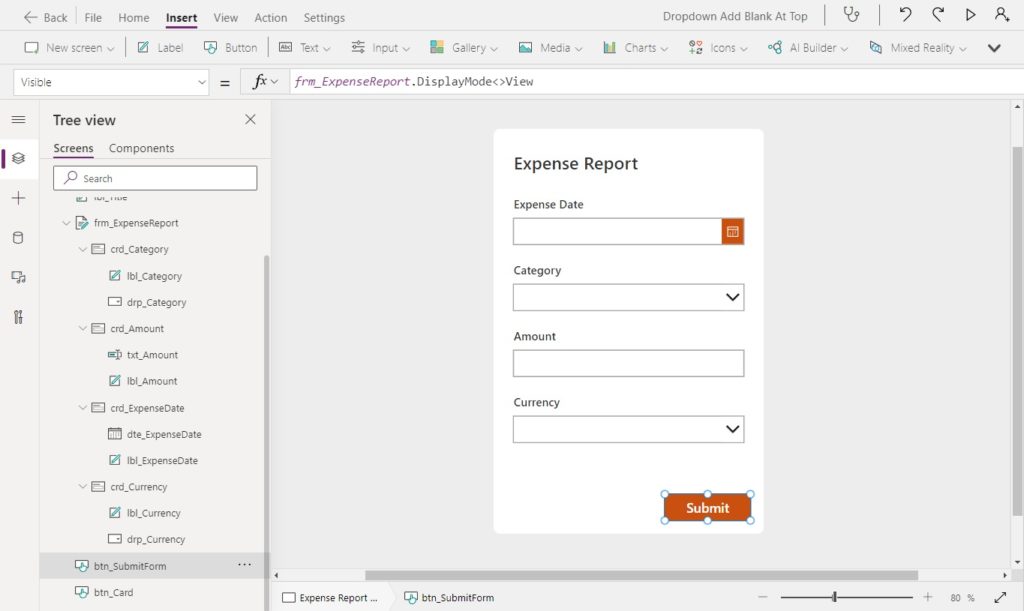
Use this code in the Visible property of the button to detect when the form is not in view mode.
frm_ExpenseReport.DisplayMode<>DisplayMode.View
If the form is successfully submitted it should store the last submitted record in a variable and change the form to view mode.
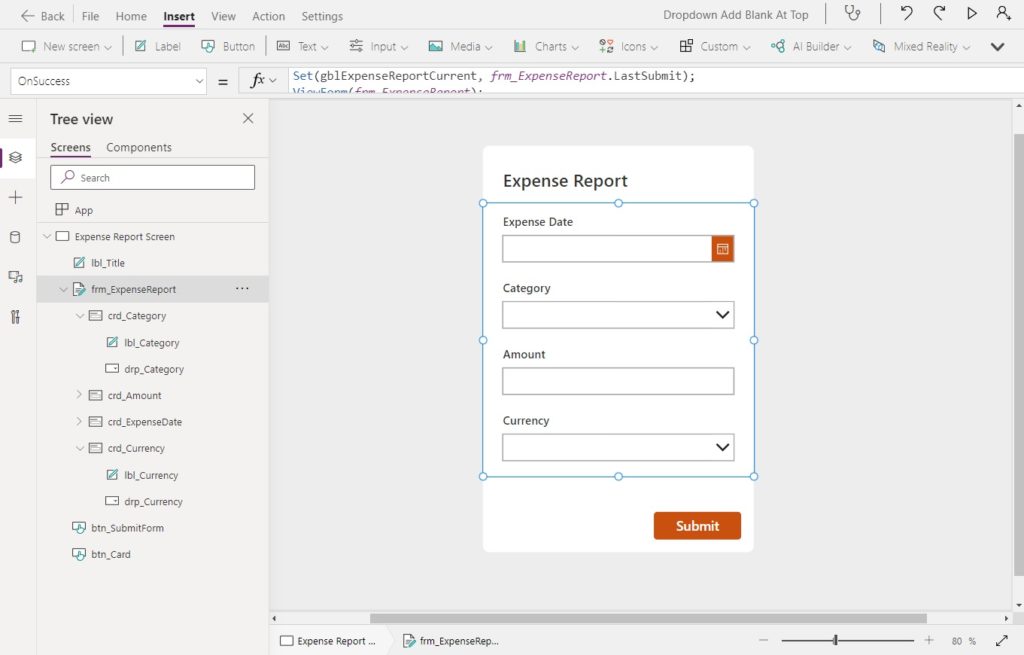
Write this code in the OnSuccess property of the Expense report form.
Set(gblExpenseReportCurrent, frm_ExpenseReport.LastSubmit);
ViewForm(frm_ExpenseReport);
Then use this code in the Item property of the form.
gblExpenseReportCurrent
Test The Expense Report App
We’re done! Give the finished Expense Report app a try.

Questions?
If you have any questions about How To Add A Blank Value To A Dropdown List In Power Apps please leave a message in the comments section below. You can post using your email address and are not required to create an account to join the discussion.


Hi Matthew, great post and interesting to see an alternate way to get the blank option to using a collection. My question, why does the ungroup work? Not used it before and looking at MS function help does elude to why it would work.
Thanks in advance.
Jonathan
Thank you! I have so many source lists for dropdowns with one blank row in them! This is much better.
Eileen,
Thank you for taking the time to write me. I was wondering if anyone else had this same problem so I’m glad to know my article helped you!
I’ve used this with great results, but wondering if you had a solution for a sort option. If I sort it, the blank value ends up on the bottom of the list.
Got it to work. I added an additional column to sort by that wasn’t the title and that worked:
Ungroup(
Table(
{myMenuOptions: Table({Title: Blank(), Sort:0.2})},
{
myMenuOptions: Sort(Filter(
List,
Column1 = “abc”
), Sort, Ascending).Title
}
),
“myMenuOptions”
)
Hi
why not to use the below on App start
ClearCollect(
YourDropdownMenuSource,
{Name: “”}
);
Collect(
YourDropdownMenuSource,
Distinct(
YourDropdownSPlistValues,
‘columnName’.DisplayName
)
);
Somar,
I did it with UNGROUP to demonstrate that it was not necessary to use a collection 😉 😉
Hi Matthew, thanks for this. Is there a way to add a text value like “All” to the dropdown, instead of Blank()?
Hi Matthew, any luck with this?
👍 Never seen this pattern before!
Hi Matthew,
Two questions.
1) I’m using this method with a dataverse table (populated via dataflow). After I implement this code into the items field, the field names revert back to their dataflow values ccr7_ etc… Any idea why this happens?
2) I’m then trying to Patch in a different property of the dataverse table, but cannot seem to access other properties of that value. [Have set up a LOOKUP() ONChange to set the record back.
Thanks! Great Article.
Andrew,
1) Nope, not sure why that happens but I’ve seen it before. Sometimes I write the Display Name of a column and when I reopen the app it has the schema name. It’s annoying.
2) I’m not sure what this question is asking…
Hey Matthew – is there any way to achieve this while still using the Choice data type?
Patrick,
You would have to use a SharePoint – HTTP Request action inside of a flow to add a new Choice to the set.
Very helpful Tutorial!
Keep it up!!!!
Works with the dreaded dataverse OptionSet! Amazing!
gender: Ungroup(
Table(
{gender: Table({Value: Blank()})},
{gender: Choices(‘Gender’)}
),
“gender”
)
Thanks Mathew.
So helpful! I have my dropdown in the main SharePoint List, so I am using Choices(‘Datasource’.FieldName) in the Items property and it still worked!
Ungroup(
Table(
{myOptions: Table({‘FieldName’: Blank()})},
{myOptions: Choices(‘Datasource’.FieldName)}
),
myOptions)
For everyone struggling, for adding the blank rows, for me it worked by removing the ” ” marks around “myMenuOptions” // writting this on Nov 2024.
Ungroup(
Table(
{myMenuOptions: Table({DDValue: Blank()})},
{myMenuOptions: Filter(‘Dropdown Values’, DDType=”Expense Category”).DDValue}
),
myMenuOptions
)