Extend A Power Automate Approval Over The 30 Day Limit

Power Automate approval flows can go beyond the 30 day limit if they are designed properly. A flow that waits an approval for over 30 days will timeout due to a limitation of the service. However, we can create an approvals process with an infinite duration by creating two separate flows. The 1st flow will create the Approval and then end. Then the 2nd flow will wait for the approval to become completed, determine the outcome, and then run any subsequent action.
Table of Contents
• Introduction: The Budget Request Approval Flow
• Setup The SharePoint List
• Build A Power Automate Flow To Create Approvals
• Create A Power Automate Flow To Collect Approval Results
• Run The Create An Approval Flow In Power Automate
• Test The Automated Flow To Get The Approvals Response
Introduction: The Budget Request Approval Flow
Managers at a manufacturing company use the budget request approval flow to ask for funding. This funding is used to purchase or upgrade equipment. An approval can take longer than 30 days so it is important that approval flow does not timeout.
Setup The SharePoint List
Create a new SharePoint list named Budget Requests with the following columns:
- Title
- Amount (number)
- Requested By (person)
- Request Status (choices: Submitted, Approved, Rejected)
- Approval ID (text)
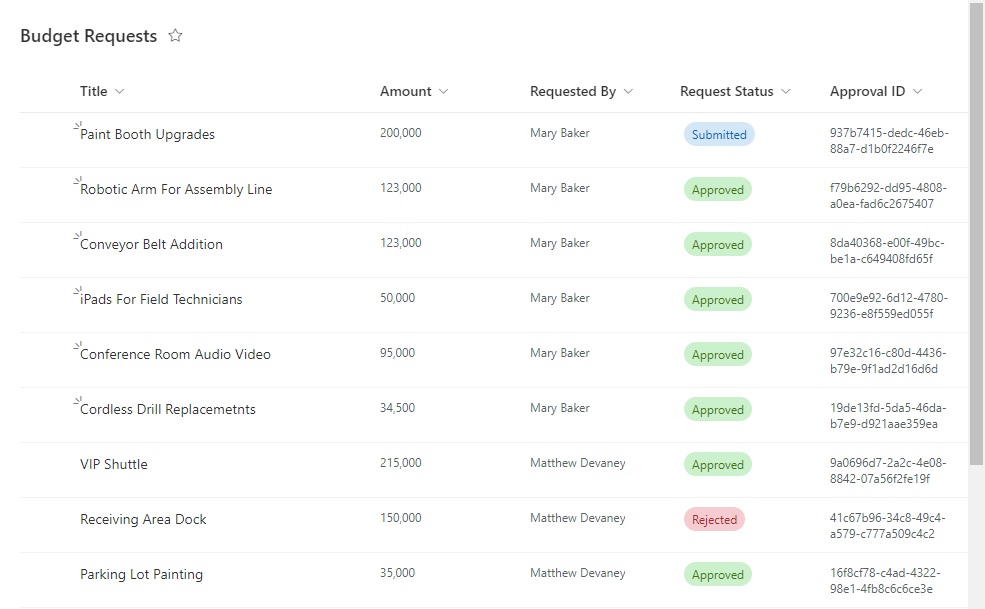
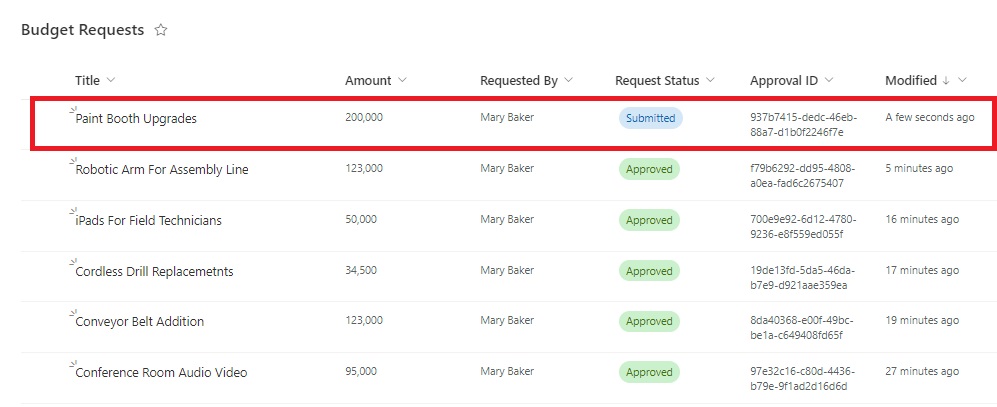
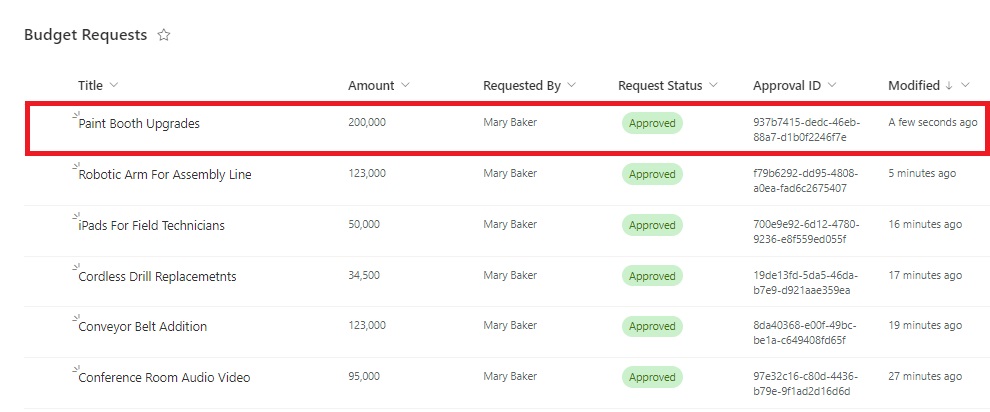
The SharePoint list does not require any data to be populated initially. Over time as budget requests are added the list will begin to look like this.
Build A Power Automate Flow To Create Approvals
A long running approvals process with no 30 day time limit will require two flows. The 1st flow will create the new approval and the 2nd flow will wait for the approval to be completed and take any subsequent actions.
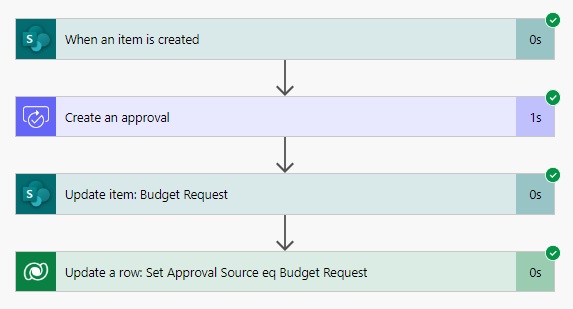
Open Power Automate and start an automated flow when a new item is created in the Budget Requests SharePoint list. Then create a new approval using inputs from the Budget Request item. Once the approval is sent update the budget request status to submitted and write the Approval ID to the SharePoint list. This will allow us to track which Power Automate approval is related to which Budget Request.
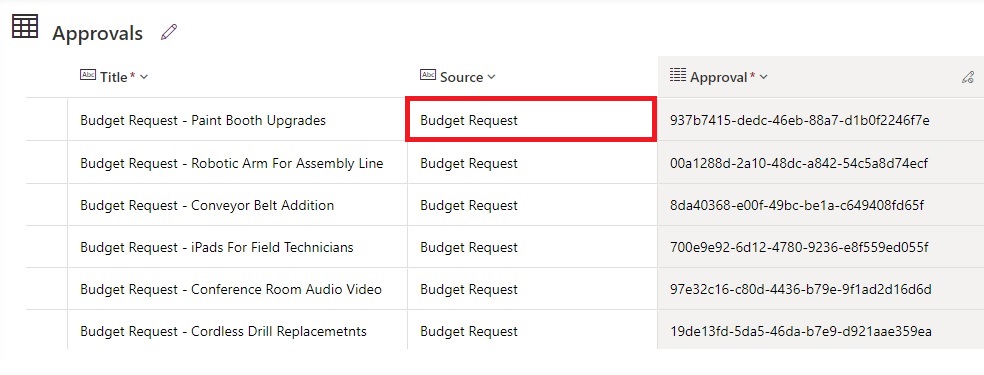
The final flow action updates the approval record in Dataverse to add a source named “Budget Requests.” We will use the source column to track the origin of the approval flow. And to ensure our 2nd flow only triggers on approvals requested from within the 1st flow.

Create A Power Automate Flow To Collect Approval Results
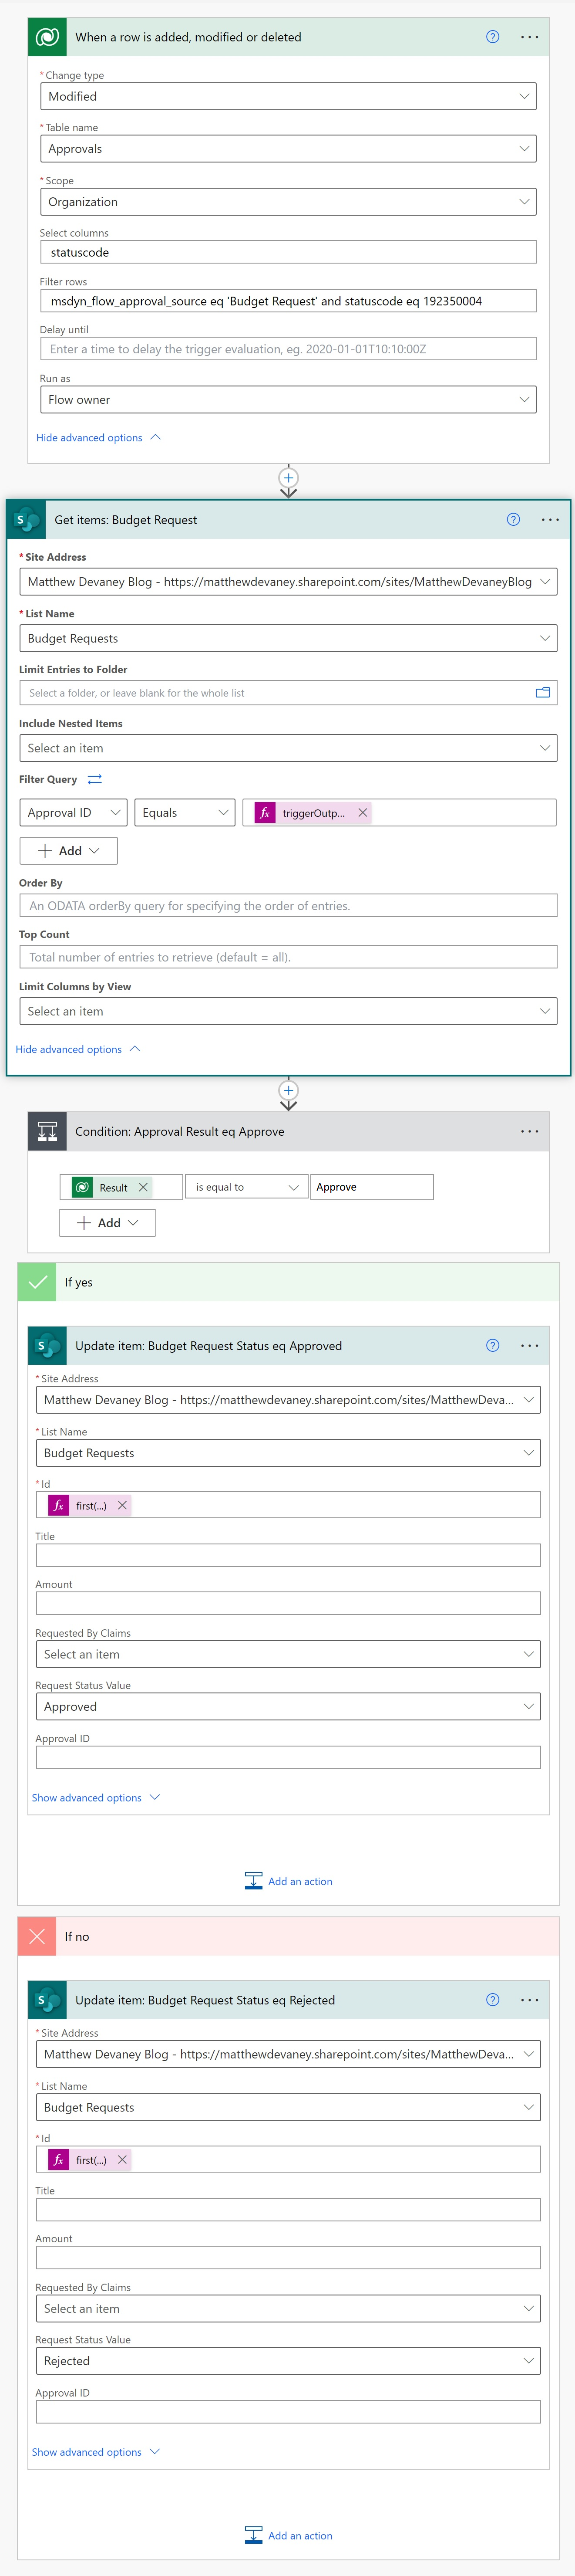
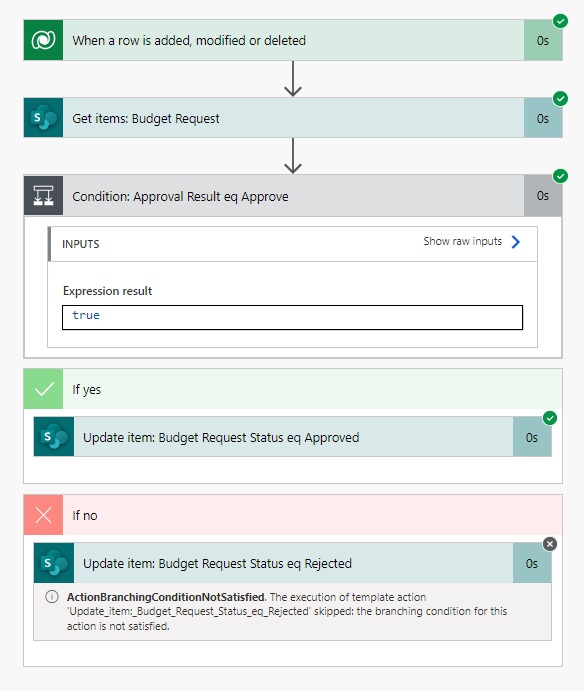
When an approval is completed the 2nd flow collects the result and takes any subsequent actions. Create a 2nd automated flow and use a Dataverse trigger to start it when a row is modified in the Approvals table. Only trigger the flow when the statuscode column is updated and check to see if the approvals source is “Budget Request” and the statuscode equals Completed (option set value: 192350004).
Then use the SharePoint – Get Items action to find the Budget Request with the matching Approval ID. If the approval result is “Approve” then update the Budget Request status to Approved. Or if the approval results it “Reject” then change the Budget Request status to Rejected.
Flow Expressions:
Dataverse When A Row Is Added Modified or Deleted – Select Columns
statuscode
Dataverse When A Row Is Added Modified or Deleted – Filter Rows
msdyn_flow_approval_source eq 'Budget Request' and statuscode eq 192350004
SharePoint Get Items – Filter
triggerOutputs()?['body/msdyn_flow_approvalid']
SharePoint Update Item Approved – Request Status
first(outputs('Get_items:_Budget_Request')?['body/value'])?['ID']
SharePoint Update Item Rejected- Request Status
first(outputs('Get_items:_Budget_Request')?['body/value'])?['ID']
Run The Create An Approval Flow In Power Automate
Our long running approval process is ready to test. Save both of the flows we have created and turn them on.
Go ahead and create a new item in the Budget Requests SharePoint list with the following values:
- Title – Paint Booth Upgrades
- Amount – 200,000
- Requested By – Mary Baker (or someone in your organization)

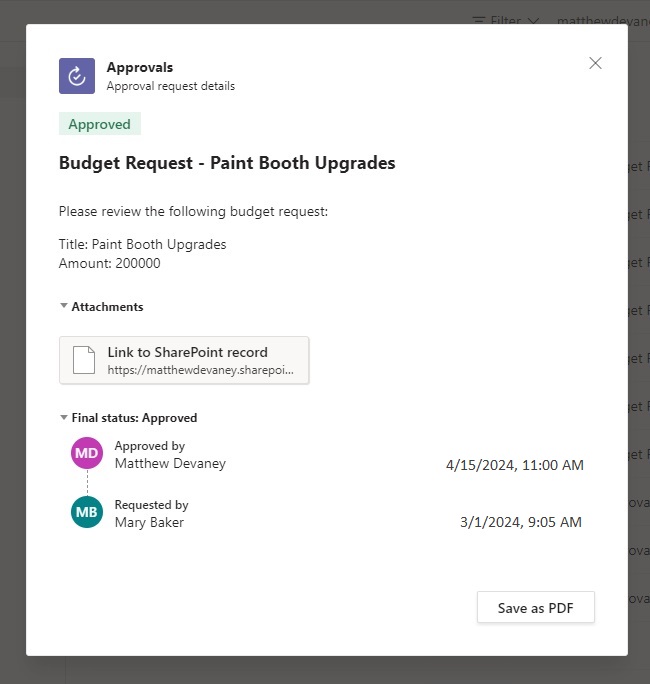
The approval will appear in the recipient’s Approvals Center.
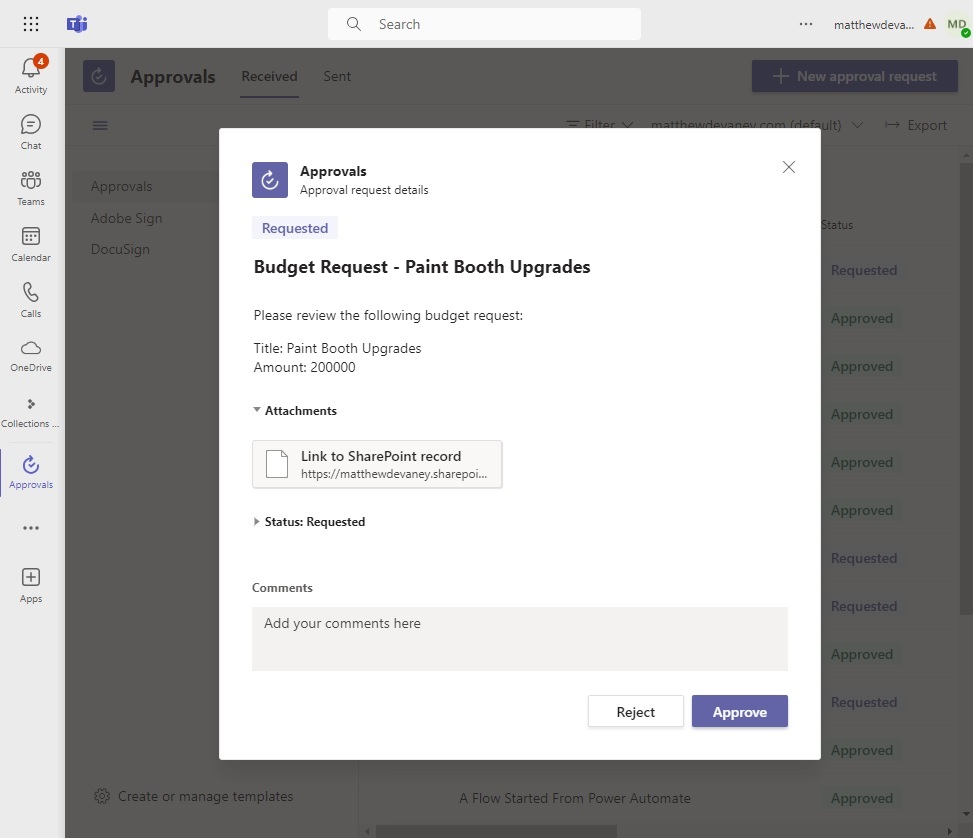
In the background the Power Automate flow does not await a response to the approval and continues to run. It updates the SharePoint list item with a status of Submitted and the Approval ID.
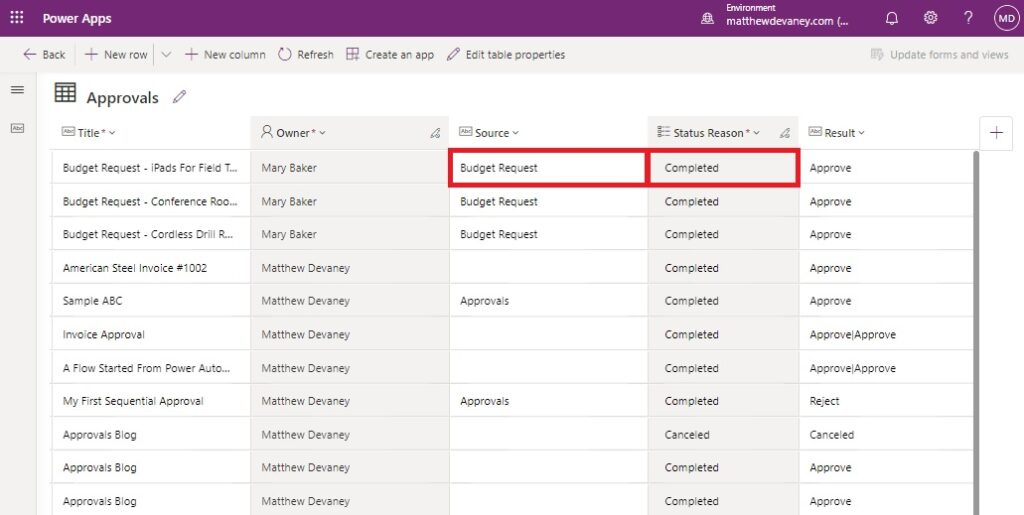
And it also updates the Approvals table record with the source Budget Request.
Test The Automated Flow To Get The Approvals Response
Trigger the second Power Automate flow by asking the approval recipient to choose Accept.
The approval now appears with a status of approved in Approvals Center.

When the approval is Accepted the status reason changes to Completed. The flow trigger conditions are now met so the flow begins to run
The SharePoint list item with the matching Approval ID is updated with the request status of Approved. If the response were Reject instead, the list item would show the status Rejected.
Did You Enjoy This Article? 😺
Subscribe to get new Power Apps & Power Automate articles sent to your inbox each week for FREE
Questions?
If you have any questions or feedback about Extend A Power Automate Approval Over The 30 Day Limit please leave a message in the comments section below. You can post using your email address and are not required to create an account to join the discussion.


Thank you very much for your post.
In the “Condition: Approval Result eq Approve”, shouldn’t it be Result is equal to Approve rather than Result?
Lonuel,
Thank you for the comment. The screenshot is now fixed 🙂
With this being based on Dataverse would premium licensing be required for anyone, or with it being a built-in table for approvals is it ‘free’ for standard users?
Hello Phil!
You will need a single account with a Power Automate license to run these flows. Set the flow owner for both flows to the licensed account.
The users who receive Approvals do not require any license.
First, OMG this solution is genius, and so simple.
Second, by creating the ‘Svc_Account’ to run the flows, does this not fall into the statement (trap) that anyone that benefits from the ‘premium licensing’ should also be licensed?
Eugene,
In my own best judgement I understand this to be within the licensing agreement.
The service account is not circumventing anything here. It is operating as intended and an automated flow is always run by the flow owner.
Great post Matthew. Is the Dataverse connection to the approvals table a premium feature? Is it possible to use an admin connection to Dataverse if not everyone has a premium license?
Eric,
Only a single licensed Power Automate admin account is needed. Users who receive the approval do not need any license.
Make sure to set the admin account as the Owner of both flows.
Thank you Matthew. I knew the approval was okay, just was not sure about the direct access to the table. Again, great info as always.
When you mean “a single licensed Power Automate admin account”, you do mean a user account with Power Automate Premium (or PA Process), right?
I have an E5 license, however I don’t have access to Premium connectors.
CH,
Yes, I mean Power Automate Premium. Current list price is $USD 15 per month.
Very helpful Matthew, thanks for sharing. I tried the example you showed and it worked. I was wondering which table stores the approval comments? It’s not in the Approvals table output (only the result is).
Mohammed,
Suggest you look in the Approval Responses table.
Matthew, you are a genius! Thank you very much for this – I’m going to re-engineer a few of my flows to take advantage of this pattern and it will be a game changer 🙂
Do you have any thoughts on reassigning approvals? I’m sure I won’t be the only person who would appreciate tips on creating a process to allow super-users to reassign existing approvals that they are not named on as an approver themselves.
For example, a payroll team processes approved expenses every week. They only receive expense claims once the cost centre owner has actioned the approvals. If an approver is unexpectedly absent then the payroll team may want to reassign any pending approvals for that person.
Steve,
Yes, I will be sharing my method to reassign approvals using Power Automate next week 😊
I’m looking forward to it – many thanks!
Great post , but i cannot see the filter query options in your screenshot for the Get Items: Budget request.
Have you enabled experimental features?
Vincent,
You are correct. Experimental features were turned on. I should turn them off and take another screenshot.
Use this expression in the filter:
ApprovalID eq ‘@{triggerOutputs()?[‘body/msdyn_flow_approvalid’]}’
Presumably, could we use a SharePoint list to hold the data instead of Dataverse?
Jeffery,
I don’t believe so. We must trigger on the Dataverse Approvals table to make it work. Fortunately, only one service account with a per user license is required to make this all work.
This is the approach I use when designing Approval flows so that the business logic for triggering the Approval is decoupled from the business logic when it’s fully approved. It’s good to note that the statuscode has several different values that can be useful for automating processes when approvals are canceled, abandoned, expired, or suspended. It’s not 100% clear to me how all of those statuses are invoked, but hopefully we’ll get some better docs soon.
Hi Matthew,
Just thought I would let you know that the trigger used ‘To Collect Approval Results’ seems to only work when the user approves the request using Teams. If the user approves via make.powerautomate.com the trigger fails to start.
Looks like it’s working now. Please ignore my previous comment
Hey! Thank you for the useful article! I wanted to ask: the second flow is triggered once the approval is given (or rejected), but what if the statuscode in the Dataverse table does not update, when the request is approved? So, everything works right as you described, but once the flow reaches this point, it is stopped basically. I was setting the flow in almost same manner and I am just wondering if all crucial points are reflected in the screenshots. Thank you in advance!
Can this work for multiple approvals too?
Hi Matthew,
I’ve created a flow that creates approvals and then waits for user approval. It turns out that all pending approvals are automatically being cancelled and I don’t know what’s causing this. If you know of a solution, I’d appreciate it!