How To Use Power Automate + Azure OpenAI GPT Models

You can use Power Automate to call Azure OpenAI and return a response from the latest GPT models. Azure OpenAI is a safe way to use GPT that doesn’t use your company data for model training. And its low-cost consumption-pricing model is ideal for high-volume use-cases. AI Prompts in Power Platform are simpler to setup and deploy to makers but you should consider Azure OpenAI when more power is needed.
Introduction: The Helpdesk Ticket Priority Automation
An I/T department uses Power Automate and a GPT model provided by Azure OpenAI to read all incoming helpdesk tickets and assign a priority level.
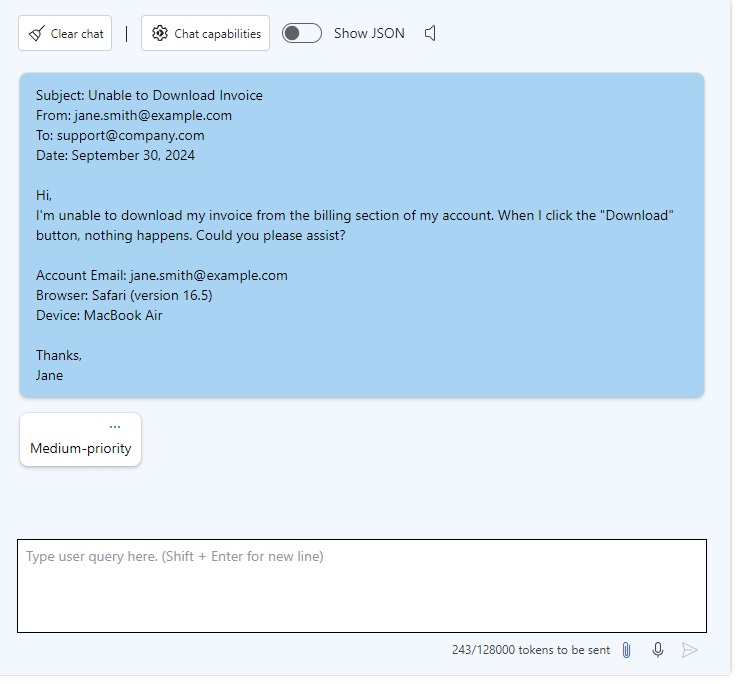
After the GPT model reads the ticket it responds with High-Priority, Medium-Priority or Low-Priority
Create A New Azure OpenAI Resource
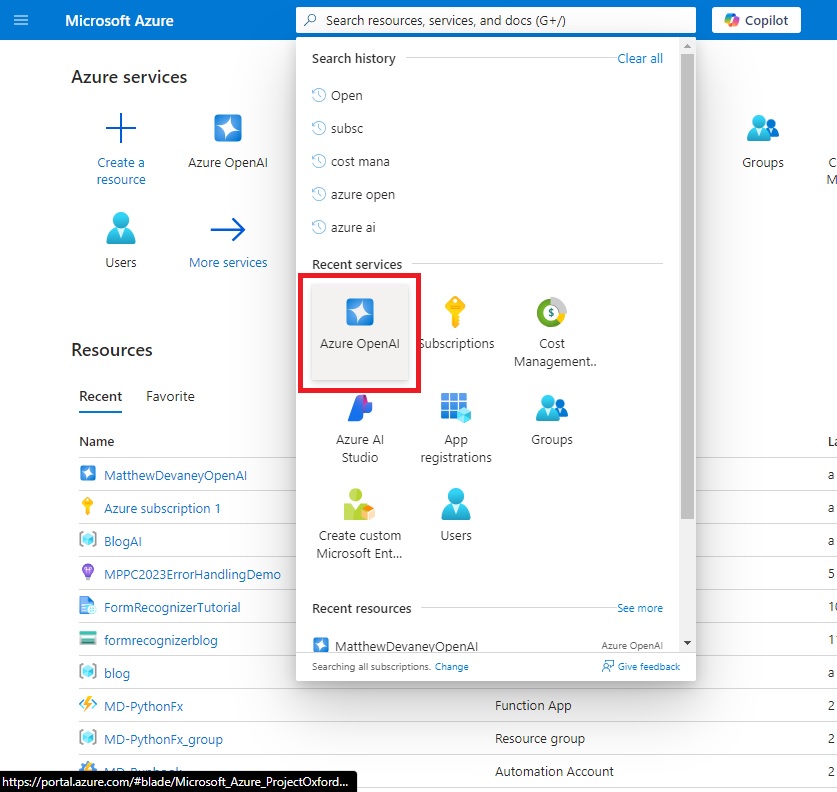
To deploy a GPT model in Azure we must first create an Azure OpenAI resource where it will be hosted. Open the Azure Portal and go to the Azure OpenAI service.
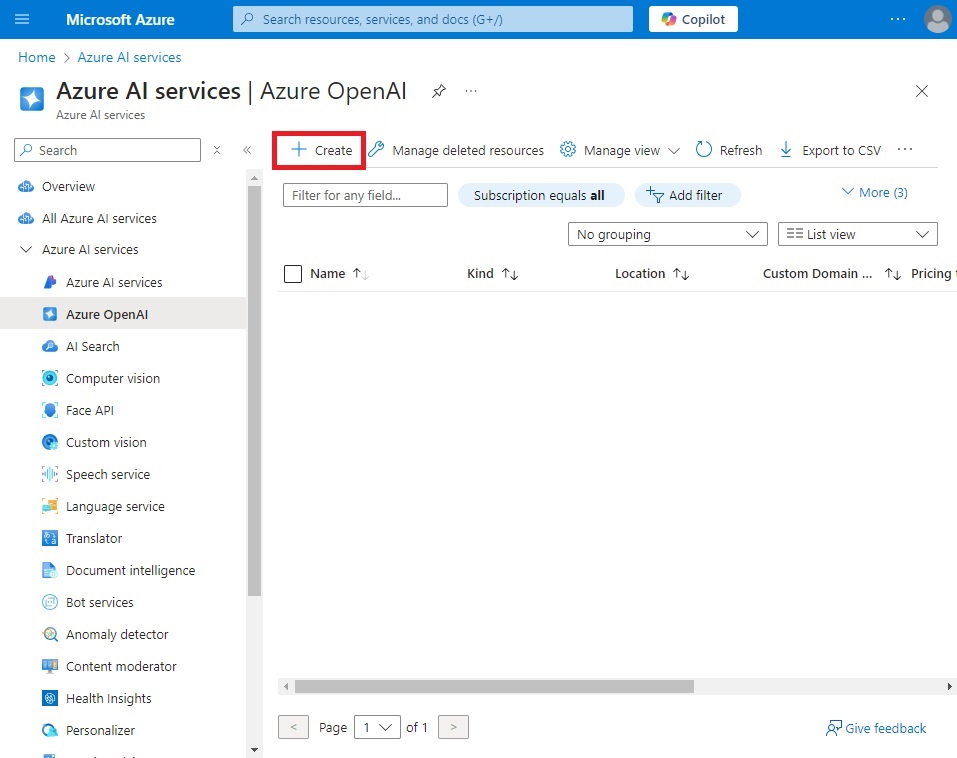
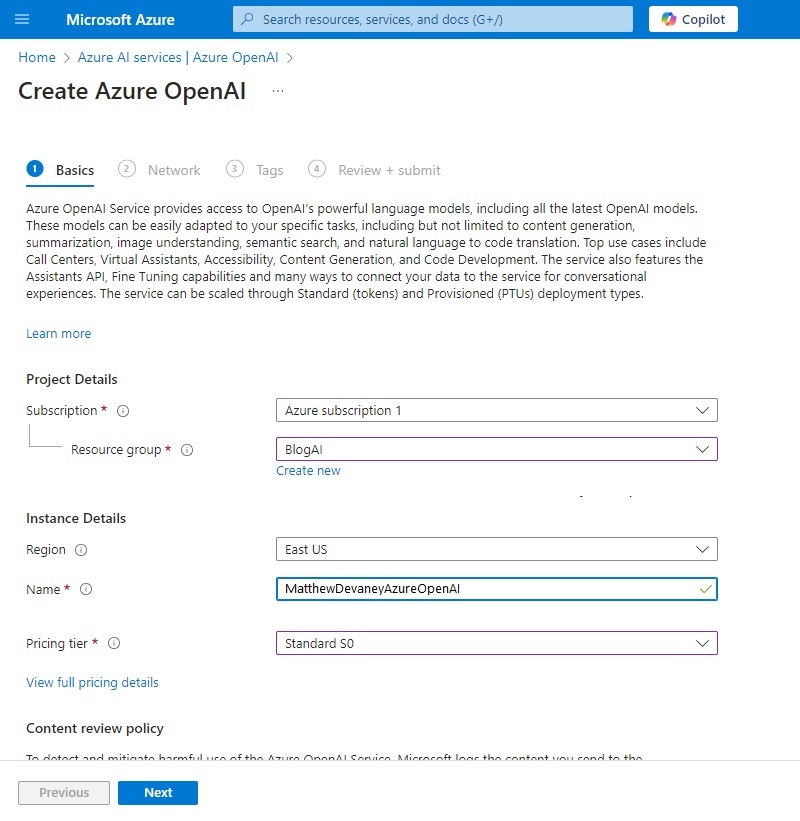
Create a new Azure Open AI resource.
Fill-in the project details for subscription, resource group, region, name and pricing tier. Then press next.
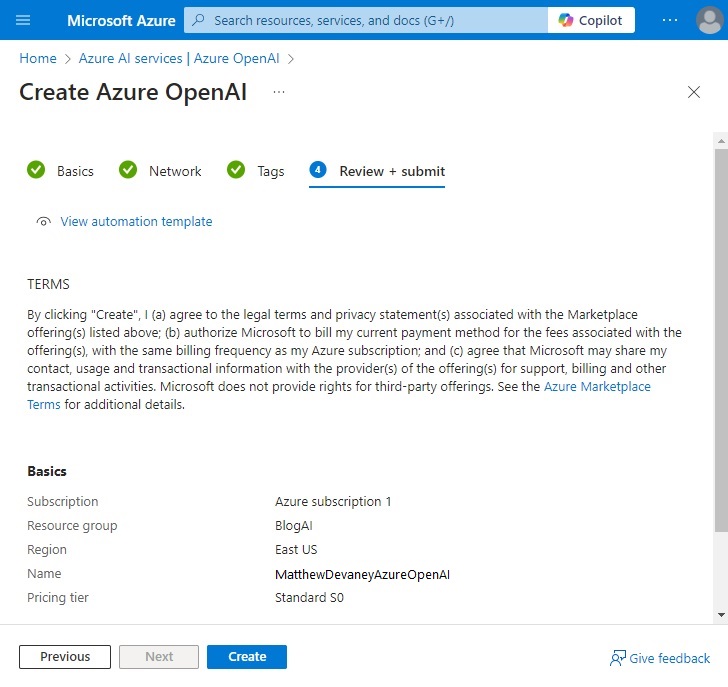
Continue pressing the next button until the review + submit step. Then press Create.
Launch Azure OpenAI Studio
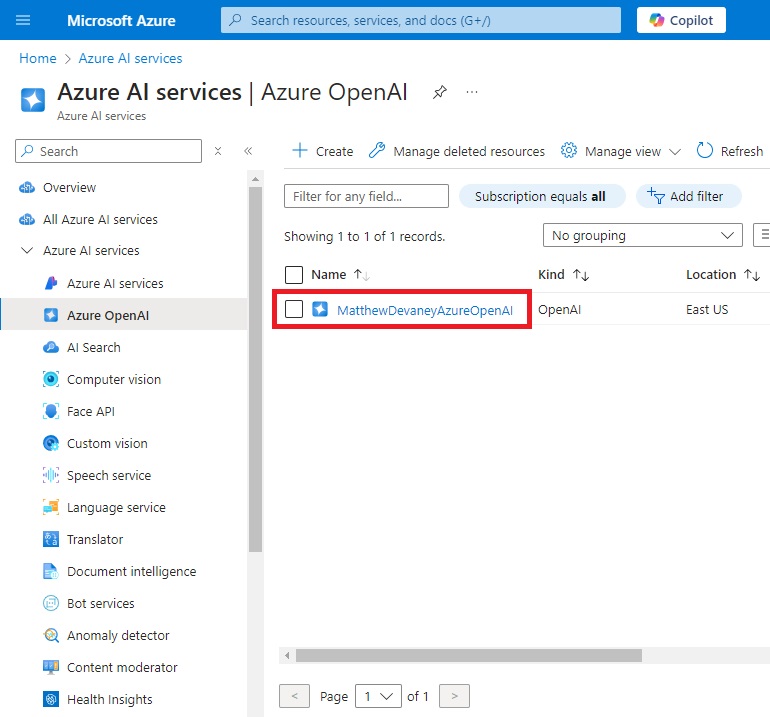
To work with the resource we created we must open it in Azure OpenAI studio. Select the resource to view its details.
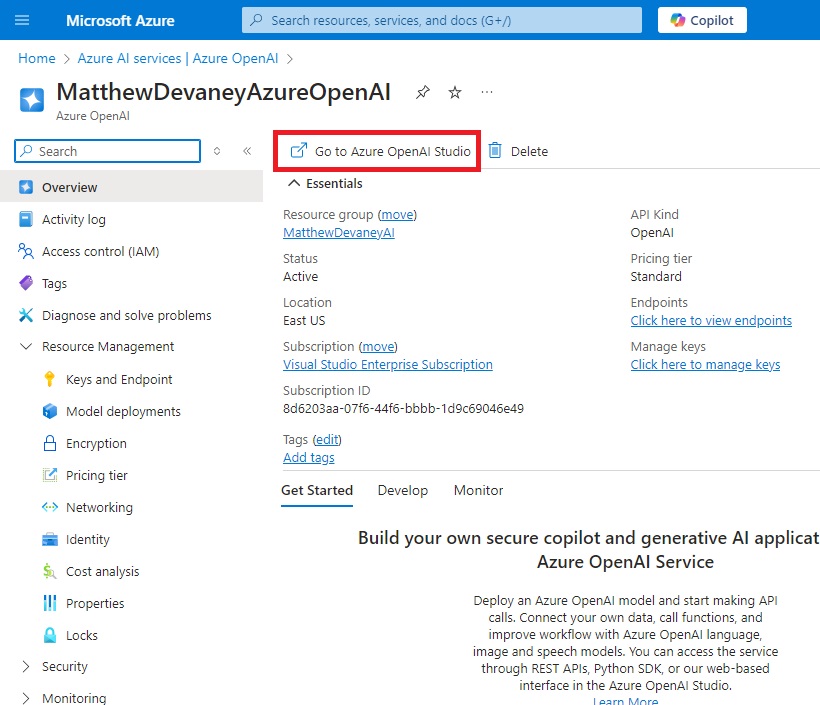
On the the Overview page select Go to Azure OpenAI Studio.
Deploy A GPT Model In Azure OpenAI Studio
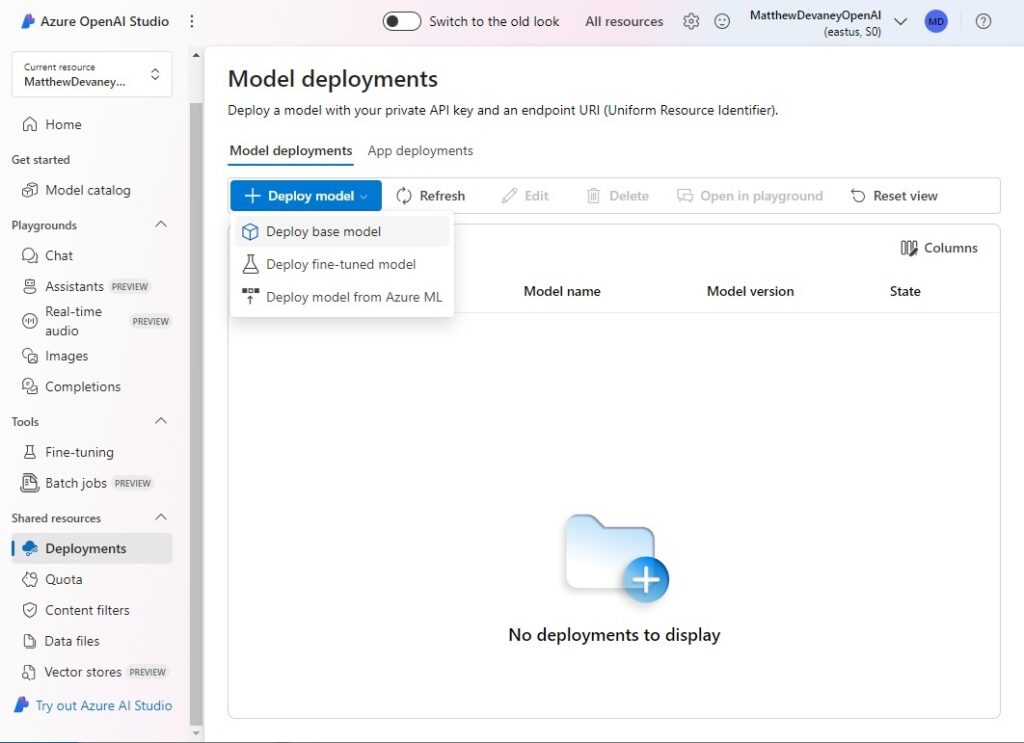
A GPT model must be deployed to make it available for use in Power Automate. Go to the deployments tab and deploy a base model.
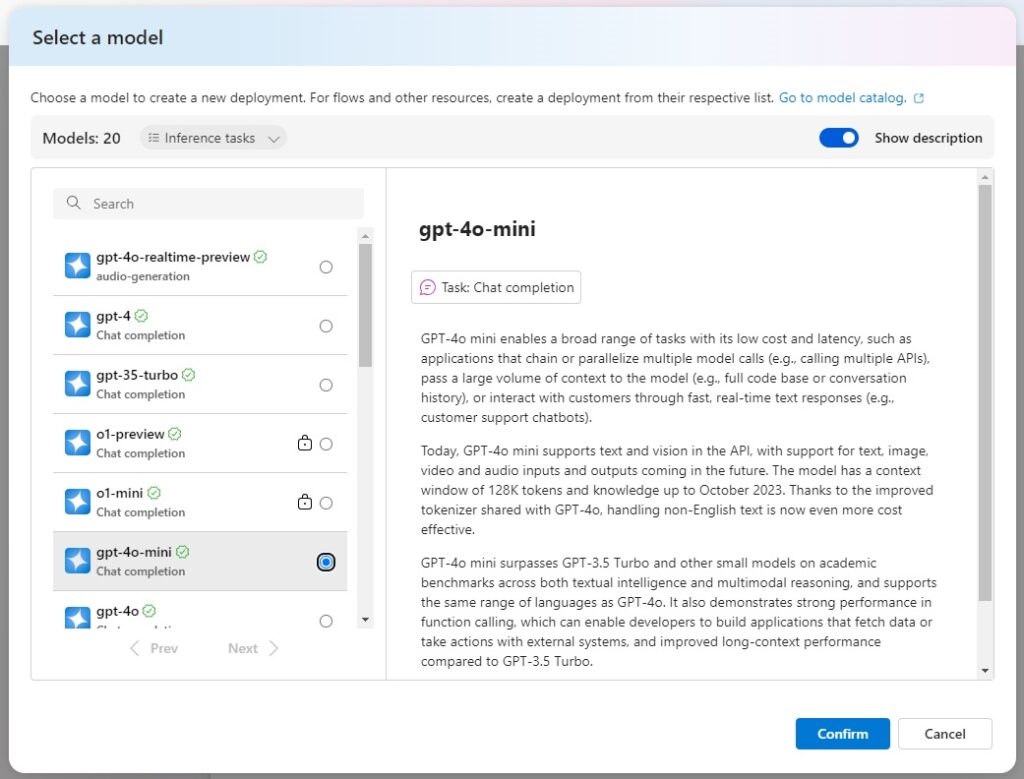
Choose your preferred GPT model and press Confirm. This tutorial uses GPT-4o-mini but you can select any model from the list. Each model has different abilities and costs.
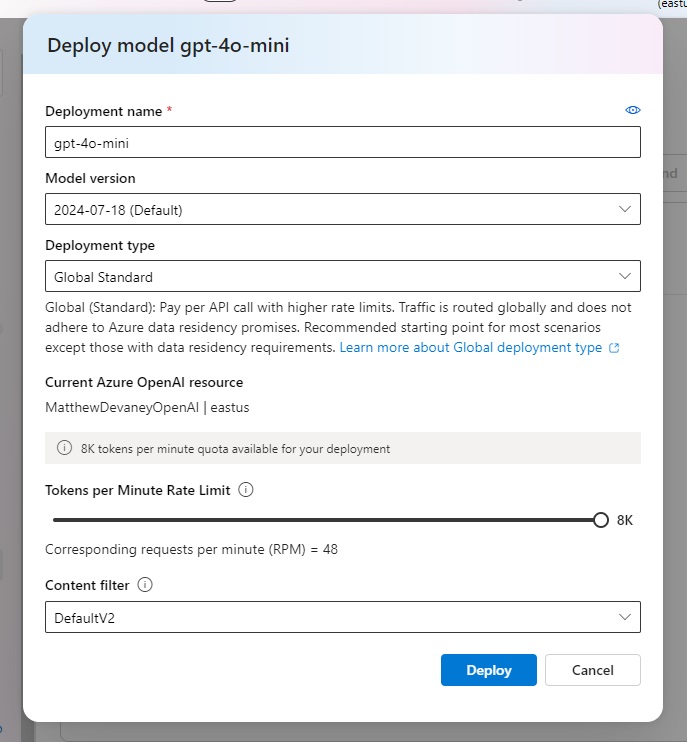
Use the default deployment name, model version and set the deployment type to global standard. Increase the Tokens per Minute Rate Limit to the maximum allowed value. Then deploy the model.
Details of the model deployment will appear on the next screen.

Add A System Message To The GPT Deployment In Chat Playground
The chat playground allows developers to configure and test their GPT deployment before using it in Power Automate. Go to the chat tab and select the deployment that was just setup.
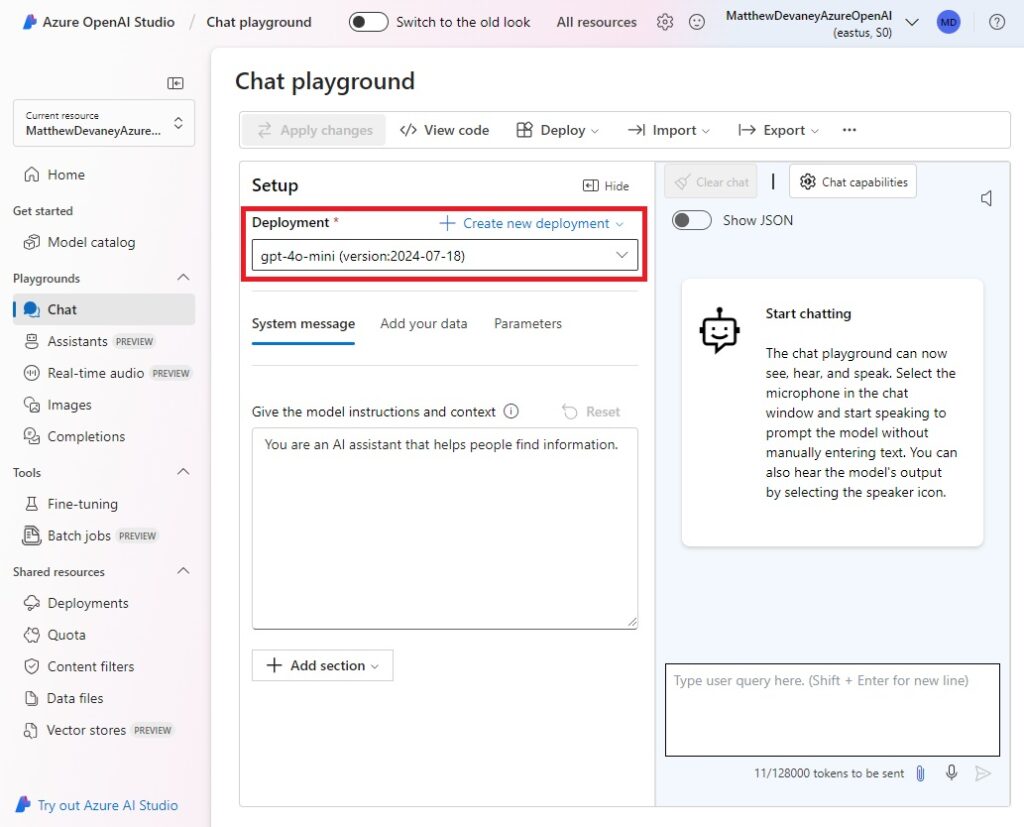
The system message gives the model instructions and context on how to respond to any incoming chat message. We will tell the GPT model the how to categorize incoming helpdesk tickets by priority level. Then we will ask it to respond with one of the following options: high-priority, medium-priority or low-priority
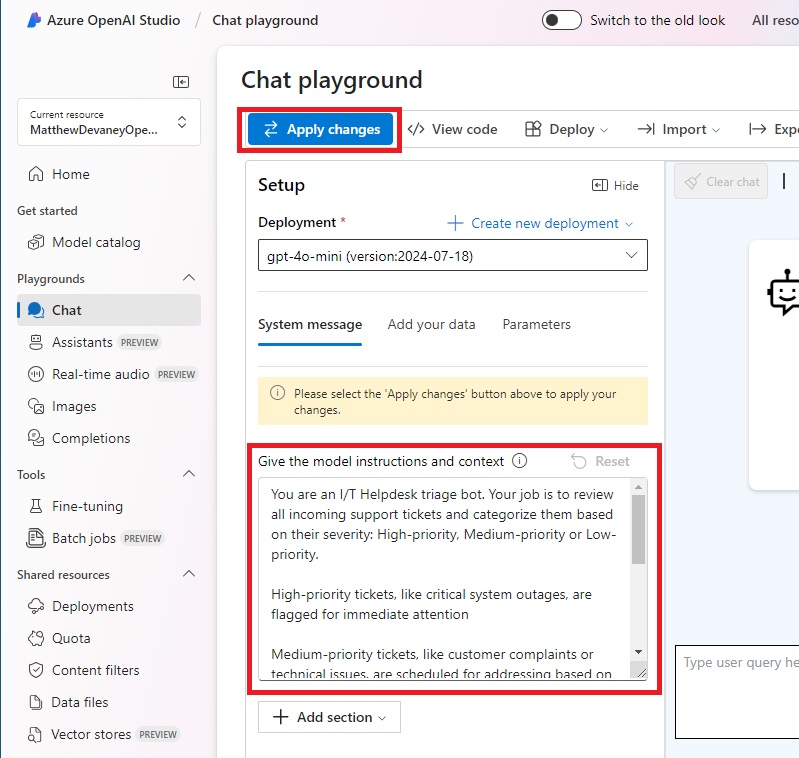
Copy and paste this text into the system message field and press the Apply Changes button.
| You are an I/T Helpdesk triage bot. Your job is to review all incoming support tickets and categorize them based on their severity: High-priority, Medium-priority or Low-priority. High-priority tickets, like critical system outages, are flagged for immediate attention Medium-priority tickets, like customer complaints or technical issues, are scheduled for addressing based on availability Low-priority tickets, like general inquiries or feature requests, are queued for resolution after higher-priority issues are handled After you review a support ticket to determine the severity respond with the category that has the best match. Only include one of these phrases in the response: “High-priority”, “Medium-priority”, “Low-priority. |
Send A Chat Message To The GPT Model In Chat Playground
When a chat message is sent to the GPT model, it first looks at the instructions in the system message and uses them to create a response. We will input text formatted as a support ticket email into chat window and see what priority level is assigned by GPT.
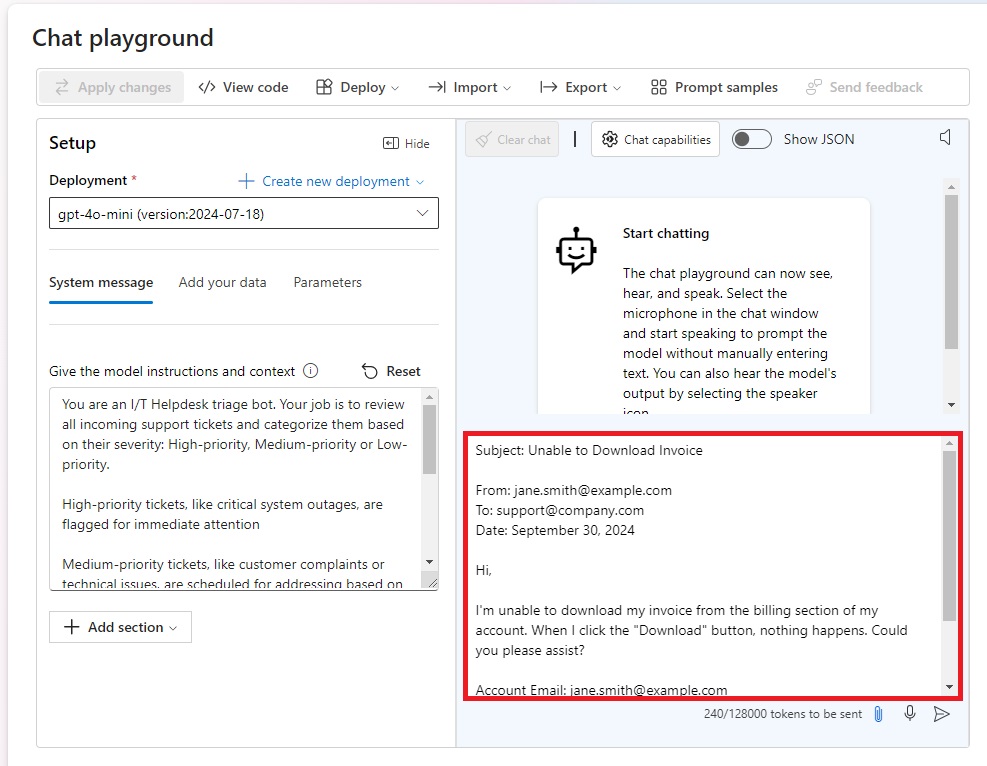
Copy and paste this text into the chat window and press the Send button.
| Subject: Unable to Download Invoice From: [email protected] To: [email protected] Date: September 30, 2024 Hi, I’m unable to download my invoice from the billing section of my account. When I click the “Download” button, nothing happens. Could you please assist? Account Email: [email protected] Browser: Safari (version 16.5) Device: MacBook Air Thanks, Jane |
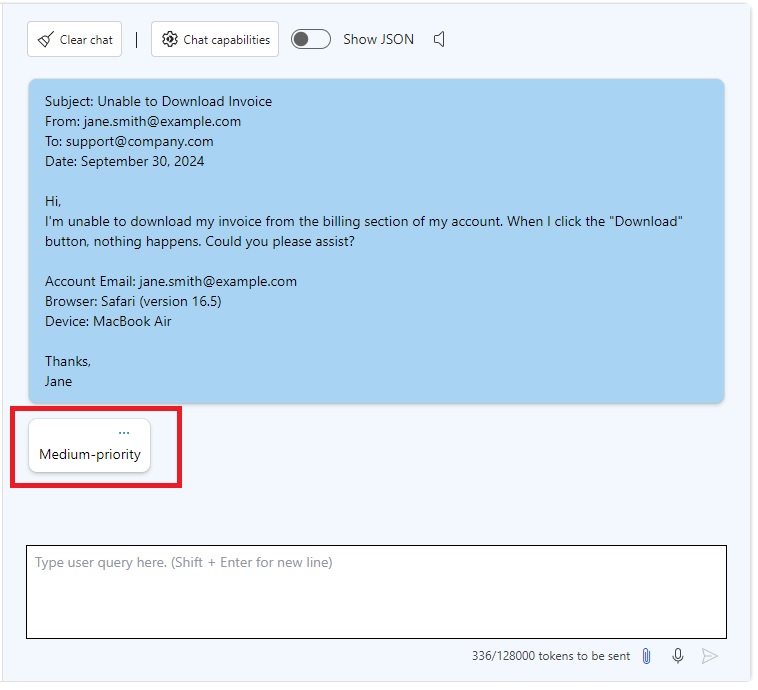
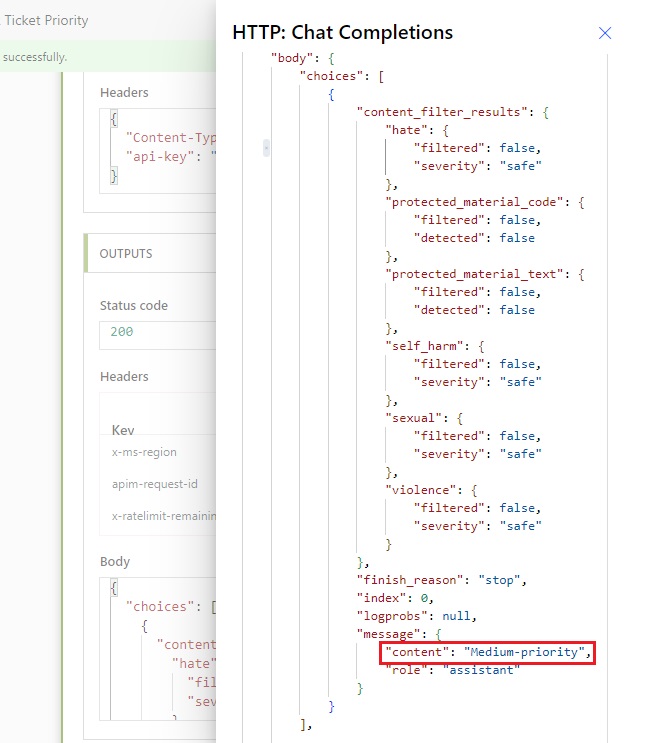
The response returned in the chat window is “medium-priority.”
Create A Power Automate Flow To Call Azure OpenAI
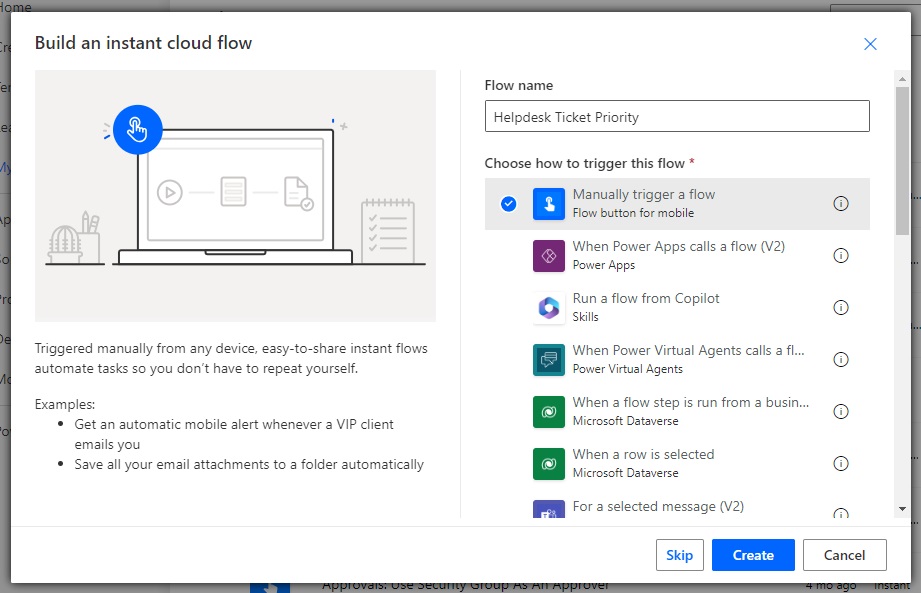
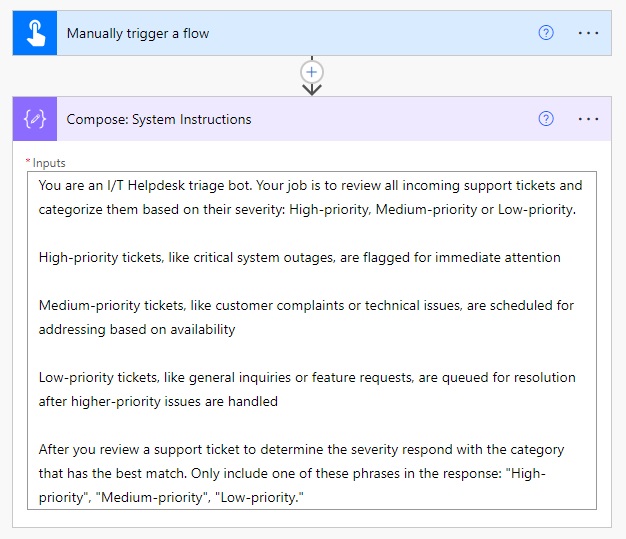
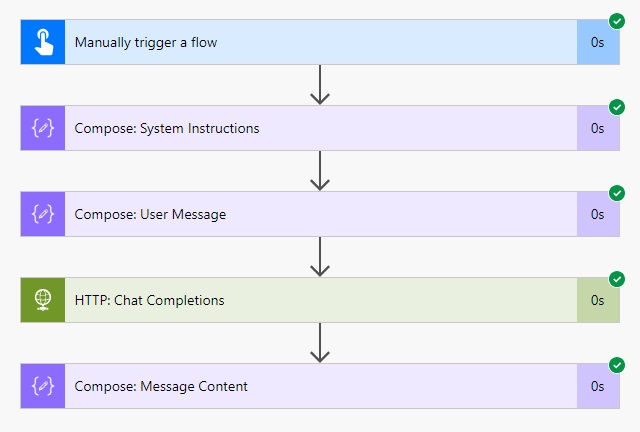
We want to build a Power Automate flow that gets an helpdesk ticket email message, sends it to Azure OpenAI and returns a priority level for the ticket. Open Power Automate and create a new flow with a manual trigger.
Add a Data Operations – Compose action to the flow with the same system message that was used in Chat Playground.
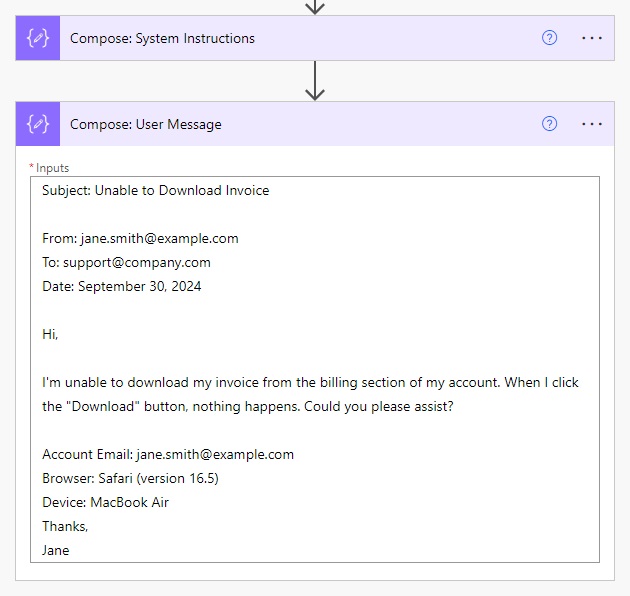
Then add a 2nd Compose action below it with the helpdesk ticket formatted as an email. We are simplifying the helpdesk ticket use-case to make it easier to follow. In the real-world we might have used an Office 365 Outlook – When A New Email Arrives trigger and collected values from it in the user message.
Get A Chat Completion From The GPT Model In Azure OpenAI
We must use an HTTP action to call the chat completions endpoint in Azure OpenAI and return the message sent in response. Create an HTTP action in the flow and use the POST method.
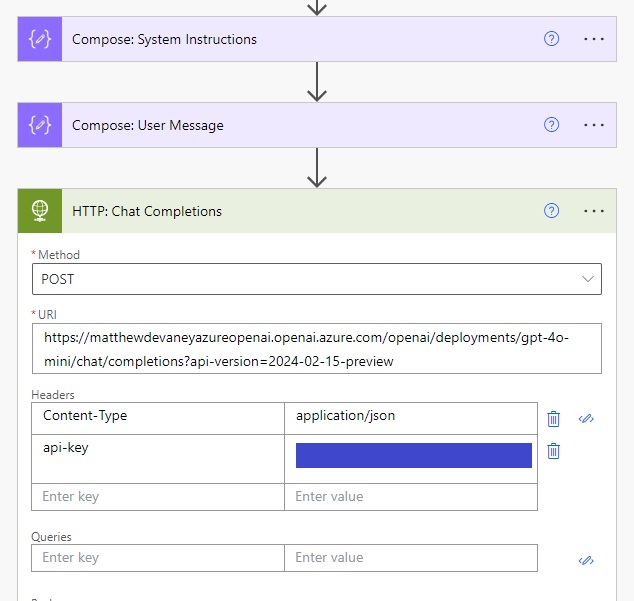
The URI for the Azure OpenAI chat completions endpoint looks like this. Your specific endpoint will have a different resource name (matthewdevaneyazureopenai), deployment name (gpt-4o-mini) and API version (2024-02-15-preview)
https://matthewdevaneyazureopenai.openai.azure.com/openai/deployments/gpt-4o-mini/chat/completions?api-version=2024-02-15-previewCode language: JavaScript (javascript)
To get your own URI for the flow open Chat Playground and select View Code.
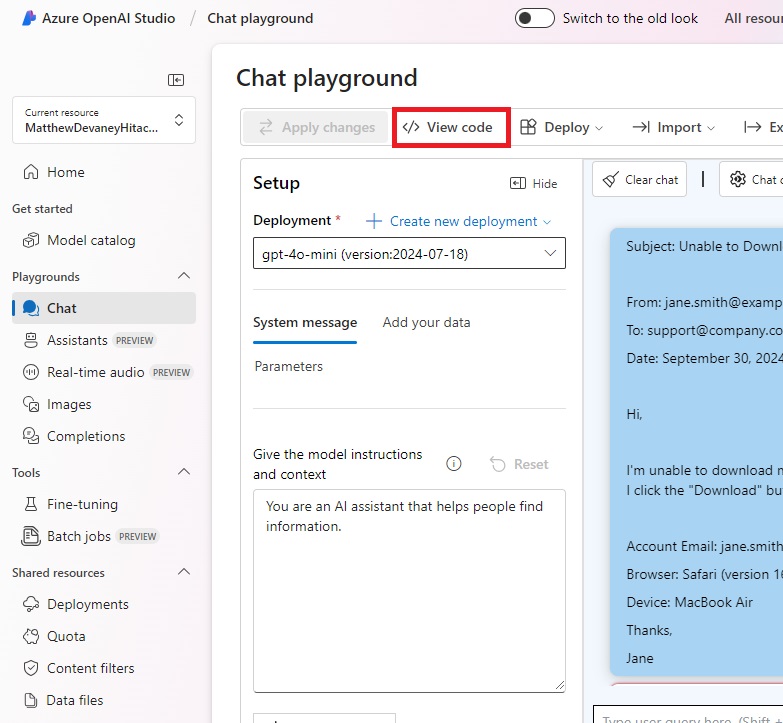
Use the complete web address found in the ENDPOINT variable.
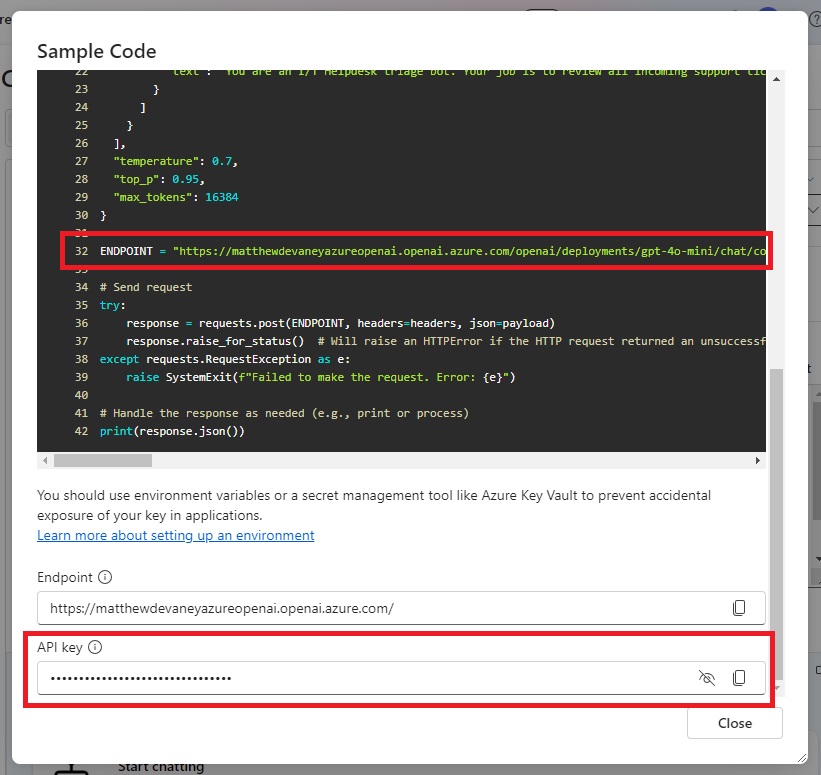
Also include the following header values in the HTTP request. The api-key is also found in the footer of the sample code menu.
| Header | Value |
| Content-Type | application/json |
| api-key | ******************************** |
Include The System & User Messages In The HTTP Action Body
The body of the HTTP action includes the system message, the user message and a few other configuration values.
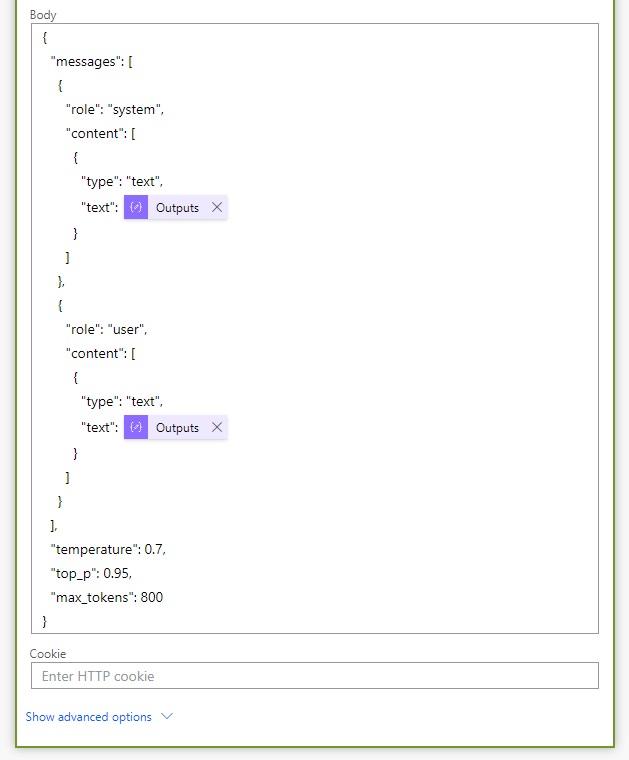
Use this code in the body of the HTTP action. System and user message values come from the Compose actions we setup earlier in the flow.
{
  "messages": [
    {
      "role": "system",
      "content": [
        {
          "type": "text",
          "text": @{outputs('Compose:_System_Instructions')}
        }
      ]
    },
    {
      "role": "user",
      "content": [
        {
          "type": "text",
          "text": @{outputs('Compose:_User_Message')}
        }
      ]
    }
  ],
  "temperature": 0.7,
  "top_p": 0.95,
  "max_tokens": 800
}Code language: JavaScript (javascript)
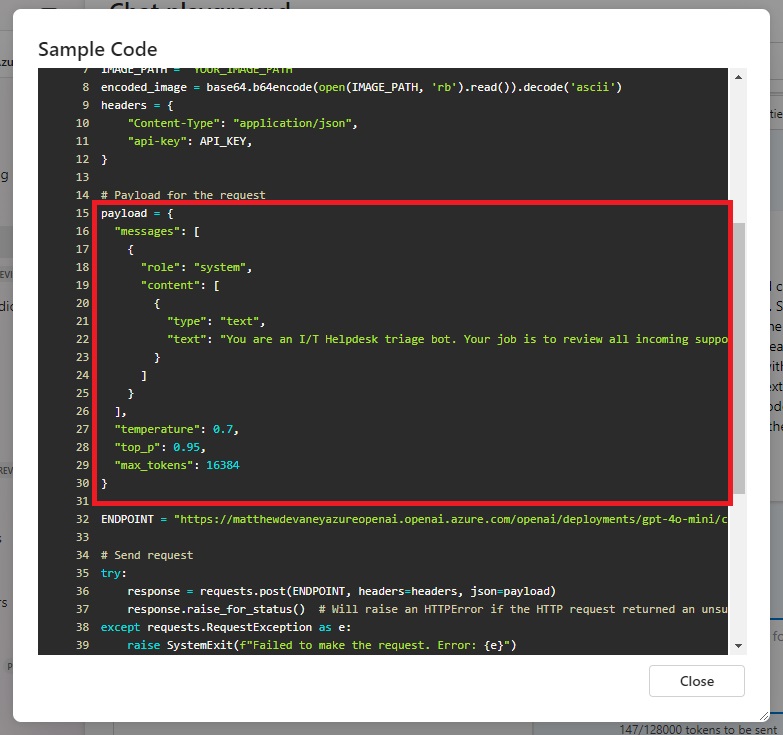
The structure for the HTTP action body can be found in the payload variable of the sample code.
Return The Message Content From The Azure OpenAI Response
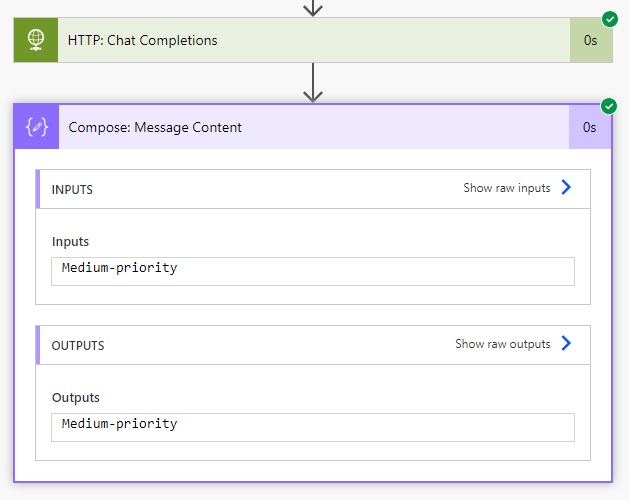
The response from Azure OpenAI contains many details all we want to know is the helpdesk ticket priority. Add a Data Operations – Compose action to the flow and write an expression to get the message content.
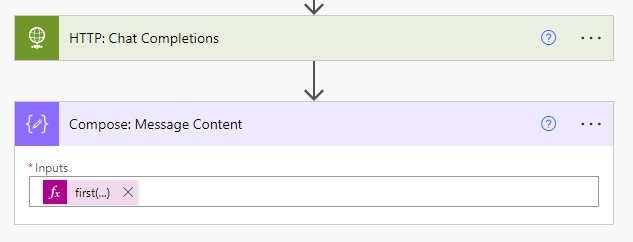
Use this code to get the content of the first message returned by Azure OpenAI.
first(body('HTTP:_Chat_Completions')?['choices'])?['message']?['content']Code language: JavaScript (javascript)
Run The Power Automate Flow To Call Azure OpenAI
Save the flow and test it with hardcoded system instructions and a user message.
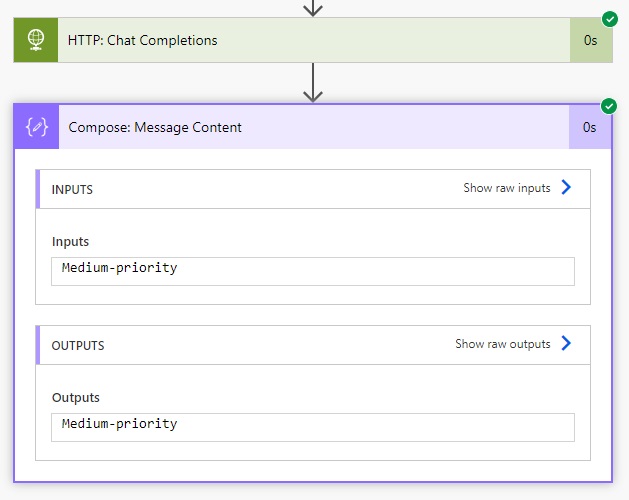
The body of the HTTP action returns “medium-priority.”
And we can see the output in the Compose action following the HTTP action.
Did You Enjoy This Article? 😺
Subscribe to get new Copilot Studio articles sent to your inbox each week for FREE
Questions?
If you have any questions or feedback about How To Use Power Automate + Azure Open AI GPT Models please leave a message in the comments section below. You can post using your email address and are not required to create an account to join the discussion.




This is good Matthew. Well documented and well done. The low-cost consumption-pricing model is a life-saver
Temidayo,
Totally. USD$ 0.05 per million input tokens is insane. I feel like I could use it forever without spending anything significant.
Hi Matthew,
For the body of the HTTP action, there is no User role and content in the sample code screenshot. How did you know you need to include that?
As for my case, my User content is broken down into something like this. Can you provide some insights on this? Thanks.
[
{
“type”: “text”,
“text”: “Subject: Unable to Download Invoice”
},
{
“type”: “text”,
“text”: “From: [email protected]“
},
{
“type”: “text”,
“text”: “To: [email protected]“
}
]
Alex,
I was able to see that every message has a role by toggling on the Show JSON button at the top of the chat window. See screenshot below.
As for your other question, the Chat Playground will break each newline into a separate messages. Therefore, subject, [email protected] and [email protected] will all be sent as their own messages. Chat playground knows multiple messages are being sent through the chat window and waits to respond to them as one!
Hi Matthew thank you for this very informative flow that I have successfully implemented, just one question, Is the HTTP connector a premium one, as I am able to use it even though I dont have a premium subscription.
KPaul,
Yes, the HTTP connector is a premium action.
Thank you for the excellent instructions. Is it also possible to submit a document?
Hi,
Thanks,
I have a problem, as soon as I send several lines of text I get an error:
[{‘type’: ‘json_invalid’, ‘loc’: (‘body’, 121), ‘msg’: ‘JSON decode error’, ‘input’: {}, ‘ctx’: {‘error’: ‘Expecting value’}}]
Is it not possible to send several lines in a query?
When I send one line I get a response from AI
I am getting this error :Your resource does not have enough quota to deploy this model with the selected deployment type and version. You can try selecting a different deployment type or model version, or manage your quota.
Ajay,
Your organization needs to apply for quota on your GPT deployment. Ask an admin to do this 🙂
Hi Matthew, im facing this issue: UnresolvableHostName. The provided host name ‘*****’ could not be resolved.
Do you have idea on this error?
can we create a Free azure open Ai account for learning purposes??