Make A Calendar In Power Apps – Part 1

Calendars are a common feature of many apps. They are used by teams to share events, by planners to schedule resources and employees to track hours worked. Power Apps provides a calendar screen out-of-the-box but I’ve always thought the best way to truly understand how something works is to make it for yourself.
In this two-part series I will show you how to make a calendar in Power Apps. Part 1 will focus on the basics of how to build a calendar and Part 2 will show you how to add events to calendar & display them.
Building A Grid With Dates
The basic structure of a calendar is nothing more than a grid displaying a series of dates. In Power Apps we can construct this grid by using a vertical gallery control. Multiple dates can be shown on the same row with the WrapCount property.
Begin by placing a button on the screen called btn_Calendar_Today. Change the text of the button to show “Today”.

When the button is clicked it will set a variable to the 1st day of the month. This will allow the user to easily return to the current day. Place this copy inside the OnSelect property of the button. Also copy this code into the OnVisible property of the screen so the variable gets set on the user’s arrival.
Set(varFirstDayOfMonth,
    Date(
        Year(Today()),
        Month(Today()),
        1
    )
)Code language: JavaScript (javascript)
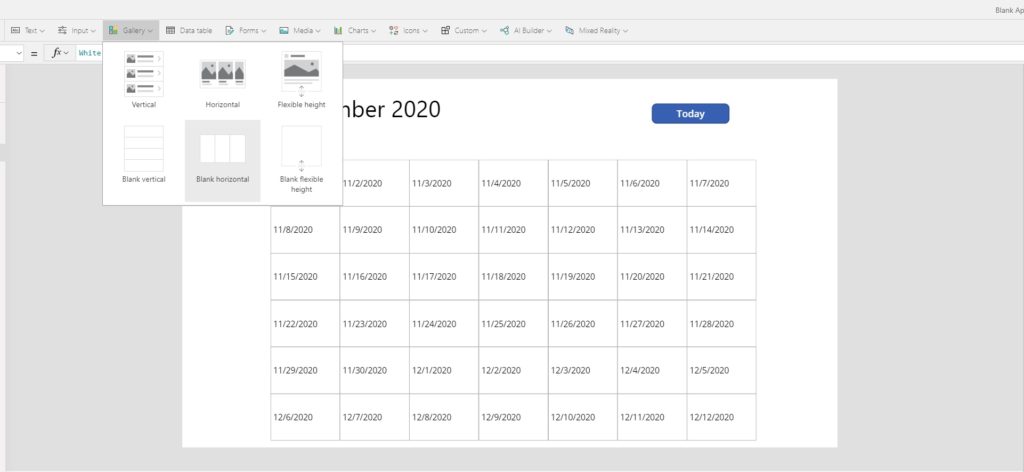
Next, add a vertical gallery to the screen called gal_Calendar_Days.
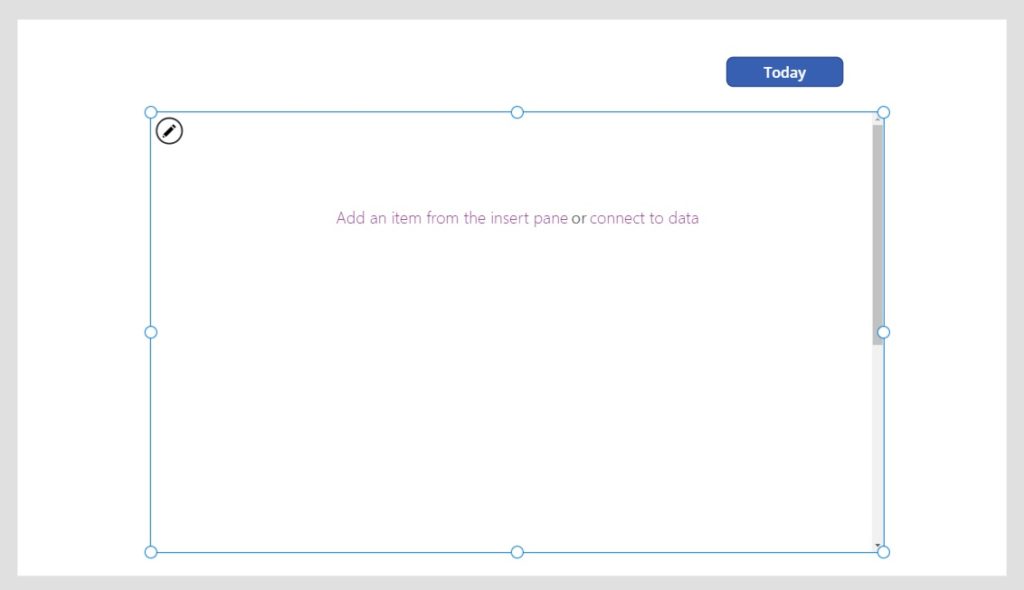
We will create the dates of the calendar using the SEQUENCE function. This code section is pretty interesting. It generates a sequence of 42 days from the 1st day of the month then shifts them so the first date is always a Sunday (just like a Calendar). Write this code in the Items property of the gallery.
ForAll(
    Sequence(42),
    varFirstDayOfMonth
    +Value-Weekday(varFirstDayOfMonth, StartOfWeek.Sunday)
)Code language: CSS (css)
To see the dates insert a label into the gallery…
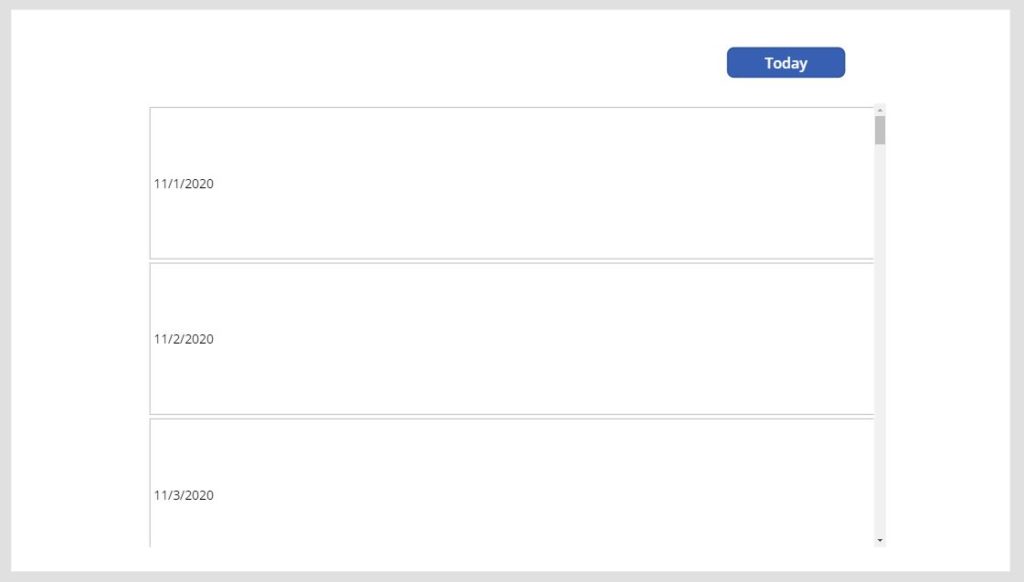
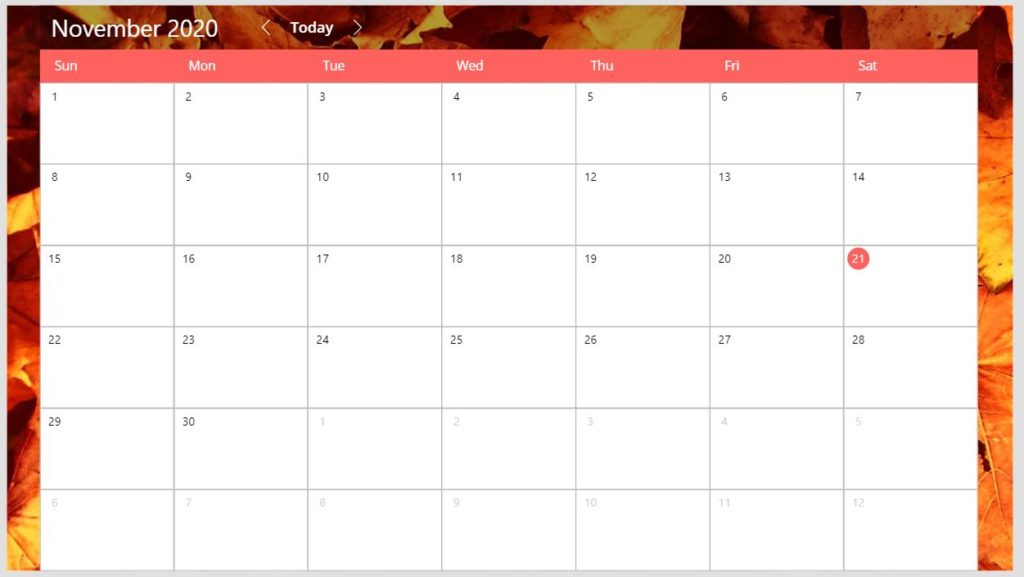
…then write this code in each property of the label to achieve the same styling as shown in the image above.
BorderColor: RGBA(179, 179, 179, 1)
BorderThickness: 0.5
Height: Parent.TemplateHeight
HoverFill: ColorValue("#FD625E10")
PressedFill: ColorValue("#FD625E30")
Text: ThisItem.Value
Width: Parent.TemplateWidthCode language: HTTP (http)
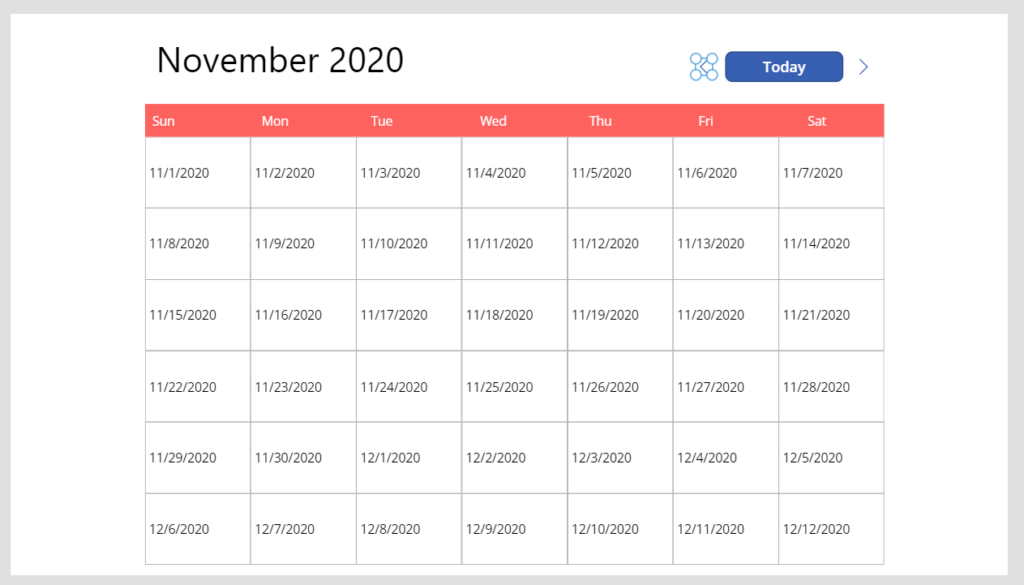
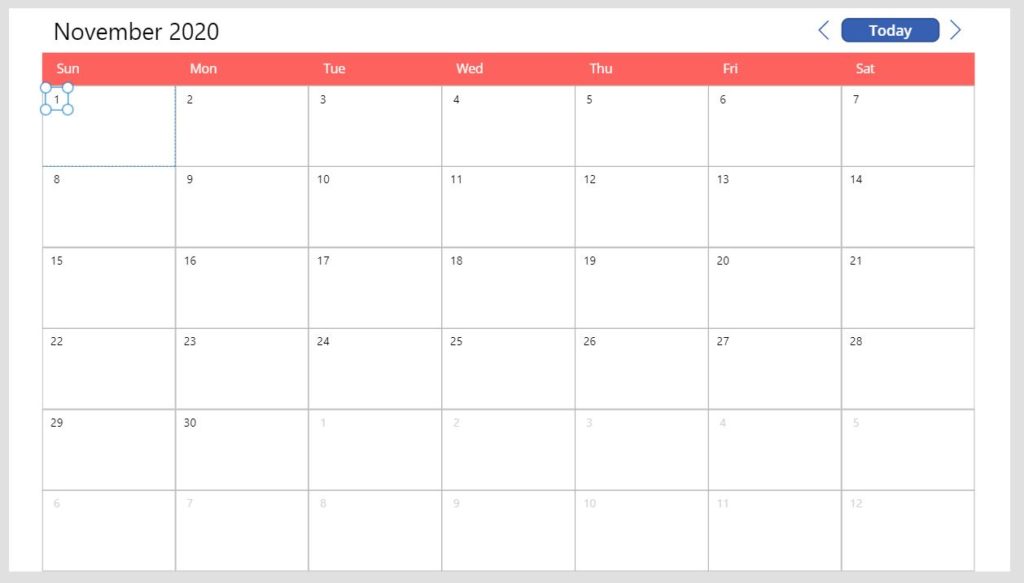
We can now see the dates in a list but a calendar is supposed to be in a grid format…
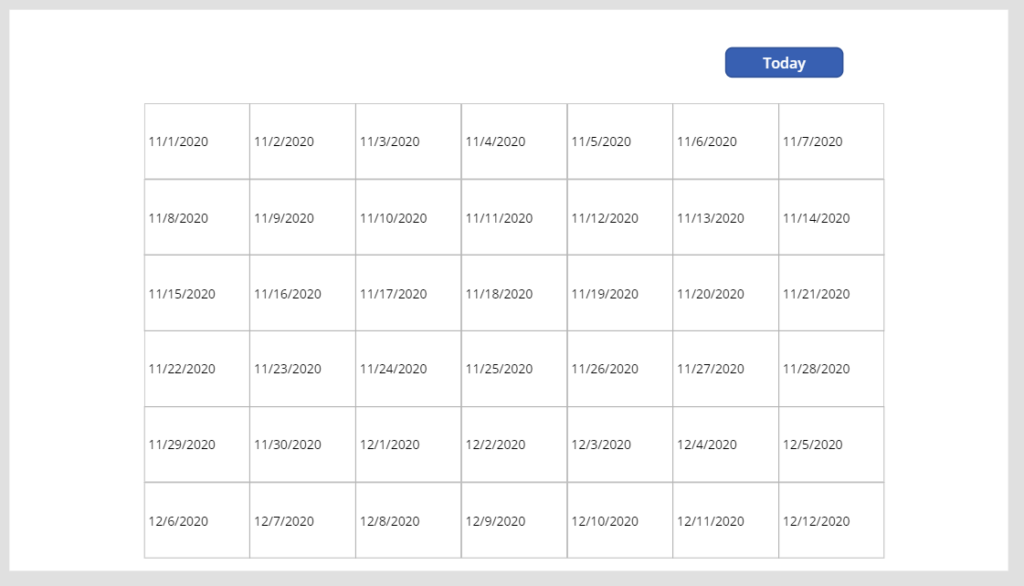
…so we must change the properties of the gallery to the values below. Now our app is starting to look like a calendar.
Fill: White
TemplatePadding: 0
TemplateSize: Self.Height/6
WrapCount: 7Code language: HTTP (http)
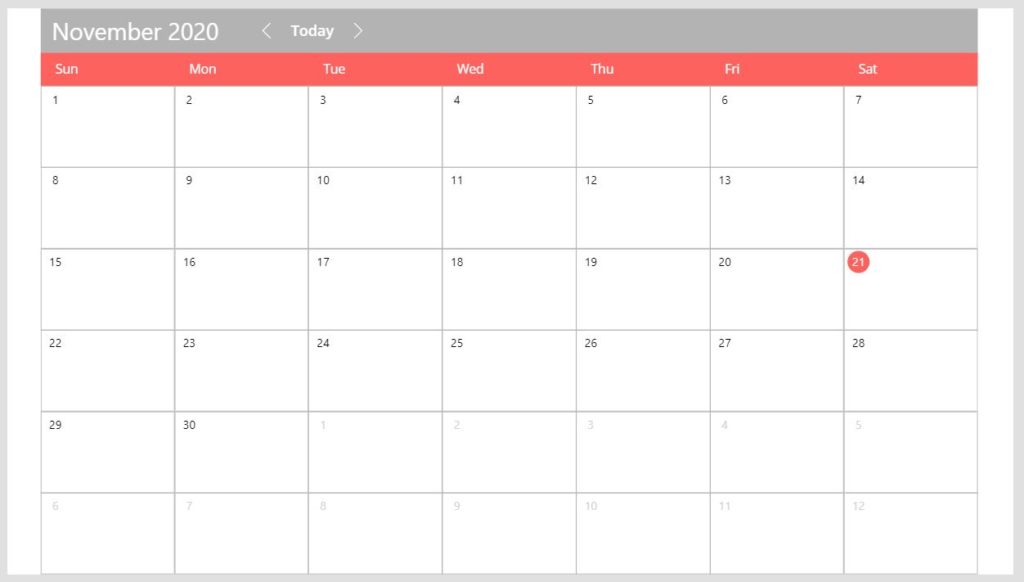
Calendars always show the month & year above the grid. Make a new label with large/bold text.
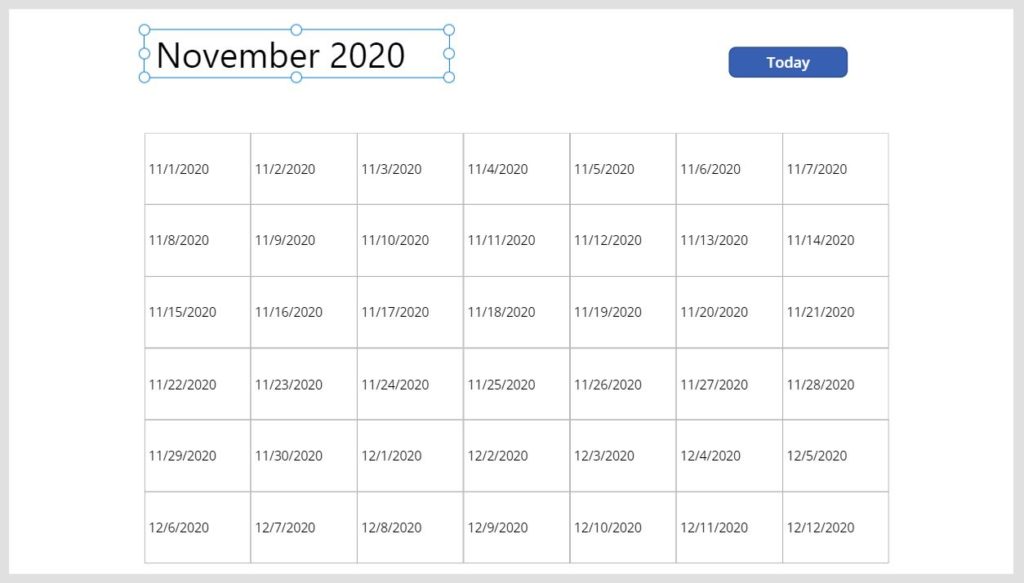
Then use the Text function to to show the current month & year of the 1st day of the month. Set the Text property of the label to this code.
Text(varFirstDayOfMonth,"[$-en-US]mmmm yyyy")Code language: JavaScript (javascript)
The last basic element of a calendar we need to create are the weekdays above each column. Insert a new horizontal gallery called gal_Calendar_Weekdays onto the screen.
Drag the edges of the gallery into position as shown below…
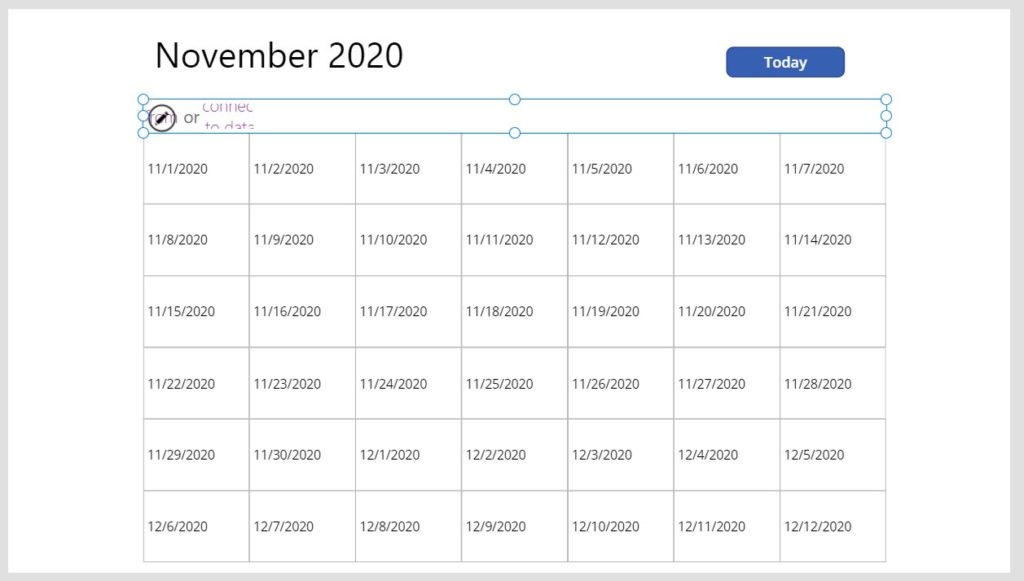
…then use this code to fill it with values and update the style.
Fill: ColorValue("#FD625E")
Height: 45
Items: Calendar.WeekdaydaysShort()
ShowScrollbar: false
TemplatePadding: 0
TemplateSize: Self.Width/7
Width: gal_Calendar_Days.Width
X: gal_Calendar_Days.X
Y: gal_Calendar_Days.Y - Self.HeightCode language: HTTP (http)
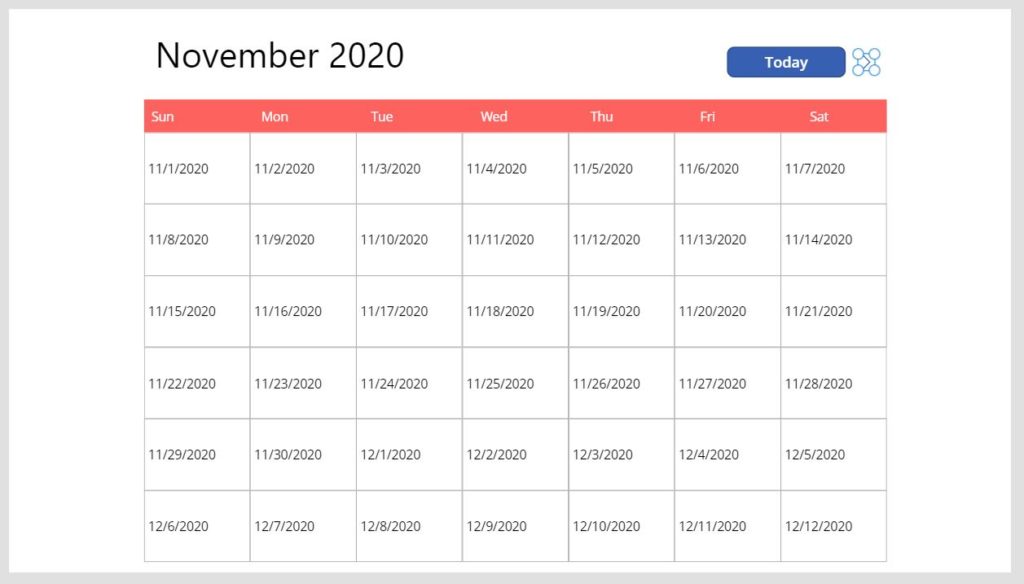
As final a touch we’ll give the weekdays a solid-colored background to indicate that its a table header.

Use this code in each property of the gallery gal_Calendar_Weekdays.
Color: White
Height: Parent.TemplateHeight
Text: ThisItem.Value
Width: Parent.TemplateWidthCode language: HTTP (http)
Changing The Current Month
With the basic calendar created we can now start adding functionality. The highest priority feature is to allow the user to switch the month & year being displayed.
Put a ChevronRight icon beside the Today button.
Clicked this icon will advance the calendar to the next month. Write this code into the OnSelect property of the icon.
Set(varFirstDayOfMonth,
    Date(
        Year(varFirstDayOfMonth),
        Month(varFirstDayOfMonth)+1,
        1
    )
)Code language: JavaScript (javascript)
Test the icon. Our app should behave as shown in the image below.
Now lets create a way for the user to browse to the previous month. Make another ChevronLeft icon and place it on the opposite side of the today button.
Place this code in OnSelect property of the icon.
Set(varFirstDayOfMonth,
    Date(
        Year(varFirstDayOfMonth),
        Month(varFirstDayOfMonth)-1,
        1
    )
)Code language: JavaScript (javascript)
We can now advance the calendar both forward and backward in time as shown below.
Alternate Way To Change The Month
Many users would also expect the month to change when they click on a date in the calendar that does not belong to the current month. An example of this behaviour is the date picker found in Microsoft Outlook. To implement the feature select the label inside your gallery…
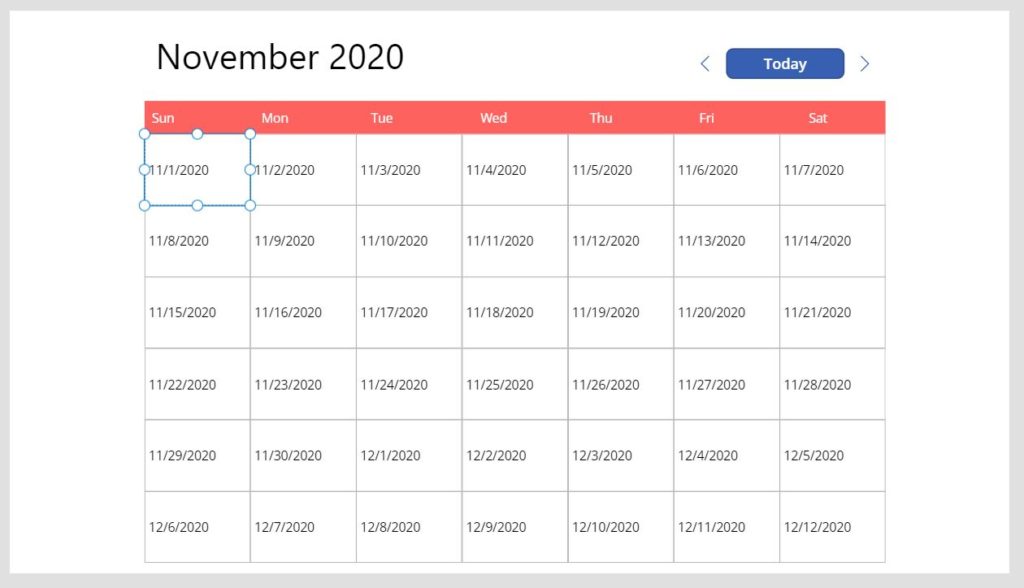
…and write this code in the OnSelect property.
Set(
    varFirstDayOfMonth,
    Date(
        Year(ThisItem.Value),
        Month(ThisItem.Value),
        1
    )
);Code language: JavaScript (javascript)
The calendar now changes its perspective if you click on a date outside of the current month. Our styling of the label’s Hoverfill and PressedFill properties also work nicely here.
Showing The Date As A Single Number
Calendars display the day as a number and not as a full date like we are currently doing. Remove any text from the gallery’s label then insert a button called btn_Calendar_Day beneath it. Use this code in the following properties of the button.
Color: Black
Fill: Transparent
HoverColor: Self.Color
HoverFill: Self.Fill
PressedFill: Self.Color
PressedFill: Self.Fill
RadiusBottom: 180
RadiusLeft: Self.RadiusBottom
RadiusRight: Self.RadiusBottom
RadiusTop: Self.RadiusBottom
Text: Day(ThisItem.Value)
Code language: HTTP (http)
Drag and position the button in the top-right corner of the gallery’s grid. Next, we want to any days of the current month to have a black number and any days not in the current month to have a grey number.
Change the Color property of btn_Calendar_Day to accomplish this.
If(
    IsToday(ThisItem.Value), White,
    Date(Year(ThisItem.Value),
    Month(ThisItem.Value),1)=varFirstDayOfMonth, Black,
    LightGray
)Code language: JavaScript (javascript)
Another feature we can add here is to identify the current day with a circle behind it.
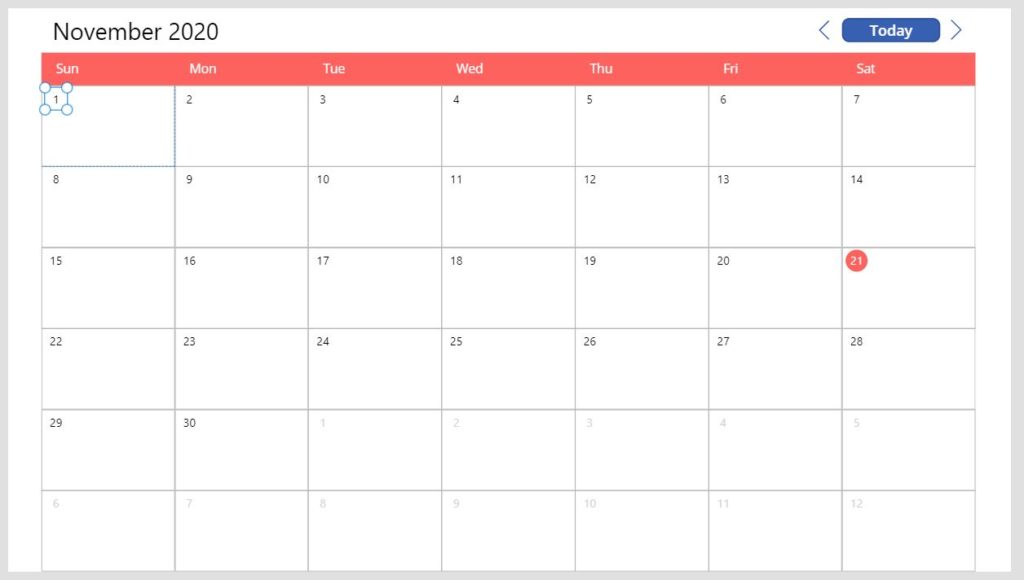
Use this code in the button’s Fill property to make a the circle colored.
If(IsToday(ThisItem.Value), ColorValue("#FD625E"),Transparent)Code language: CSS (css)
Finishing Touches
We’re done adding features to the calendar so we’ll turn our attention to making it look pretty. Create a new label and place it behind the current date text/calendar controls…

…and give it a slightly transparent grey Fill using this code.
RGBA(0, 0, 0, 0.3)Code language: CSS (css)
Move the calendar controls to the left and change their style…
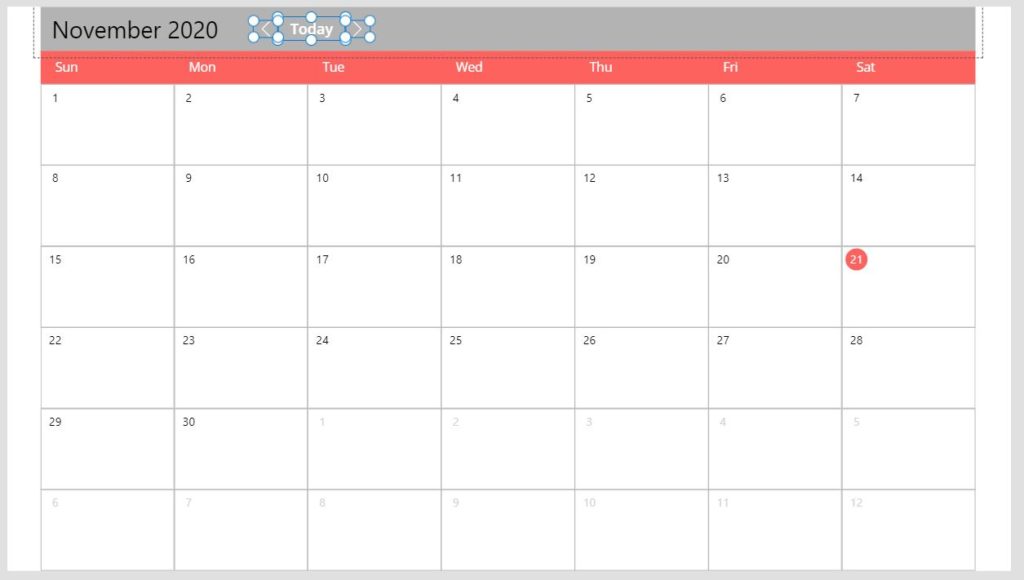
…by updating these properties in all of them.
Color: White
HoverColor: Self.Color
PressedFill: Self.Color
Fill: Transparent
HoverFill: Self.Fill
PressedFill: Self.FillCode language: HTTP (http)
Make the current month text a white Color.
Last but not least, pick an image to act as a background and place it below all of the other controls. If the image does not fill the entire screen change its ImagePosition property to ‘Fit’ or ‘Tile’ based on your preference.
Do You Want To Let Users Add Events To The Calendar?
Find out how by reading the next article in this series: Make A Calendar In Power Apps – Part 2.
Did You Enjoy This Article? 😺
Subscribe to get new Copilot Studio articles sent to your inbox each week for FREE
Questions?
If you have any questions or feedback about Make A Calendar In Power Apps – Part 1 please leave a message in the comments section below. You can post using your email address and are not required to create an account to join the discussion.


This is great – much nicer than the one built into Power Apps. Will I be able to use SharePoint calendars to overlay events on this? I was hoping to use SharePoint calendars that display annual leave in Power Apps. I have calendars for each department so it would be cool to be able to select each and view events in the Power Apps calendar. This will help users deciding on dates and help manager when approving.
Hi Dean,
In my next article I’m going to show how to display events on the calendar (and add events too). I’ll be using a SharePoint list with similar columns to the SP Calendar (Date, Title, Description) so I think you will be able to read it and adapt the instructions to your situation.
Brilliant, I’ll look forward to reading your solution.
This is great, thanks for sharing.
Will this show local date/time or will it change as per users local regional time?
Also, excited to see if you planning to add events to this.
This calendar example only uses dates and not time so actually the answer is neither. In my next article I will show how to add events and we will also learn how to handle time information there too. I plan to post the article tomorrow. You can either come back to the site to read it or subscribe below and I’ll send it directly to your email inbox.
Thank you, I am reading Part-2 now and will comment. Your blogs are great and superhelpful
Thank you so much! This is awesome! Thanks for sharing! Does this work with Dataverse?
Leigh,
Yes, you could easily swap SharePoint for Dataverse in this example. None of the code would change.
I do my examples in SharePoint because that’s what most people have for free but I prefer using Dataverse myself.
A fine piece of work, Matthew! I’m trying to integrate Outlook into PowerApps myself. That doesn’t work very well yet. Can you also write the data to Outlook instead of a SharePoint list? This must have been a lot of work.
Following your discussion, I’m looking to do something similar
Hi Matthew,
Following your blog and got stuck with changing dates to single number.
I am not sure if I missed something.
attached image
GKK,
I made an error in the article which has now been fixed. Please change the button’s Text property to:
Day(ThisItem.Value)
Thank you again Matthew. I am still very new to PowerApps and your blog really helps.
Just one more thing, this “To see the dates insert a label into the gallery…”
should be Button instead of a label.
Hello Matthew
I found your blog on building a calendar. I am very new to power apps and coding en- general. In reading the comments about To see the dates insert a label into the gallery…”
should be Button instead of a label.
I should add a button into the gallery with the the insert the provided code? If you can add any clarification that would be great. Thank you very much for this.
Massive thanks for this blog, it was a really good starting point for building a custom calendar I need in one of my Apps.
I’ve since extended the logic to only allow specific dates to be selected (Tuesdays or Thursdays) and only if they’re at least 2 days into the future.
Wow, that is very creative. I did not even think to do that. Thank you for sharing your creation Craig.
can you share your logic, code please? I’ve followed this to do a covid room/desk booking but user has thought to limit the bookings for only up to 2 months ahead.
Are you asking, “how can I ensure the can only select dates between today and 2 months from today?”
yes. A client wanted only to allow their users from today to 2 months ahead
Hi Matt, thank you for sharing this!
Sorry for bother you (probably is just a beginner’s issue) but I cannot make the gal_Calendar_Weekdays work. It just show the background color but nothing else. It seems that the Items = Calendar.WeekdaysShort() has no effect at all; but if I put a dropform with exactly the same content in Items it shows correctly.
It feels like I’m bumping my head in the wall, any suggestions or tips?
Thank you!
Hello Walter,
If you use Calendar.WeekdaysShort() in the Items property of the gallery and place a label inside the gallery with the Text property ThisItem.Value it should show the days of the week.
Hi Matthew,
great article. Thank you.
I want to fill the weekdays white and Sunday/Saturday in grey.
And I want to beginn the week in the gal_Calendar_Days with monday.
What can I do?
Thx
Maik
To make the calendar start on Monday you would put this code in the Items property of the gallery:
ForAll(
Sequence(42),
{
Value: varFirstDayOfMonth + Value – 1 – Weekday(
varFirstDayOfMonth,
StartOfWeek.Monday
) + 1,
NextDay: varFirstDayOfMonth + Value – 1 – Weekday(
varFirstDayOfMonth,
StartOfWeek.Monday
) + 2,
PreviousDay: varFirstDayOfMonth + Value – 1 – Weekday(
varFirstDayOfMonth,
StartOfWeek.Monday
)
}
)
To make the weekends grey type this code into the TemplateFill property of the gallery:
If(Weekday(ThisItem.Value,2) in [6,7], Gray, White)
Thanks, that works great. And what about the gal_Calendar_Weekdays?
Maik,
You can write your own table for the day header row:
[“Mon”, “Tue”, “Wed”, “Thu”, “Fri”, “Sat”, “Sun”]
I did this … It was much easier 😉 I hoped, I can solve it with Calendar.WeekdaysShort()
Matthew, a big thank you for this super helpful tutorial! Looking forward to start on your Part 2 tomorrow.
Freddie,
You’re in luck. I’ve already published it back in November 2020 but forgot to post the link in the article for Part 1. Oops. I’ll go back and correct but here it is for now: https://www.matthewdevaney.com/make-a-calendar-in-power-apps-part-2/
Hello Sir,
First of all thank you for your article part one and two, it was very helpful for me,
however I would like to add views per day and per week, is there a possibility of implementing this in your calendar, should we develop this or there is a reuse of the components already present.
thank you in advance
Epic post bro!!! Thank you once again!
Chris Huntingford!!!
This message totally made my day. I am super glad you took the time to write me 🙂
How to get the Calendar Status.
When i am using office 365 outlook connector, Need to know the room availability at present ( Busy or Free)
How to get the current meeting Details.
This is amazing work
Could you have different images for each month?
Joseph,
Yes, its definitely possible. This code could work in the Image property of the background Image. You would need to extend it for all 12 months and upload the pictures.
Switch(

    Month(varFirstDayOfMonth),

    1, JanuaryImage,

    2, FeburaryImage,

    3, MarchImage,

    DefaultImage

)
Hi this is very effective. I’m trying to customize it: how to remove the weekends making this a 30 items grid? thanks for your help Ettore
Ettore,
I haven’t done it, but I suspect you could change the Sequence function to 30 items and do a Filter based on the weekday. There’s a WEEKDAY function that returns the day as a number. You would filter the dates produced by SEQUENCE to include only Mon-Fri assuming Monday equals 2 and Friday equals 6.
Thanks for your hint . I managed to make it work.
E.
Hello, Thank for the hint but I could’nt get the right formula to write in “Items” of the gallery for this specific case. Can you please help with the right formula. Many thanks in advance !
I am trying to set the gal_Calendar_Days, but am receiving this error “ThisItem.Value = This formula uses scope, which is not presently supported for evaluation”
Any suggestions?
Erica,
That error message means you might be placing the formula in a control property where it is not supported.
Hi, im entered the code into the items property for gallery but it didn’t show any date when i insert the label. What should i do?
am i doing this wrong? Because it didn’t show any date after i entered the code
Imran,
The OnVisible property of a screen does not trigger until you leave and come back. You must do this to set the variable called varFirstDayOfTheMonth. Then the dates will show.
That is amazing! Thank you for sharing on twitter.
Eye C U 👍
This brillaint and so simple compared to some others I’ve seen with loads of variables using the Set function. I would like to take this one step further and show a full 12 months gallery, with scrollable by year. I’ve created a layout but unable to get the OnSelect property to select a Month/Year that can be used to filter a gallery using just the seldcted month e.g. 06 2022. The left/right arrows work and scroll between the years and the button text shows the correct Month/Year.
Regards
Derek
My current gallery is filtered by the dropdown, so if the selected month could drive the dropdown, then should work to filter my gallery.