Multiple Page Form On A Single PowerApps Screen

A long form broken-up into short logical pages is an excellent design choice because it makes the task of entering data easier for the user to understand. In this tutorial will show you how to make a multipage form on a single screen. It is not necessary to create multiple screens to accomplish this.
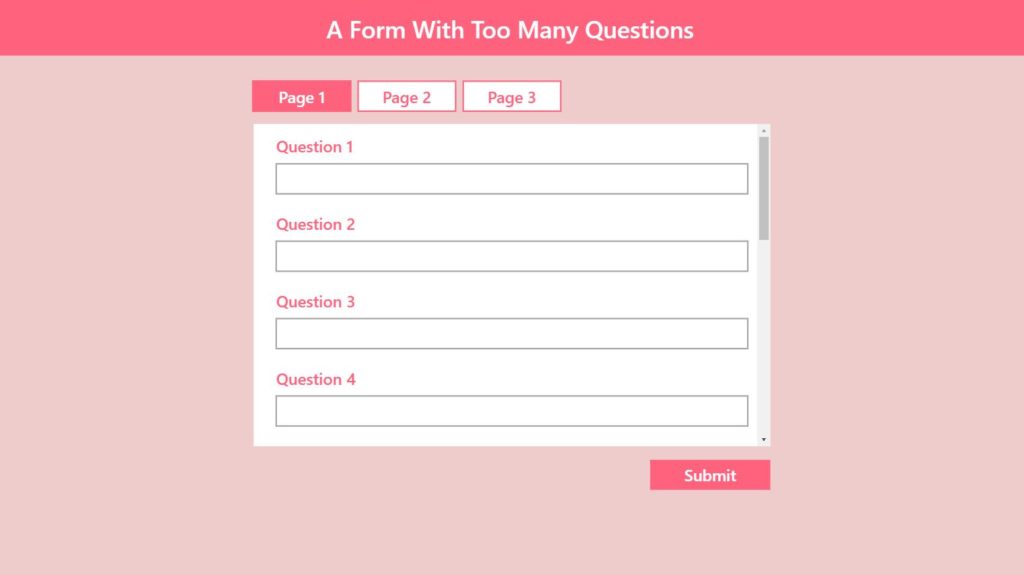
Here’s what the finished app will look like:
Creating A Form With Tabs
The form in this example has 12 questions and they do not fit on the screen all-at-once. To improve its design we will make 3 pages having 4 questions each and a tab-style navigation above the form.
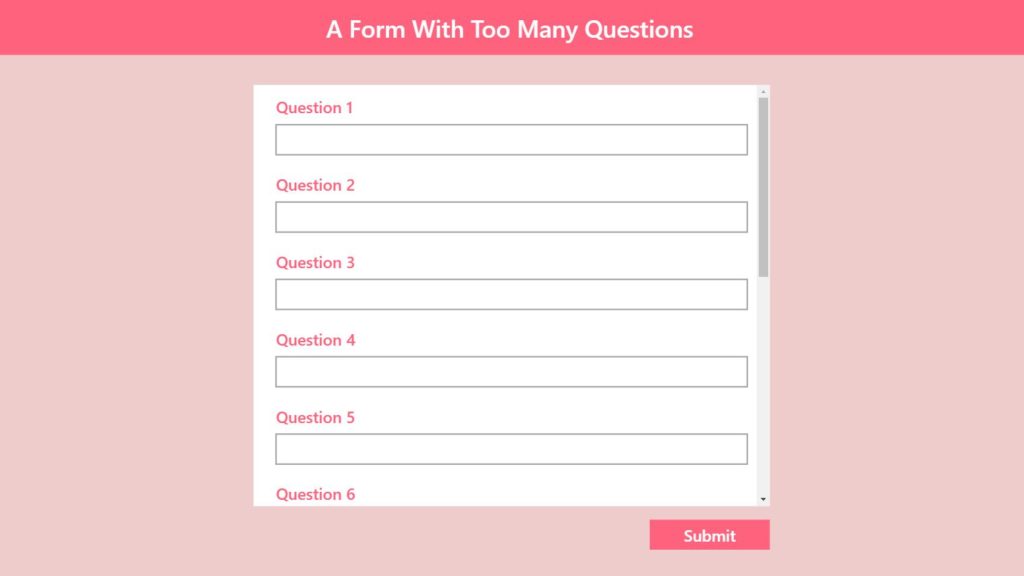
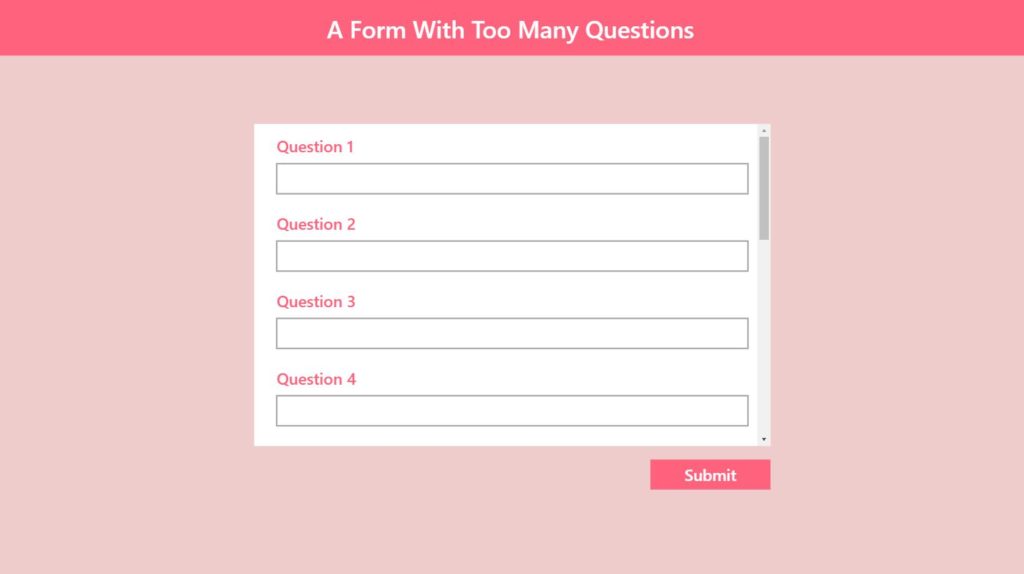
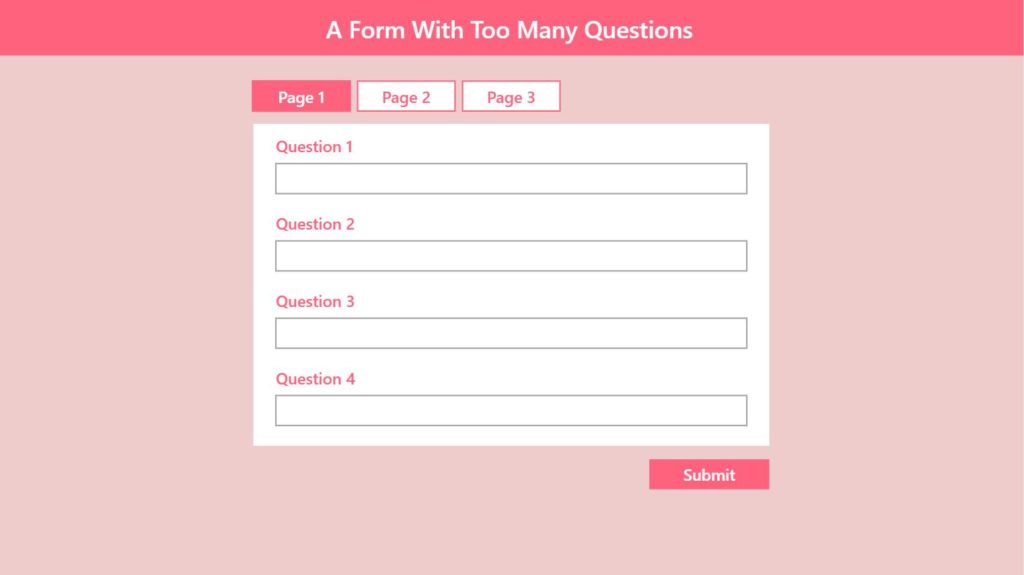
Begin by changing the height of the form so only 4 questions are visible
Then create a blank horizontal gallery. Place a button inside the gallery which will create a few buttons side-by-side. Move the gallery above the form.
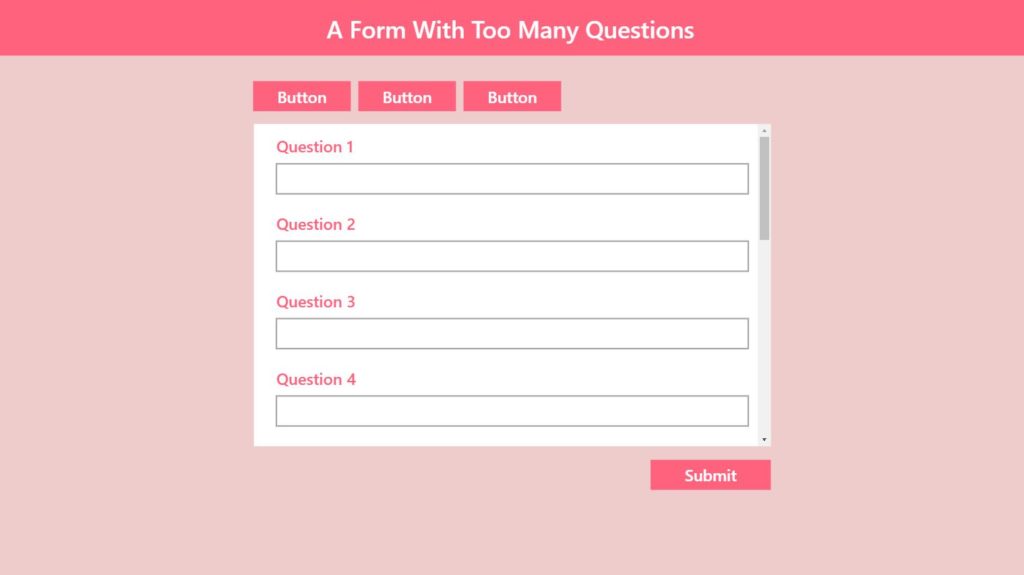
Next we will create the button text so it looks like this.

Put this code in the Items property of the gallery.
["Page 1","Page 2","Page 3"]Code language: JSON / JSON with Comments (json)
Then place this code in the Text property of the button
ThisItem.ValueCode language: CSS (css)
We want the button for the selected page to have a pink fill with white text and any unselected pages to have a white fill with pink text.

To define the selected page put this code in the OnSelect property of the button
UpdateContext({locCurrentPage: ThisItem.Value})Code language: CSS (css)
Then apply this code to each property within each respective property of the button
BorderColor: RGBA(255, 98, 125, 1) // color pink
BorderStyle: Solid
BorderThickness: 1
Color: If(locCurrentPage=ThisItem.Value, White, RGBA(255, 98, 125, 1))
Fill: If(locCurrentPage=ThisItem.Value, RGBA(255, 98, 125, 1), White)
HoverColor: White
HoverFill: ColorFade(RGBA(255, 98, 125, 1), -10%)
PressedColor: White
PressedFill: ColorFade(RGBA(255, 98, 125, 1), -30%)
Code language: HTTP (http)
Finally, we want only the specific data cards to show while a page is selected.
Put this code in the Visible property of the DataCards.
locCurrentPage="Page 1" // Visible property of DataCards #1-4Code language: JavaScript (javascript)locCurrentPage="Page 2" // Visible property of DataCards #5-8Code language: JavaScript (javascript)locCurrentPage="Page 3" // Visible property of DataCards #9-12Code language: JavaScript (javascript)
Now you have a tab-style navigation above the form.
Don’t forget to use this code in the OnVisible property of the screen to ensure the Form always opens to Page 1.
UpdateContext({locCurrentPage: "Page 1"})Code language: CSS (css)
Adding Next Page and Previous Page Buttons To A Form
We will also create Next Page and Previous Page controls for the user’s convenience.
Increase the Height property of the form by 50 and place a label with the text “Next Page >>” on it as shown in the image below.

This code goes in the OnSelect property of the label to control what page the form advances to next
Switch(
    locCurrentPage,
    "Page 1", UpdateContext({locCurrentPage: "Page 2"}),
    "Page 2", UpdateContext({locCurrentPage: "Page 3"})
)Code language: CSS (css)
We want the Next Page label not to appear when the form is on Page 3. Use this code in Visible property of the Next Page label to control when it is shown.
locCurrentPage<>"Page 3"Code language: HTML, XML (xml)
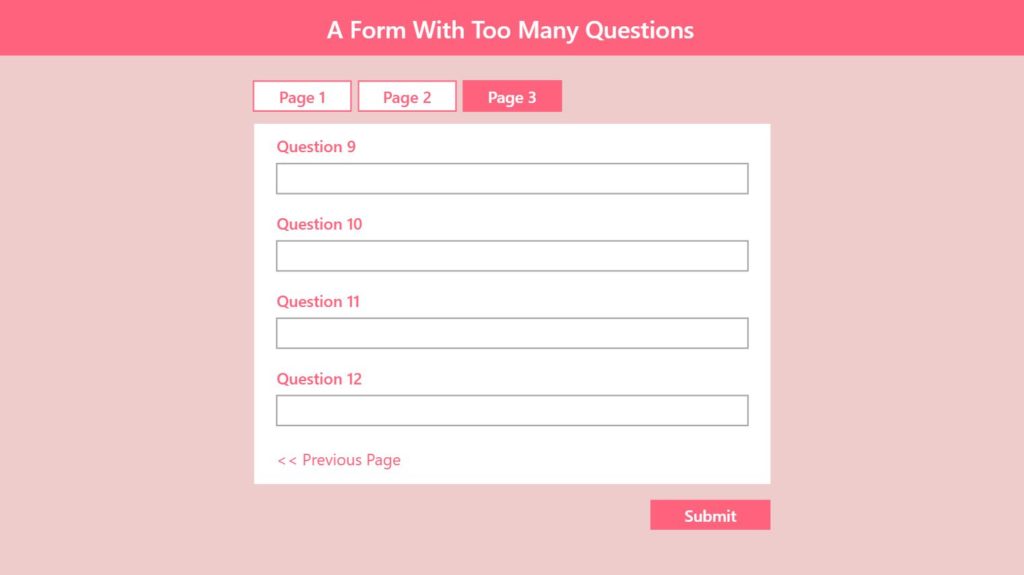
Now that the Next Page label is working we should also create a Previous Page label. Insert a new label and place it as shown in the image below
This code goes in the OnSelect property of the Previous Page label to control where the form advances to next
Switch(
    locCurrentPage,
    "Page 2", UpdateContext({locCurrentPage: "Page 1"}),
    "Page 3", UpdateContext({locCurrentPage: "Page 2"})
)Code language: CSS (css)
The previous page label should not show on Page 1 so use this code in its Visible property.
locCurrentPage<>"Page 1"Code language: HTML, XML (xml)
Lastly, the Submit button should not show unless the user is on Page 3

Use this code in the Visible property of the Submit button so it will only appear on the final page of the form
locCurrentPage="Page 3"Code language: JavaScript (javascript)
Final Step
All of the form navigation controls have been created and we have successfully made a multipage form on a single screen.

To save the form data put this code in the OnSelect property of the Submit button
SubmitForm(Form1)Did You Enjoy This Article? 😺
Subscribe to get new Copilot Studio articles sent to your inbox each week for FREE
Questions?
If you have any questions or feedback about how to create a multiple page form on a single screen please leave a message in the comments section below. You can post using your email address and are not required to create an account to join the discussion.


Excellent article!!Thanks!
is there a way then to make the the pages look like one page form as well. or how to make a field updated another field when inputting information but not replacing text added on the field already. e.g. a comment box where the requestor and receiver can communicate without the need for email exchange.
Sbell,
This tutorial is about how to make multiple page forms. If you want a single page form just add an Edit Form to your app. It is single page by default.
Excellent article. I was able to develop a form by following the instructions. It works well with a new form and data is successfully submitted.
I am struggling with one issue though. I have a list and when I select an item from that list, the details should be populated on this form across the three pages. However, the details are not showing up. I have a similar form but without the pages and the details show up just fine. I haven’t changed the OnSelect or for that matter any other property, so I am struggling to figure out what I was doing wrong.
Quick question. When submitting my form, I received the error “too many controls one 1 screen”. I have since created multiple screens, but dealing with more issues with that. So I thought, hey, try the tabs instead. But, I am guessing this won’t work because even though I can put fields on multiple tabs, they will all still be on the same screen, and therefore too many controls for one screen. Correct? Thank you.
Diane,
The too many controls message is just a warning. If your Power Apps app is performing fine I would say you can safely ignore it.
Thx. I have since created 4 screens, each with a form. But having issues when editing from the Sharepoint list. Thinking of putting the 4 forms on 1 screen with tabs. See if that will help.
This is amazing! I have a Capstone project where I have to create an IT ticketing system and this is literally going to put shiny gold stars next to my perfect score! Thank you!!!
Elle,
This is one of the first posts I ever made on Power Apps. I’m happy to know it is still helping people. Thank you for writing to me 🙂
Hi Matthew, Thank you very much for this. Do you know why after applied this concept and having in my form modern or classic dropdows controls if I don’t click in all all the tabs the data goes away? Basically if I have the first data visible and I make a chenge the data for the others combobox dissapear. Thx