Power Apps Offline Mode: A Step-By-Step Tutorial

Mobile Power Apps for tablets or phones still have to work when there is no internet connection. As a developer, making Power Apps with an offline mode is one of the the greatest challenges you will undertake. It requires careful planning to ensure no data is lost when the device goes offline and to quickly upload a large amount of data when the device comes back online.
In this article I will show you a full example of how to build mobile Power Apps with an offline mode.
| April 6, 2022 – The article was updated to include a new technique for generating offline record IDs using the GUID function |
Introduction: Home Inspection App
The Home Inspection App is a tablet app used by employees of a company that performs home inspections for new home buyers. After an employee looks-over the home they submit a report on its condition via the app. Sometimes the employee is not in range of a cellular signal or wifi so an offline mode must be included in the app. When the app is offline any reports will be saved to the tablet. Then when the tablet comes in range of internet service once again the reports will be saved back to the datasource.
Setup The SharePoint List
Create a SharePoint list called Home Inspections with the following columns:
- OfflineID (single-line text)
- Address (single-line text)
- StartTime (date and time)
- Assigned To (single-line text)
- Report (multiple-line text)
Load the following data into the SharePoint list. The OfflineID holds a GUID: a 32 character hexadecimal value that is randomly generated and has a near-zero chance of being a duplicate value. In an online-only scenario we rely on SharePoint to assign each record a unique id on creation. However, in an offline app we might not be able to connect to SharePoint an therefore need to make our own unique ids.
| OfflineID | Address | StartTime | AssignedTo | Report |
| aa30a399-ad93-4c01-9f61-bac690affd19 | 30 State Street | 1/9/2020 9:00AM | Matthew Devaney | |
| 5e21a4c6-3485-405c-b8e7-4df68d9421a4 | 200 Broadway Ave | 1/9/2020 11:00AM | Matthew Devaney | |
| e3fe8617-9056-462e-85d3-be48ae604b95 | 15 Circle Road | 1/9/2020 1:30PM | Matthew Devaney |
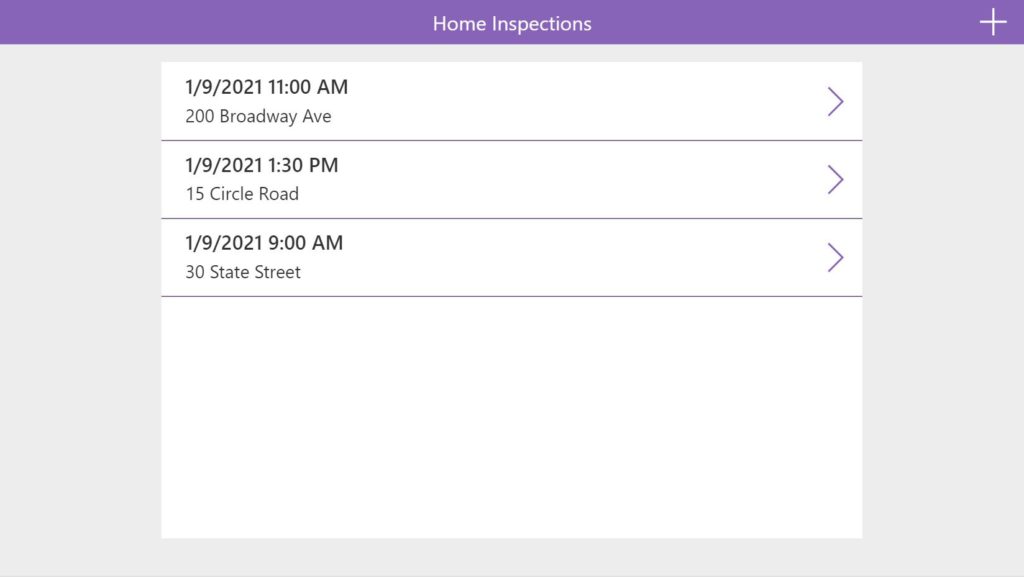
Create A Gallery To Show List Of Home Inspections
Open Power Apps and start a new canvas app from blank. Connect the app to the Home Inspections SharePoint list. Then write this code in the OnStart property of the app to store the Home Inspections list inside a collection.
// load home inspections data into collection
ClearCollect(
    colHomeInspections,
    'Home Inspections'
);Code language: JavaScript (javascript)
Insert a new screen called Gallery Screen. On this screen the employee selects a home inspection appointment from a list and goes to the next screen to write a report.
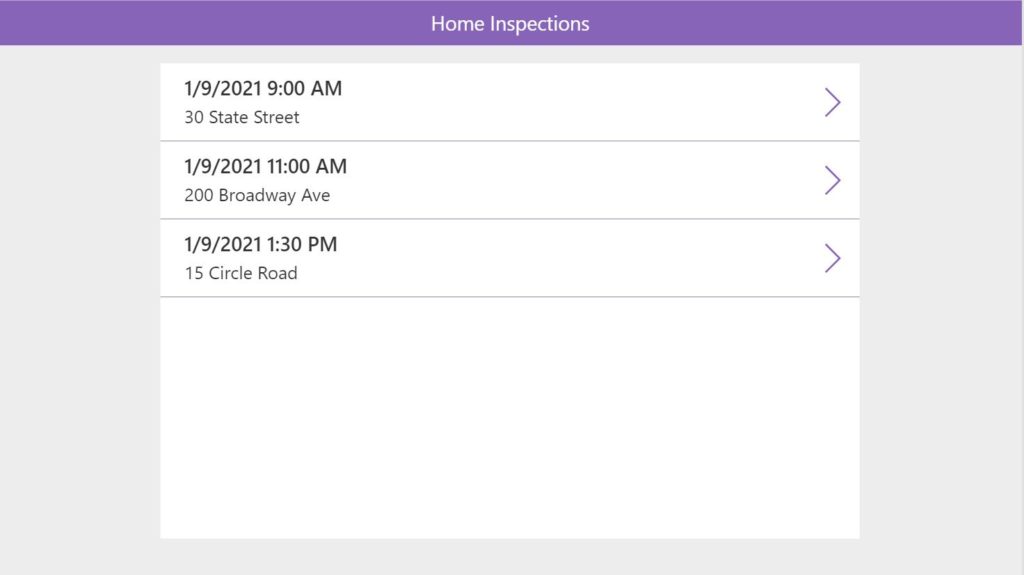
Insert a gallery on the screen with Home Inspections as the Items property.
colHomeInspections
Then write this code in the OnSelect property of the the gallery. Errors will appear because we have not created the Form Screen or the Edit Form yet. Its OK, we’ll take care of those in a moment.
Set(varCurrentRecord, ThisItem);
EditForm(frm_Form_Main);
Navigate('Form Screen');Code language: JavaScript (javascript)
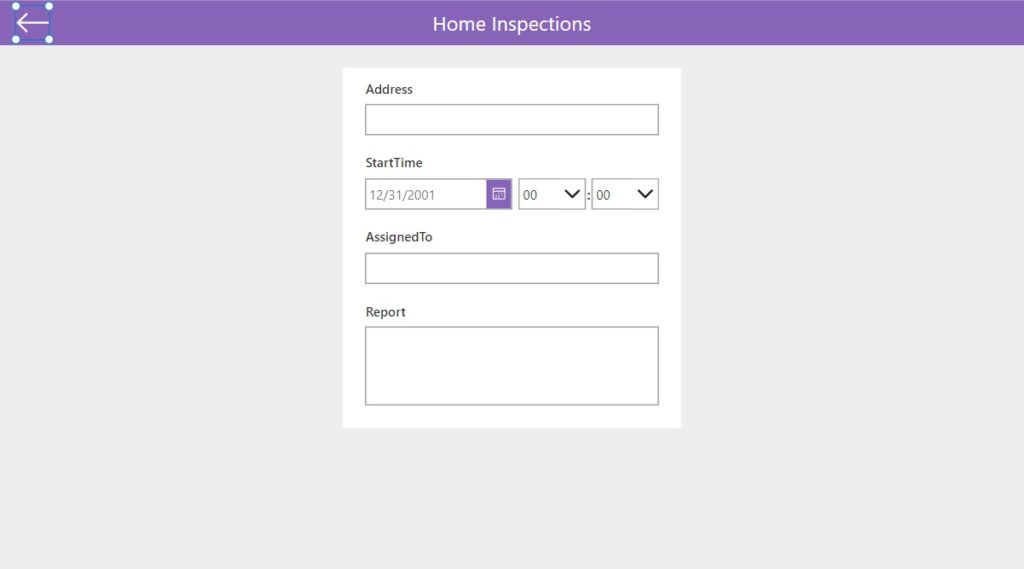
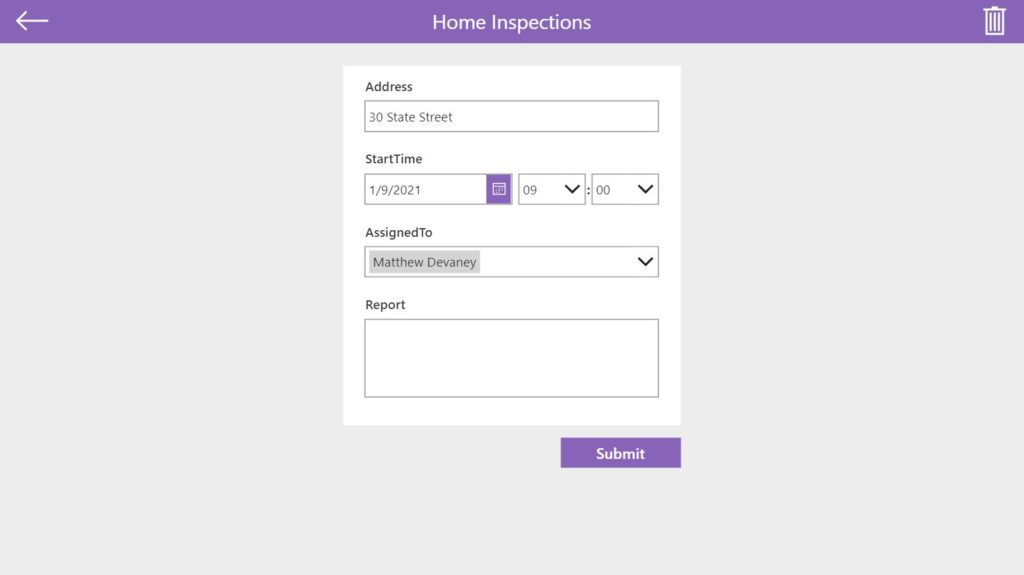
Make A Form To Record Home Inspection Results
Next, insert another screen called Form Screen. Add an Edit Form to the screen called frm_Form_Main and use Home Inspections as the datasource.
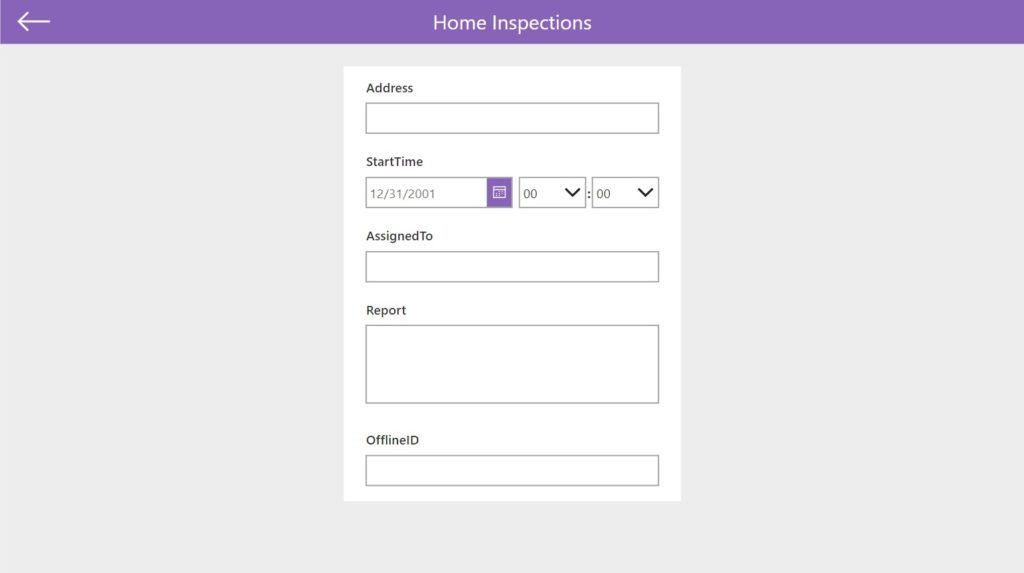
Place the varCurrentRecord variable in the Item property of the form. Now when the employee selects a home inspection appointment from the list it will appear in the form.
varCurrentRecord
The OfflineID field is necessary to identify the record but we do not need the user to see it.
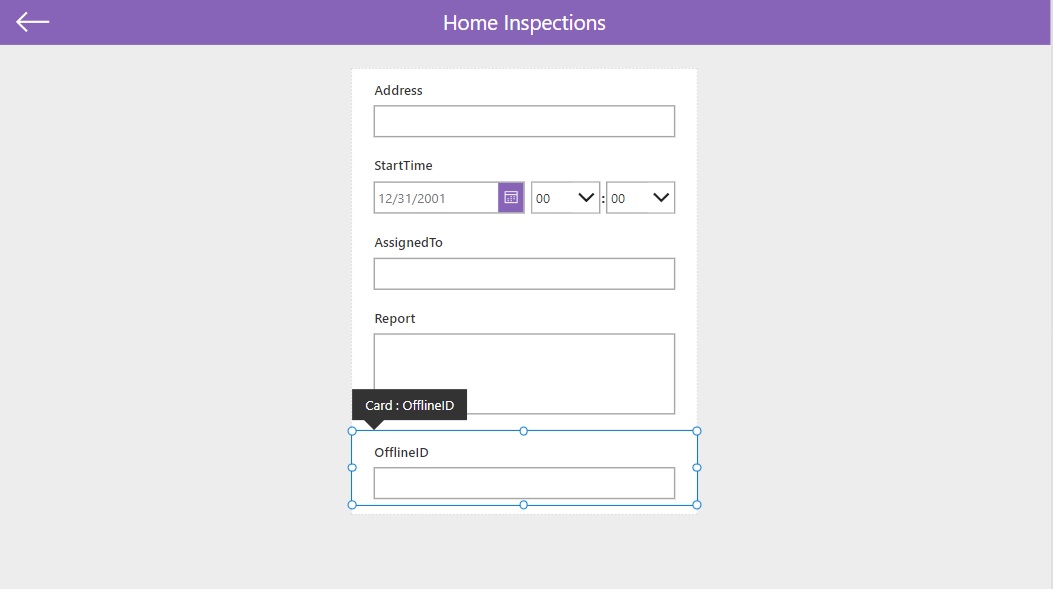
Use this code in the Visible property of the OfflineID card.
falseCode language: JavaScript (javascript)
The employee needs a way to go back to the Gallery screen if they have chosen the wrong appointment. Create a Left Arrow icon and position it on the left-side of the title bar.
Make a Left Arrow icon and put this code in the OnSelect property.
Navigate('Gallery Screen')Code language: JavaScript (javascript)
There are 3 more blank screens we should create right now. However, we will not write any code for them until later.
- Saving Screen
- Loading Screen
- Admin Screen
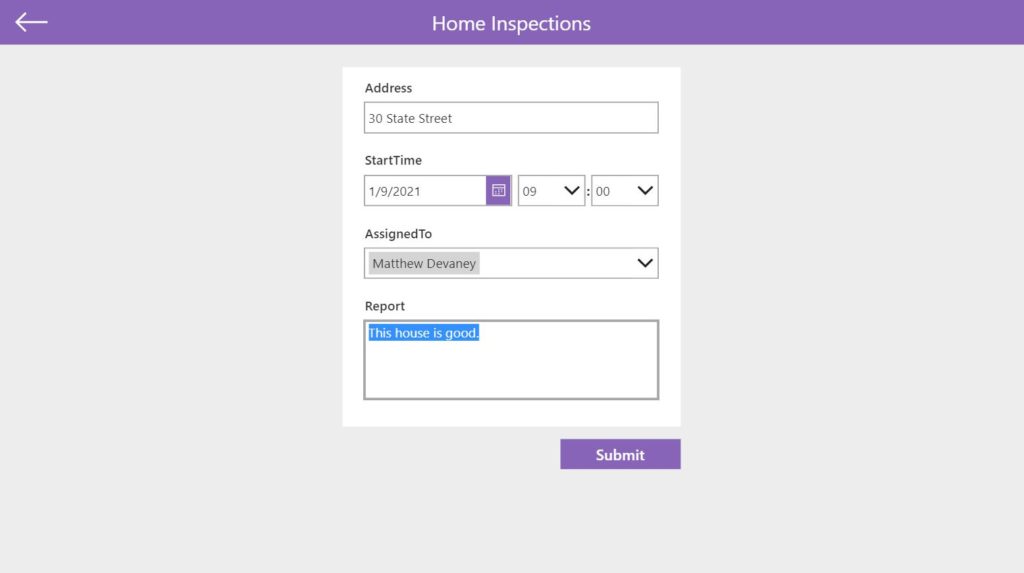
Editing Records In Power Apps Offline Mode
The employee opens the appointment, writes a report and submits it to SharePoint once complete. When the tablet does not have internet service the changed appointment record must be saved to the local device instead. Place a Submit button on the screen directly below the Edit Form.
Write this code in the OnSelect property of the Submit button. It will save the form data to the colHomeInspections collection and then save colHomeInspections to the local device. Notice that we are not trying to update the SharePoint list yet. We will check for a connection and try to do that on the Saving Screen .
// update collection with form data
Patch(
    colHomeInspections,
    LookUp(colHomeInspections, OfflineID=varCurrentRecord.OfflineID),
    frm_Form_Main.Updates
);
// save collection to local device
SaveData(
    colHomeInspections,
    "localHomeInspections"
);Code language: JavaScript (javascript)
Additionally, we need to track which record was edited in a new collection called colUnsavedRecords. We will also save colUnsavedRecords to the local device in case there is no internet connection. Then the app will go to the saving screen.
Add this code to the OnSelect property of the Submit button as well.
// update collection with form data
Patch(
    colHomeInspections,
    LookUp(colHomeInspections, ID=varCurrentRecord.ID),
    frm_Form_Main.Updates
);
// save collection to local device
SaveData(
    colHomeInspections,
    "localHomeInspections"
);

/* more code added below */

<span class="has-inline-color has-black-color">// track record that was edited
Collect(
    colUnsavedRecords,
    {OfflineID: varCurrentRecord.OfflineID}
);
// save collection to local device
SaveData(
    colUnsavedRecords,
    "localUnsavedRecords"
);
Navigate('Saving Screen');</span>Code language: JavaScript (javascript)
Admin Screen
When the app is in Play mode we want the Loading Screen and Saving Screen to run automatically. But when the app is in Studio mode we need a way to disable the loading and saving from happening so we can work on that functionality. We can do this by enabling ‘Debug Mode’ on the Admin Screen. Debug mode is not something built into Power Apps, it is something we are building for ourselves.
Go to the Admin Screen and insert a new toggle called tog_DebugMode.

Then set the Default property of the toggle to false.
falseCode language: JavaScript (javascript)
Click on the toggle and set it to true to disable automatic loading and saving on the next screens.
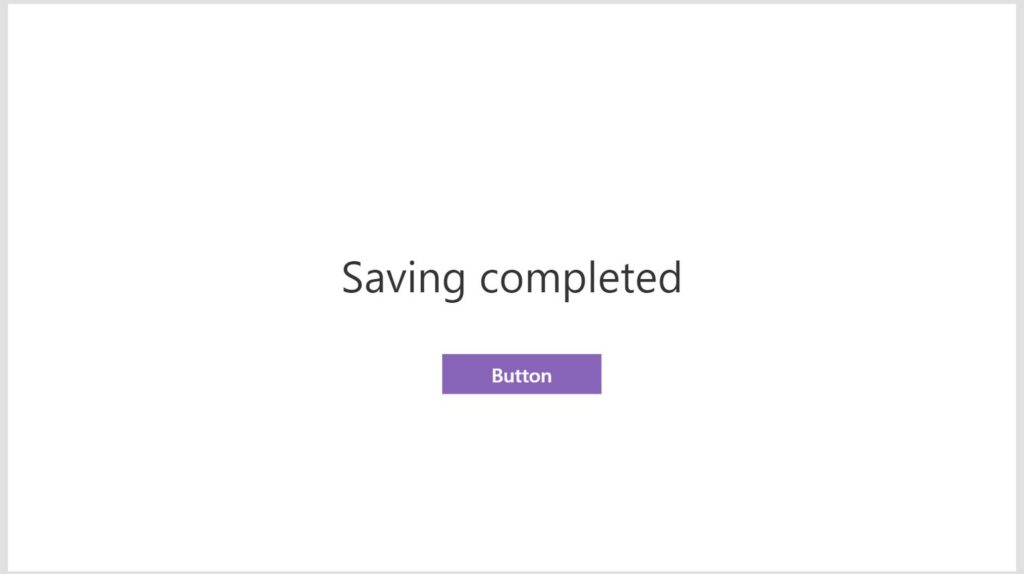
Saving Screen
Now its time to save the edited record back to the Home Inspections SharePoint list. Open the Saving Screen and place two new controls on the canvas:
- A label called lbl_Saving_Message to display the saving status
- A button called btn_Saving_Actions to hold the saving code
Use this code in the OnVisible property of the screen. It will click the button btn_Saving_Actions when the Saving Screen is opened unless the app is in Debug Mode.
If(!tog_DebugMode.Value, Select(btn_Saving_Actions))Code language: CSS (css)
Put this code in the OnSelect property of the button to check if the device is connected to the internet and write the unsaved records back to SharePoint.
// Check if device is online
If(Connection.Connected,

    // Add or update records in SharePoint
    Patch(
        'Home Inspections',
        // Choose which columns are written to SharePoint
        ShowColumns(
            // Only write records with ID found in colUnsavedRecords
            Filter(
                colHomeInspections,
                OfflineID in colUnsavedRecords.OfflineID
            ),
            "ID",
            "OfflineID",
            "Address",
            "StartTime",
            "AssignedTo",
            "Report"
        )
    );

    // Clear unsaved records collection
    Clear(colUnsavedRecords);
    SaveData(
        colUnsavedRecords,
        "localUnsavedRecords"
    );
);

UpdateContext({locMessage: "Saving completed"});
Navigate('Loading Screen');Code language: JavaScript (javascript)
To let the user know what is currently happening during the save process use the locMessage variable in the Text property of the label lbl_Saving_Message.
locMessage
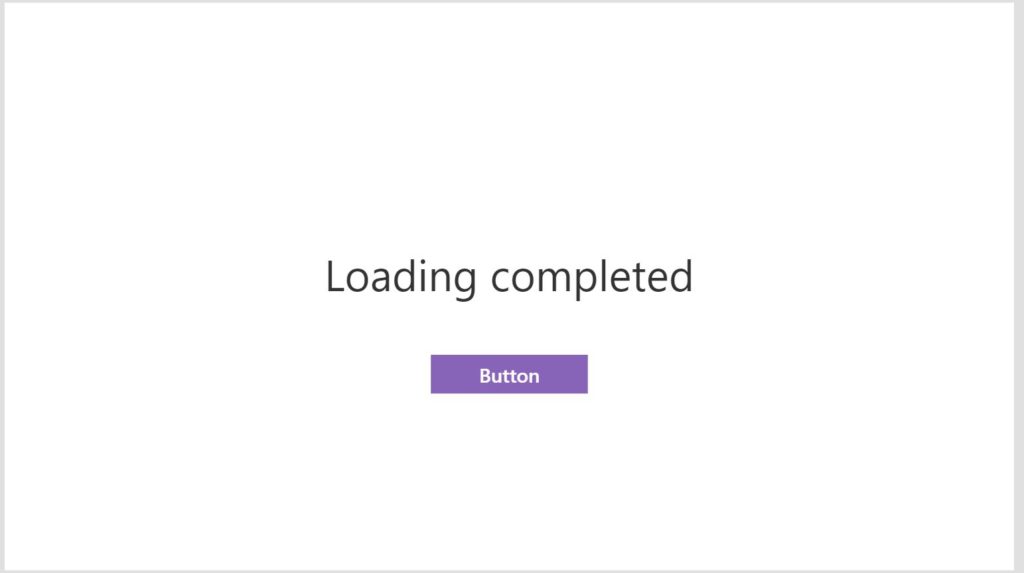
Loading Screen
The Loading Screen is structured similarly to the Saving Screen. Open the Loading Screen and place two new controls on the canvas:
- A label called lbl_Loading_Message to display the loading status
- A button called btn_Loading_Actions to hold the loading code
Use this code in the OnVisible property of the screen.
If(!tog_DebugMode.Value, Select(btn_Loading_Actions))Code language: CSS (css)
Put this code in the OnSelect property of the button. When the app is opened we load any data stored on the device to check if there are unsaved records. If there are no unsaved records and the device is connected to the internet we load the Home Inspections from SharePoint. If there are unsaved records, we use data from the device instead.
// Load offline data when the app is opened
If(
    !locAfterFirstLoad,
    UpdateContext({locMessage: "Loading your data from Local Device..."});
    LoadData(colUnsavedRecords, "localUnsavedRecords", true);
    LoadData(colHomeInspections, "localHomeInspections", true);
);
UpdateContext({locAfterFirstLoad: true});

// Check if device is online
If(
    Connection.Connected And IsEmpty(colUnsavedRecords),

    //  Get data from SharePoint
    UpdateContext({locMessage: "Loading your data from SharePoint..."});
    ClearCollect(
        colHomeInspections,
        'Home Inspections'
    );
    SaveData(colHomeInspections, "localHomeInspections")
);

UpdateContext({locMessage: "Loading completed"});
Navigate('Gallery Screen');Code language: JavaScript (javascript)
Write the locMessage variable in the Text property of the label lbl_Loading_Message.
locMessage
Finally, go back to the OnStart property of the app, remove any code and replace it with this.
Blank()
The Home Inspections App can now edit records in Power Apps offline mode.
Adding Records In Power Apps Offline Mode
An employee should be able to add a new home inspection appointment to the app. Including this functionality is very simple. We can accomplish it by adding some extra code in two sections.
Insert a new Add icon onto the Gallery Screen…
…and copy this code into the OnSelect property.
Set(varCurrentRecord, Blank());
Set(varNewOfflineGUID, GUID());
NewForm(frm_Form_Main);
Navigate('Form Screen');Code language: JavaScript (javascript)
Then go to the Form Screen…

…and add this code to the OfflineID card we made hidden earlier. When the form is in new mode it will create a GUID and when the form is in edit mode it will use the current GUID.
If(FormMode.New, varNewOfflineGUID, Parent.Default)Code language: PHP (php)
Then update the OnSelect property of the submit button with this code.
// update collection with form data
 Patch(
     colHomeInspections,
     /* updated code here */
     <strong>Coalesce(</strong>
         <strong>LookUp(</strong>
             <strong>colHomeInspections,</strong>
             <strong>OfflineID=varCurrentRecord.OfflineID</strong>
         <strong>),</strong>
         <strong>Defaults(colHomeInspections)</strong>
     <strong>)</strong>,
     frm_Form_Main.Updates
 );
 // save collection to local device
 SaveData(
     colHomeInspections,
     "localHomeInspections"
 );
 // track record that was edited
 Collect(
     colUnsavedRecords,
     {OfflineID: varCurrentRecord.OfflineID}
 );
 // save collection to local device
 SaveData(
     colUnsavedRecords,
     "localUnsavedRecords"
 );
 Navigate('Saving Screen');Code language: HTML, XML (xml)
Those small changes are all it takes to add new records with Power Apps offline mode.
Deleting Records In Power Apps Offline Mode
Removing home inspection appointments is a bit more involved. We must get rid of the record on the local device and track anything that was removed until a sync with SharePoint can be performed.
Open the Form Screen and add a Trash icon to the top right corner.
Write this code in the OnSelect property of the Trash icon. It will delete the record from the colHomeInspections collection and save colHomeInspections to the local device.
// update collection with form data
 Remove(
     colHomeInspections,
     LookUp(colHomeInspections, OfflineID=varCurrentRecord.OfflineID)
 );
 // save collection to local device
 SaveData(
     colHomeInspections,
     "localHomeInspections"
 );Code language: JavaScript (javascript)
Also, we need to track which record was deleted in a new collection called colDeletedRecords. We will also save colDeletedRecords to the local device in case there is no internet connection. Then the app will go to the saving screen.
// update collection with form data
 Remove(
     colHomeInspections,
     LookUp(colHomeInspections, ID=varCurrentRecord.ID)
 );
 // save collection to local device
 SaveData(
     colHomeInspections,
     "localHomeInspections"
 );

 /* more code added below */

<strong> // track record that was edited
 Collect(
     colDeletedRecords,
     {OfflineID: varCurrentRecord.OfflineID}
 );
 // save collection to local device
 SaveData(
     colDeletedRecords,
     "localDeletedRecords"
 );
 Navigate('Saving Screen')</strong>Code language: PHP (php)
We only want the Trash Can icon to show when the form is in edit mode. Use this code in the Visible property of the icon.
frm_Form_Main.Mode=FormMode.Edit
Then go to the Saving Screen…
…and add this code to delete the records from SharePoint when the device is connected.
UpdateContext({locMessage: "Saving your data..."});

// Check if device is online
If(Connection.Connected,

    // Add or update records in SharePoint
    Patch(
        'Home Inspections',
        ShowColumns(
            Filter(
                colHomeInspections,
                OfflineID in colUnsavedRecords.OfflineID
            ),
            "ID",
            "OfflineID",
            "Address",
            "StartTime",
            "AssignedTo",
            "Report"
        )
    );

    // Clear unsaved records collection
    Clear(colUnsavedRecords);
    SaveData(
        colUnsavedRecords,
        "localUnsavedRecords"
    );

    /* added code here */

    <strong>// Delete records from SharePoint
    ForAll(
        colDeletedRecords,
        Remove(
            'Home Inspections',
            LookUp(
                'Home Inspections',
                ID=colDeletedRecords[@ID]
            )
        )
    );

    // Clear deleted records collection
    Clear(colDeletedRecords);
    SaveData(
        colDeletedRecords,
        "localDeletedRecords"
    );</strong>
);

UpdateContext({locMessage: "Saving completed"});
Navigate('Loading Screen');Code language: PHP (php)
Then go to the Loading Screen…
…and add this code to load colDeletedRecords from the local device if the device unexpectedly went offline and prevent the app from loading the deleted record from SharePoint.
If(
    !locAfterFirstLoad,
    UpdateContext({locMessage: "Loading your data from Local Device..."});
    LoadData(colUnsavedRecords, "localUnsavedRecords", true);
    /* added code here */
    <strong>LoadData(colDeletedRecords, "localDeletedRecords", true);</strong>
    LoadData(colHomeInspections, "localHomeInspections", true);
);
UpdateContext({locAfterFirstLoad: true});

// Check if device is online
If(
    /* updated code here */
    Connection.Connected
    And IsEmpty(colUnsavedRecords)
    And <strong>IsEmpty(colDeletedRecords)</strong>,

    //  Get data from SharePoint
    UpdateContext({locMessage: "Loading your data from SharePoint..."});
    ClearCollect(
        colHomeInspections
        'Home Inspections'
    );
    SaveData(colHomeInspections, "localHomeInspections")
);

UpdateContext({locMessage: "Loading completed"});
Navigate('Gallery Screen');Code language: PHP (php)
Now the app can successfully delete records using Power Apps offline mode.
Refresh Button
The last feature we will add is a refresh button so the employee can sync the local device’s data to the SharePoint list on-demand. Create a Refresh icon and place it in the top-left corner of the Gallery Screen.
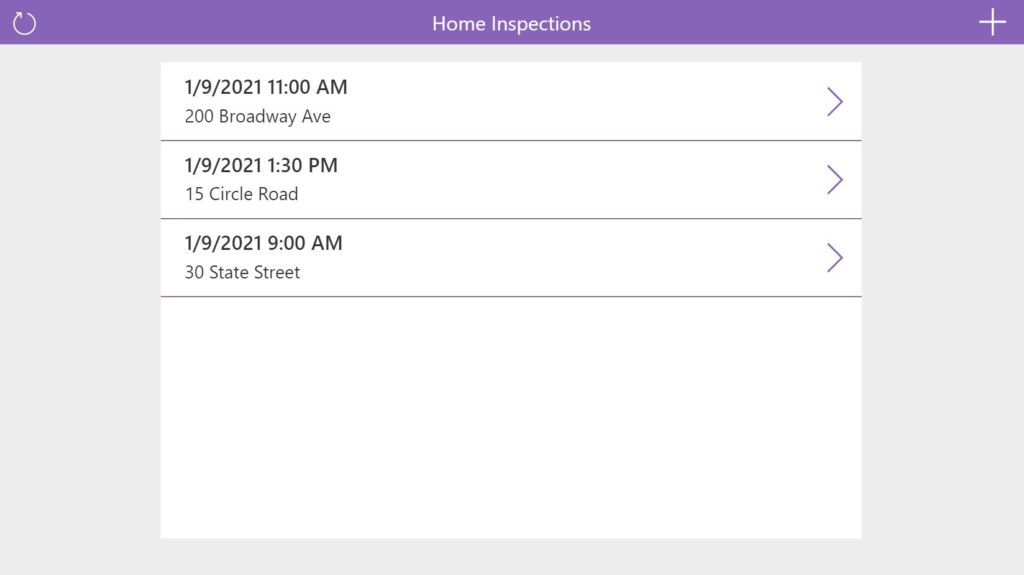
Use this code in the OnSelect property of the Refresh icon to navigate to the saving screen. The app will save any unsaved records to the SharePoint list then load any updated records form the SharePoint list.
Navigate('Saving Screen')Code language: JavaScript (javascript)
We have now fully implemented Power Apps offline mode for the Home Inspections app.
Did You Enjoy This Article? 😺
Subscribe to get new Copilot Studio articles sent to your inbox each week for FREE
Questions?
If you have any questions or feedback about Power Apps Offline Mode please leave a message in the comments section below. You can post using your email address and are not required to create an account to join the discussion.


This is the best guide and approach for creating offline apps; thank you very much!
Connor,
Thank you for the kind words. When you contacted me 2 weeks ago I actually had a draft of this blog written. It was a super nice coincidence that what I wrote lined-up perfectly with your need!
Thanks Matthew. I’ve been doing PowerApps for some time and have an extensive grocery/shopping app I created over the past little while. However, it’s quite data intensive (seemingly) and runs on wi-fi or cell connection so a little ratchety.
I’ve been wanting to implement this kind of collections technique but everyone has a little text box updating a small connection. Very basic.
This is exactly what I’ve been looking for!!!
BTW, if you would like a copy of my app I’d be happy to share it with you in case you want to use as another collections idea/technique. Just email me if you’re interested. But dont laugh.:)
Carl
Hey Matthew. For those that may not realize, the comment line for the OnSelect property of the btn_Savings_Actions on the Saving Screen:
will produce a syntax error. You probable meant forward slashes:
Carl,
Fixed. Thanks, I appreciate the help. Its hard being both the writer and editor of a blog. Sometimes minor errors like this one slip by 😉
Just finished creating this app after realizing the debug mode was giving me all the errors in the code. Duh, I guess that’s why it’s called Debug mode although I haven’t tested it offline yet though.
I had no idea it was this involved to create an online-offline mode app. I was going to do this with my Grocery App but hmmm that’ll take some time to implement given all the connections and fields I have to deal with.
If I get it working I’ll probably receive a degree in computer engineering thanks to your example!!
Anyway, Great job and thanks again for sharing with us!!
You’re welcome Carl. Agreed, offline mode is not simple but I hope with the help of my article you’ll get it working. I tried to boil it down to the simplest pattern possible so it can be done even without a ‘computer science degree’ lol 🙂
If you have a dropdown that gets its values (the values the user sees when he clicks the dropdown chevron) from a SharePoint list (items property set as shown below) and you are offline, how does the dropdown get the values from the SharePoint list?
Items = Choices(MySPList.MySPChoiceColumn)
Sorry if I missed this in your post above.
Kind regards,
Bill
Bill,
That is an excellent question. You will want to store the Choices function result in a collection. You can put add something like this code to btn_Loading_Actions. My example has 3 sets of choices.
If(
Connection.Connected,
//if connected load choices from SP list
ClearCollect(
colChoicesOptions,
{ChoicesName1: Choices(MySPList.MySPChoiceColumn)},
{ChoicesName2: Choices(MySPList.MySPChoiceColumn2)},
{ChoicesName3: Choices(MySPList.MySPChoiceColumn3)}
);
SaveData(
colChoicesOptions,
localChoicesOptions
),
//otherwise load choices from local device
LoadData(
colChoicesOptions,
localChoicesOptions,
true
)
)
Then you would replace the Items code with:
colChoicesOptions.ChoicesName1
So if I’m understanding correctly, the user has to be online at some point to build the collection of dropdown choices used in the app. In other words, if I build an app and publish it and then “Joe User” opens the app for the first time ever on his device and he happens to be offline, he will not be able to build the collection that supplies the apps dropdowns with choice values. Is that correct?
One other question comes to mind…I’m assuming that certain controls, like a combo box set to my company’s directory (using the Office365Users connector) will not work as I cannot easily load 100K users into a collection for offline use?
Yes, the user does have to be online at least once. If you want to make an app where the user will never be online that’s a different story altogether.
As for the 100k users question, that’s a scenario where offline simply won’t work. But I doubt that most times you’d need all 100k users to be visible to the app. Most likely just a department or division in a company. The standard workaround is to create a whitelist of app users.
Matthew-
Thanks so much for this post! I have more than several hours in trying to get my offline app working properly. Your explanation was spot on!
The list I’m working with has 30 some odd choice fields. I have the collection working properly and I believe the data is saved to my phone correctly. Just trying to figure out how to bring them back to the individual drop-downs when offline.
You end your reply with replacing the items code with colChoicesOptions.ChoicesName1. I’m assuming I’ll have 30 lines similar to that one, just not sure where to put them. Do they somehow go in the LoadData function? Not sure on the syntax here but, it’s late!
Any guidance would be greatly appreciated!
Thanks again!
Howard
Hi Mattew,
Great content.
I was recently working on the same requirement and followed the same approach.
I just wonder that will this offline capability work if I save the data when offline and then close the app directly after that.
So when I open my app next time connected to the internet, will my data which was saved during offline mode be synced/reflected?
Hi Mathew,
Thanks much for this blog. It really is helpful. I have a requirement wherein I want photos to be added in the offline mode alongside these details.Could you please help with that.
Thanks
Himani,
If you are attaching pictures in offline mode I would suggest developing the app in Dataverse or Dataverse for MS Teams. You can store an image in a column and patch it just like any other type of data.
However, if you must use SharePoint it would require a new article to give a full answer. At the very least you’d need to store the images in a collection then use a flow for the upload (see link below for the flow piece). From there, you’d have to figure out how to treat new photos vs. updated photos.
https://www.matthewdevaney.com/power-apps-add-picture-control-and-save-to-sharepoint-library/
My first question is if one is offline then I would assume this first step would not happen:
// load home inspections data into collection
ClearCollect(
colHomeInspections,
Filter(
‘Home Inspections’,
AssignedTo.Email=varUserEmail
)
);
If a user goes into the app initially and is offline then editing would not be possible, correct?
Brad,
Agreed. But we only use this code temporarily to make sure our app is working before offline becomes implemented. It actually gets deleted at the very end of the section “Loading Screen”.
Slow Clap!!!! Thankyou so much for this article! The app has really opened my mind to what is possible.
My only question is how do you handle the “Title” column in Sharepoint? I basically assign a GUID() and hide the title datacard. You don’t address that.
Colby,
You can disable Title as a required field in the List Settings and never worry about it again.
Hello
I have followed this using the current version of Sharepoint.
There is now a Title column mandatory in lists
I show that on the forms and set it when I add a new record, but I get the error that title must be specified
Any ideas?
Paul
Paul,
By coincidence I just answered this question for Colby Turberry on 2022-01-06 🙂
You can disable Title as a required field in the SharePoint List Settings and never worry about it again.
I tried that and I still get the same issue?
Has anyone ever had the message an unknown error has occurred when testing this with no internet?
I get this when I submit a change when there is no connection to the internet
Hello
My users want to be able to add attachments
This could be anything such as documents or photos
How can I do this? I won’t have to worry about conflicts as there will only be one person editing an entry at a time
I.e I won’t get a situation where an entry is updated in Sharepoint after it’s been downloaded to a device but before the device version is uploaded
I have to use Sharepoint
The post below talks about photos but my requirement is a bit more generic
Is there a way of getting date last updated?
Paul
You may use the Base64 representation of the image, save it to a multiline field. When you are connected, you can upload with a Power Automate Flow
Hello
When I turn Airplane mode on on my device I keep getting errors
For example, when no internet connection exists I go to edit an entry and although it should be reading from the offline list I get an error “The request was not sent or there was no response from the server
Has anyone else had this?
Likewise, when I add a new record and submit it in Airplay mode I get the the same error
Any ideas?
Paul
Hi Matthew
My app’s requirement is to bring up a gallery with a search box and have that fill the local collection. How can I do that?
Paul
I have gone through your app and have it working. What I notice is if I do multiple submissions I only can sync the latest. Is there a way to sync more than one offline record to Sharepoint
Colby,
To the best of my memory, and from what I’ve re-read it looks like the tutorial app does have the ability to sync multiple records. But I could be wrong… Can you please do a test for me – switch your device’s wifi off and tell me how many records are in colUnsavedRecords before you patch. Does it always stay at 1? Or can you see more than one record in that collection?
Hi.. Matthew I tried your app it’s really amazing but I have a little bit issue that I can’t add more than one items when offline so could you please help me out to add more than one items.
Thanks,
Ankit
Ankit,
It looks like I have some refactoring to do on this tutorial. I’ve made changes in my testing app and now all I have to do is write them up. I’ll post back here when its done.
Ankit,
I have taken a few hours to re-write this tutorial so it will now add more than one item when offline. Please re-read this tutorial from top-to-bottom and introduce the new code into your app.
Thankyou Matthew for spending your precious hours It helps me a lot thanx again.
My understanding is that the collection is saved in memory. So if the device runs out of power or is turned off, the unsaved data will be lost. Is that correct?
Rocky,
Collections are held in memory but through use of the SaveData and LoadData functions we can store them on disk. This prevents data loss when a device loses power or the app is closed.
Thanks Matthew. Will test it out.
I followed these instructions exactly. The app will modify records fine but will not add them. The only deviation was the guid part. It wouldn’t work until I made the code
If(frm_Form_Main.Mode=FormMode.New, varNewOfflineGUID, Parent.Default)
in the DataCardValue1 spot
Ryan,
Thank you so much for reviewing my instructions and leaving feedback. I have now updated the article.
Where did you update the article? All the code seems to be the same unless I’m missing it
Ryan,
Throughout the article. The basic code remains the same but I added or updated pieces. For example, the submit button and the loading pattern.
I figured it out. Not sure if I missed part of the instruction, but changing to the submit button code to this fixed it
Collect(
colUnsavedRecords,
{OfflineID: DataCardValue1.Text}
);
it looks like putting the new guid in the defaults field didn’t add it to the current record
Ryan,
My code will not add a GUID to an existing record. It is only intended to add a GUID new record.
Mine too. I have your code for if form new in the default field for the offlineid field. It now works for both. Is there a different spot to add If(FormMode.New, varNewOfflineGUID, Parent.Default) like maybe the update field that will update the varcurrentrecord variable
I did that and could add a new record. When you click to add a new record the Matt code set the varCurrentRecord in blank and no added to colUnsavedRecords
Valuable Post !!!
It helps me a lot to understand a way to manage offline scenarios.
I’ve made some slights modifications for achieving my goals.
In the OnStart :
It is necessary for the scenario when after offline period you have to restart the App and that you’re online. It restores the cached data from the device and so refresh will update the SharePoint List. If these lines are not added the cached data are removed.
I have also modified the Admin screen for helping the test of offline state.
In the end, I have also modify the Submit code because the colUnsavedRecords was not updated on my side with using varCurrentRecord when adding record. So I get the value directly from the text control.
// track record that was edited
 Collect(
     colUnsavedRecords,
     {OfflineID: OfflineIDValue.Text}
I have setup a GitHub Repository with the code in the .msapp file. and with a link to your blog post.
https://github.com/MichelLaplane/PowerApps-Samples/tree/main/HomeInspections
Hope that you agree that I have put this code on GitHub.
Thank you for your work.
thank you for sharing app.
it’s very useful
Andrea,
You’re welcome 🙂
Thank you Matthew for a great guide!
I’ve got a problem though.
In the SavingActions -> “Delete records from SharePoint”, the LookUp function returns an error:
ID=colDeletedRecords[@ID], Error: “Incompatible types of comparison. These types can’t be compared: Number, Error.”,
“Name isn’t valid, ‘ID isn’t recognized”
Any thoughts on what can be the problem?
//Jesper
Hey! I’m having the same issue. Did you manage to fix it?
Hi, same issue in the app…. Thanks
Hello, so I made some changes to this bit:
I had to change the ID and @ID to reflect what I have on the SharePoint. So ID= is for me Title= and the @ID is @OfflineID as that’s what we are comparing against.
I hope this helps,
Ben
Just after completing the 1st part-Editing Records In Power Apps Offline ModeI’m having an error popping up with the save screen button.
With ShowColumn functions having invalid arguments.
Also when using the app, the flow is stuck at the Saving screen dispay; with button non responsive.
Any guide for same, what might be the reason…Thanks
Hi Matthew,
Thanks for another great piece of work. I keep coming back to your posts whenever I deal with a new topic or concept, and always find great advice and examples.
This time I am going to build an offline app, so I wanted to start by reading this post. It is updated, and yet I think I might further improve it:
Throughout the post, whenever you clear a collection and then saving the empty collection to the device, like this:
Wouldn’t it make more sense to delete the local file from the device instead? like this:
Clear(colUnsavedRecords);

 ClearData("localUnsavedRecords"

    );
And the same for deleting “localDeletedRecords”.
Under the “Editing Records in Power Apps Offline Mode” section, the second screenshot does not match the first one.
It is:
But it should be like in the first screenshot:
Under the “Adding Records in Power Apps Offline Mode” section, it should say:”…and add this code to the [Default property of the] OfflineID card we made hidden earlier”.
Under the “Deleting Records in Power Apps Offline Mode” section,
it is:
We don’t have an ID, we collected only OfflineID. So, it should be:
On the same note, I also bumped into this post:an honest guide to canvas app offline (part 1) – The Joy of Power Apps
and I saw your comments there (and in the second part as well).
Since this post was published a little later than yours, I was wondering if you think that this post represents a different approach, and whether one is better than the other, and what is your current recommended way to build an offline app.
Thanks,
Gil.