Power Apps Tabbed Form Using Tab List Modern Control

A Power Apps Tabbed form organizes data into groupings. Users can quickly navigate between tabs to find what they need. To create form tabs we place a tab list control above a form and show/hide its input fields based upon the current selection. In this article I will show you how to make a tabbed form.
Table of Contents
• Introduction: The Business Contacts App
• Setup The SharePoint List
• Insert A Power Apps Tab List Control
• Add An Edit Form Control
• Show/Hide Form Fields Using Conditional Logic
• Test The Power Apps Tabbed Form
• Submit The Power Apps Tabbed Form
Introduction: The Business Contacts App
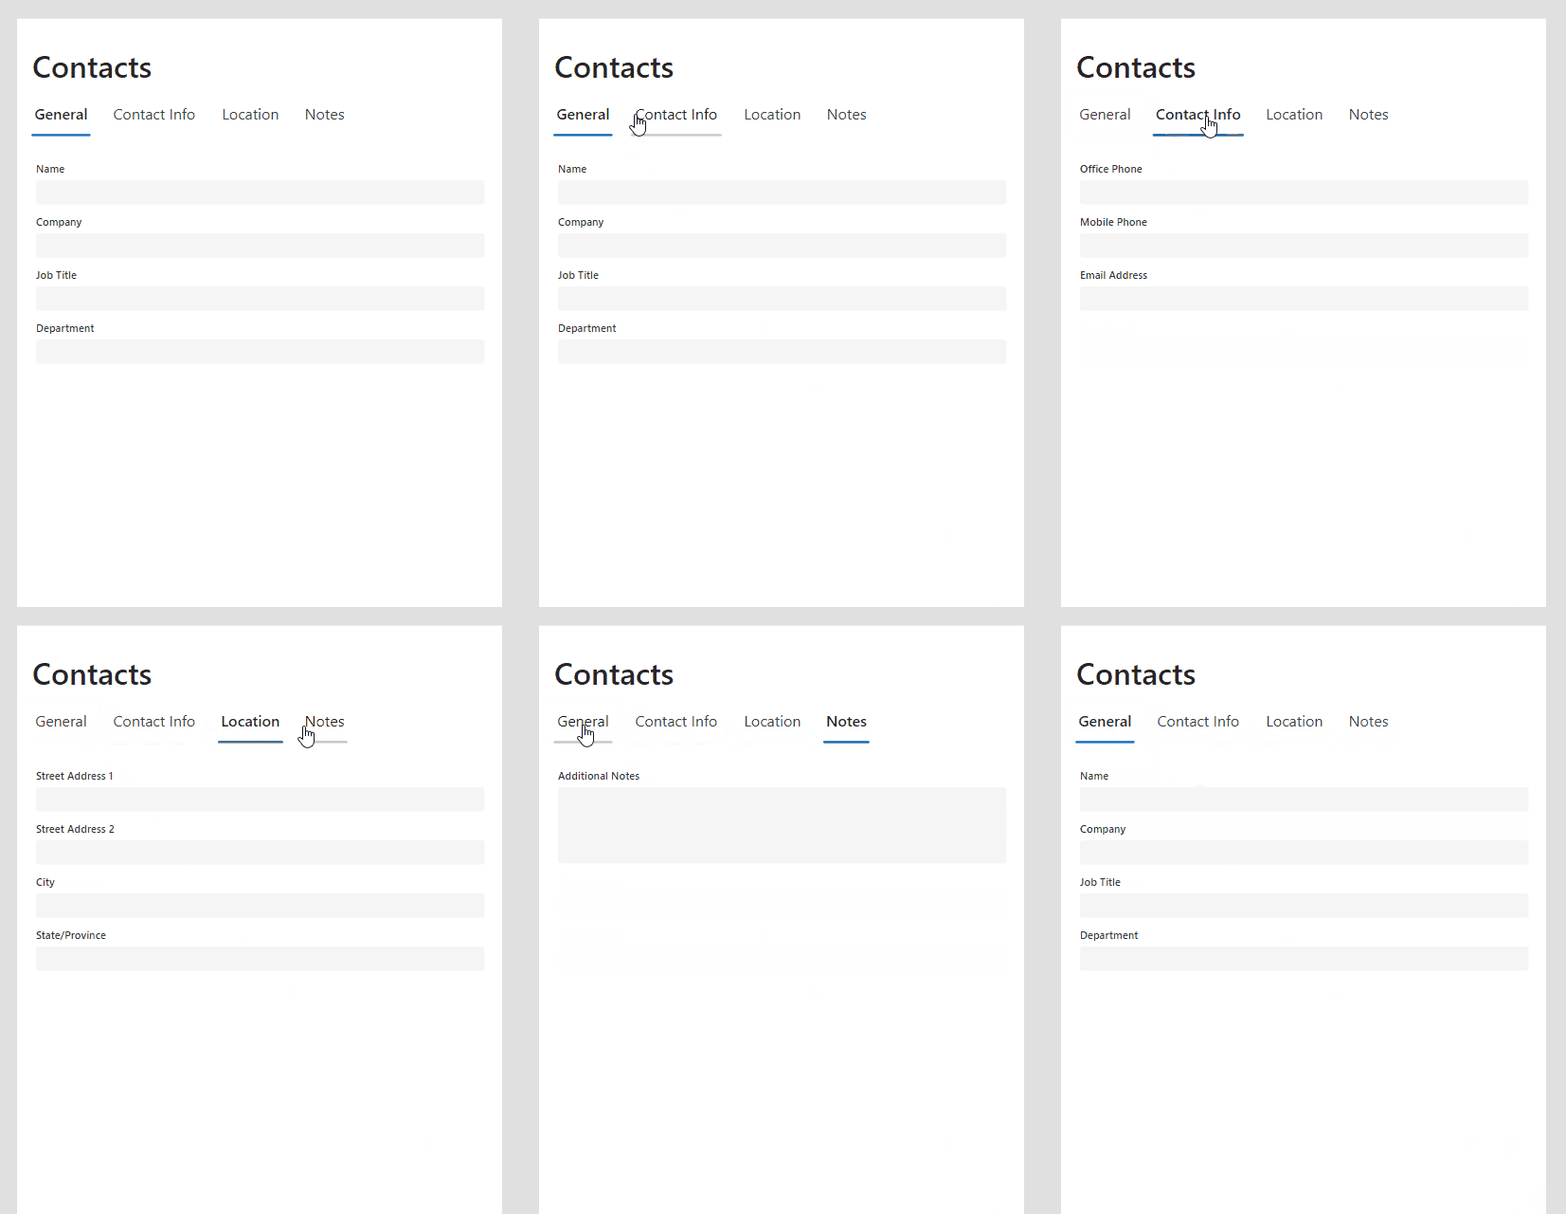
Salespeople at a manufacturing company use Power Apps to manage their business contacts. They navigate through a tabbed form to see details about their contacts.
Setup The SharePoint List
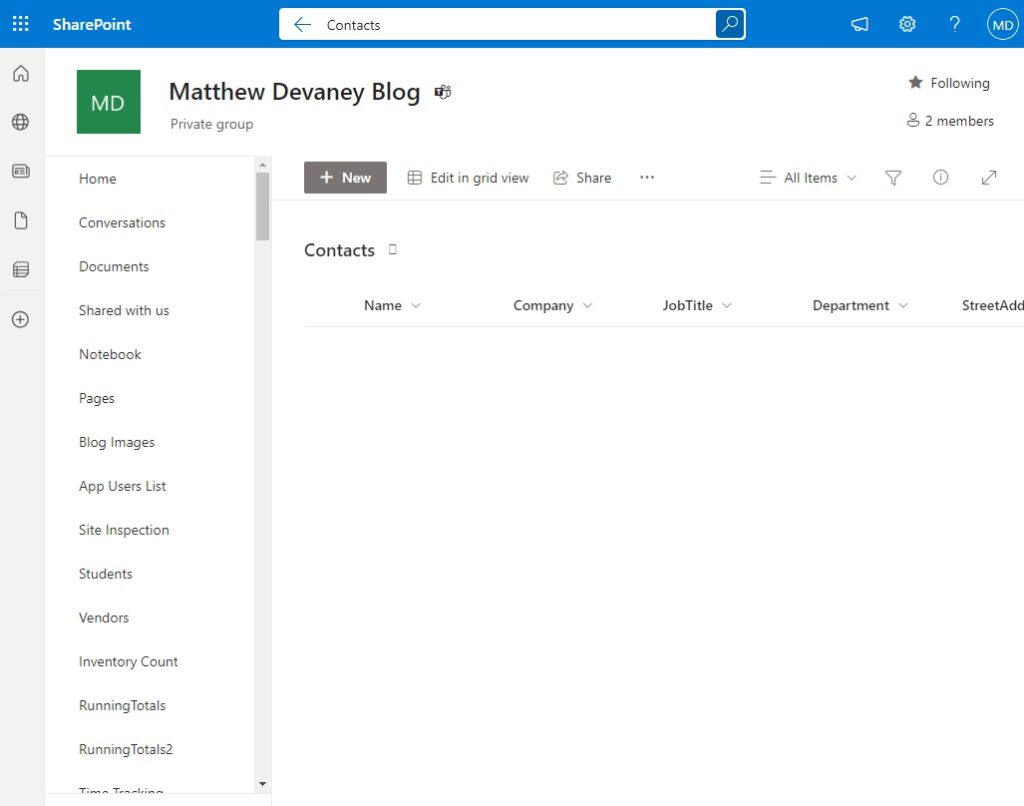
Create a new SharePoint list called Contacts with the following columns:
- Name (single-line text)
- Company (single-line text)
- JobTitle (single-line text)
- Department (single-line text)
- OfficePhone (single-line text)
- MobilePhone (single-line text)
- EmailAddress (single-line text)
- StreetAddress1 (single-line text)
- StreetAddress2 (single-line text)
- City (single-line text)
- StateProvince (single-line text)
- AdditionalNotes (multiple-line text)
Once the SharePoint list setup is completed it should look like this:
Insert A Power Apps Tab List Control
Open Power Apps Studio and create a new app from blank. Add a text control onto the screen to show the title “Contacts.” Then insert a tab list control.
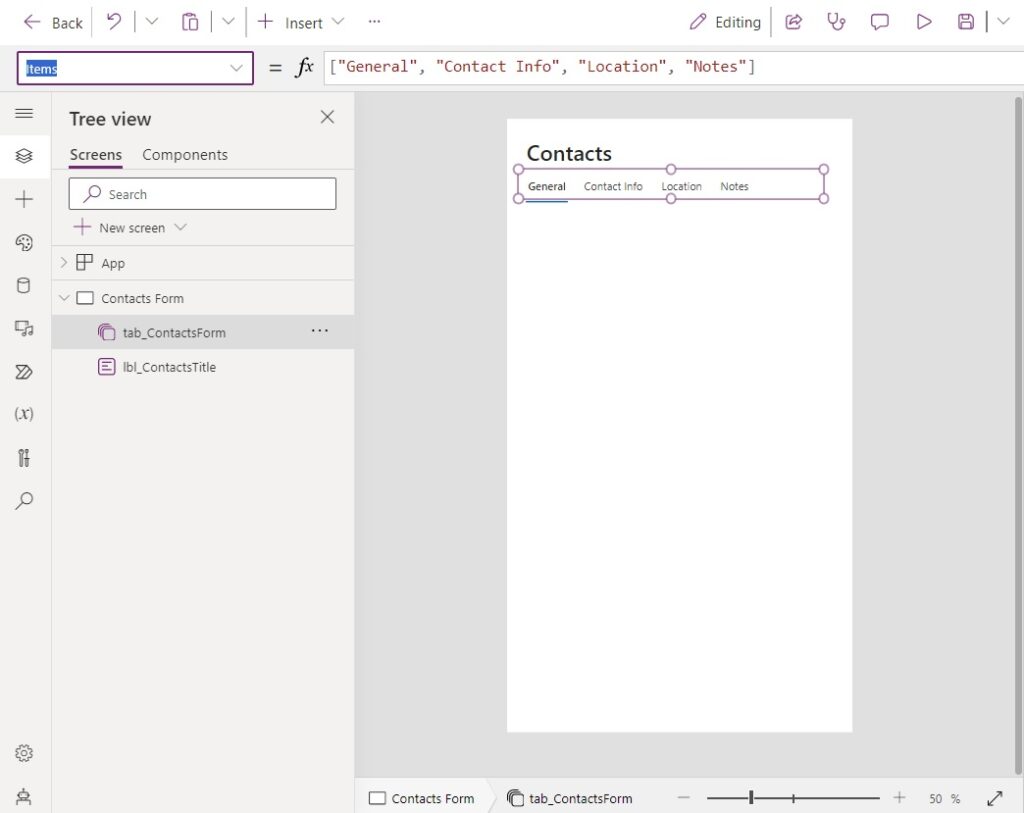
Use this code in the Items property of the tab list control to create the tab names.
["General", "Contact Info", "Location", "Notes"]
Add An Edit Form Control
Place a new form control directly below the tab list to display the Contacts data.
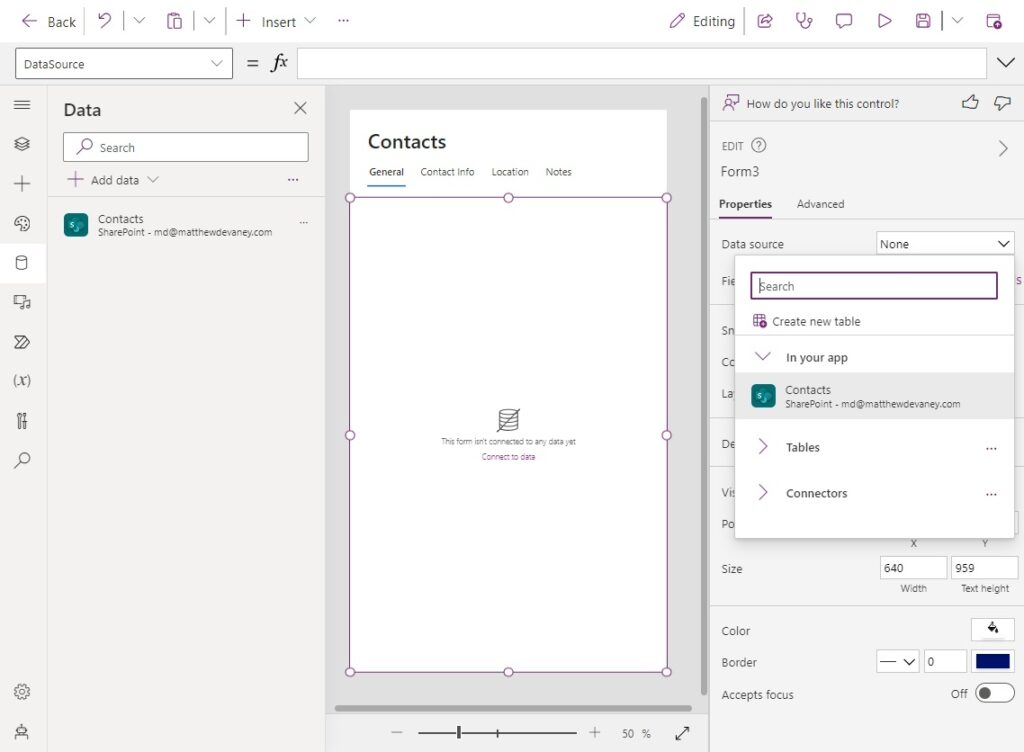
Add the Contacts datasource to the app then use this code in the Items property of the form.
Contacts
After doing this the fields in the Contacts SharePoint list appear in the form.
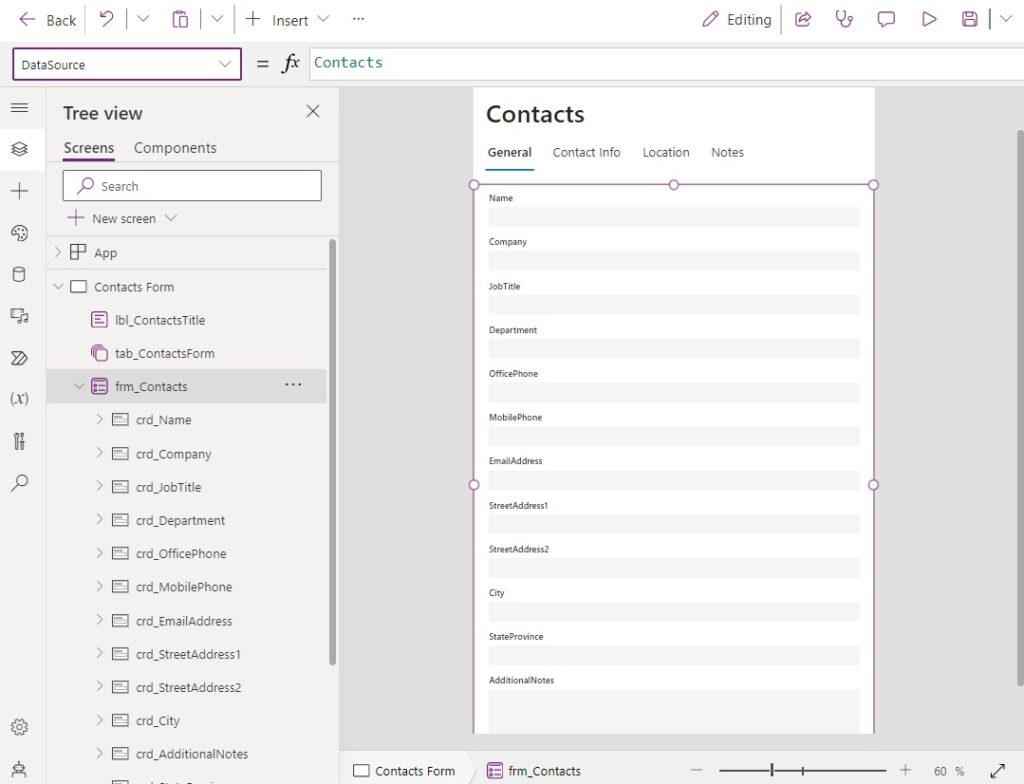
Show/Hide Form Fields Using Conditional Logic
When the “General” tab is selected we want to show the following cards and hide the rest.
- Card
- Company
- JobTitle
- Department
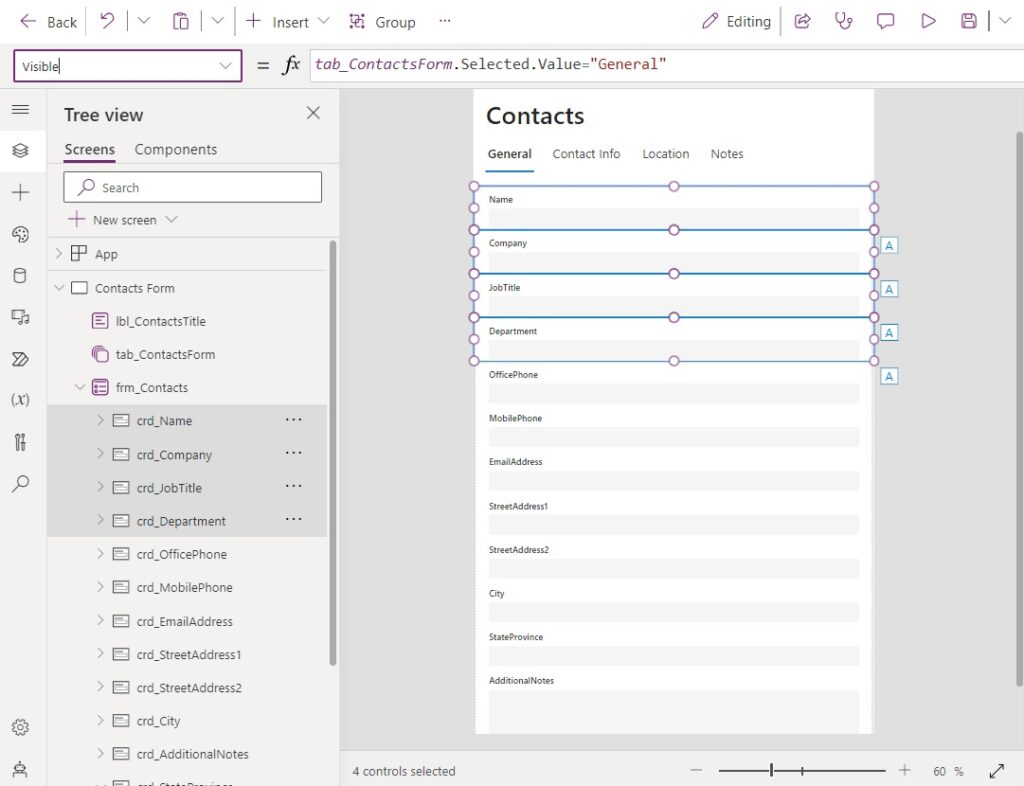
Select the cards and use code in their Visible property.
tab_ContactsForm.Selected.Value="General"
When the tab list control has “Contact Info” selected show only these fields:
- Office Phone
- Mobile Phone
- Email Address
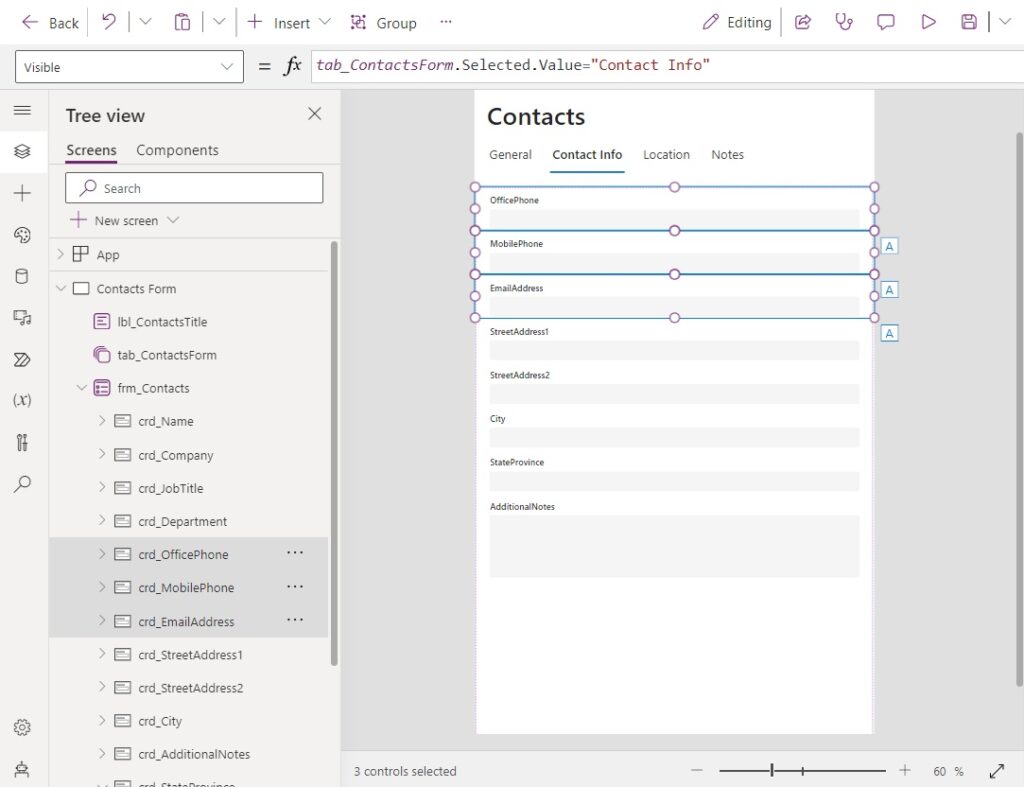
Write this code in the Visible property of their cards.
tab_ContactsForm.Selected.Value="Contact Info"
Then display these fields when the “Location” tab is selected with the tab list control
- Street Address 1
- Street Address 2
- City
- State Province
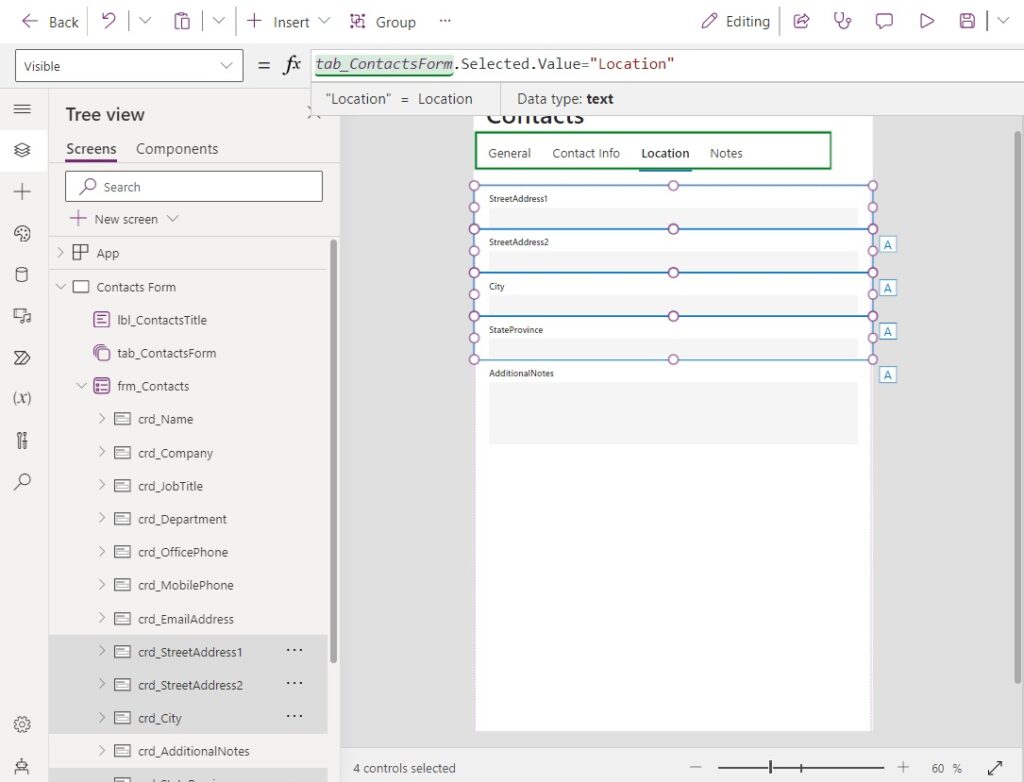
Use this code in the Visible property of the cards.
tab_ContactsForm.Selected.Value="Location"
Finally, show the Additional Notes field when the Notes tab in selected.
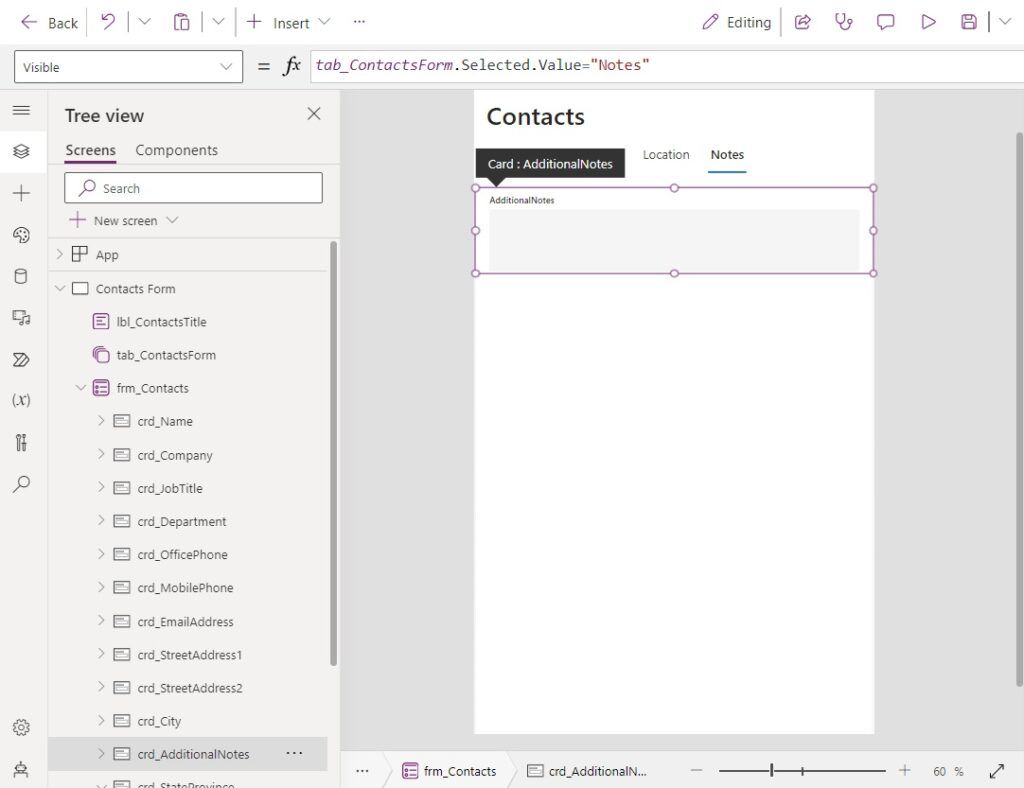
Write this code in the Visible property of the Additional Notes card
.
tab_ContactsForm.Selected.Value="Notes"
Test The Power Apps Tabbed Form
Go to preview mode and select each test one-by-one to test the form. When a tab is selected only specific input fields appear.

Submit The Power Apps Tabbed Form
Users of the tabbed form will want to save the data after they have navigated through each tab and input data. To do this, add a button at the bottom of the screen.
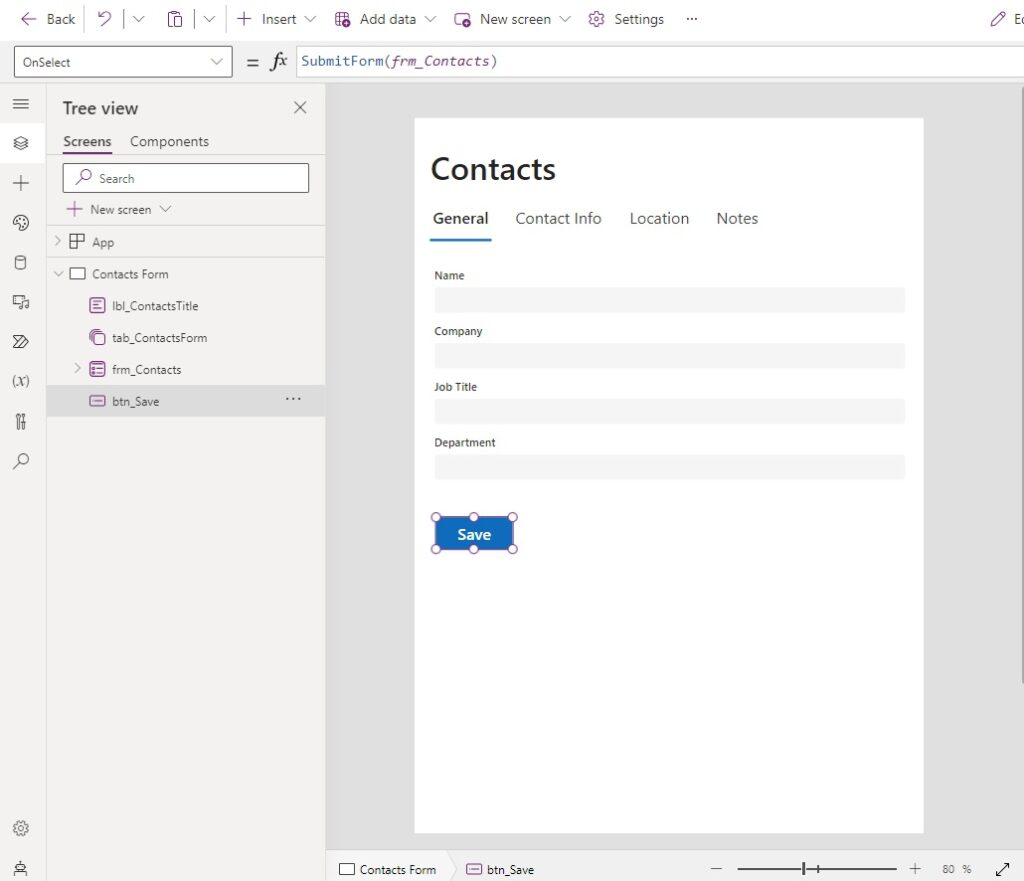
Use this code in the OnSelect property of the button to submit the form.
SubmitForm(frm_Contacts)
And write this additional code in the DefaultMode property of the form to indicate a new record should be created.
FormMode.NewDid You Enjoy This Article? 😺
Subscribe to get new Power Apps & Power Automate articles sent to your inbox each week for FREE
Questions?
If you have any questions or feedback about Power Apps Tabbed Form Using Tab List Modern Control please leave a message in the comments section below. You can post using your email address and are not required to create an account to join the discussion.





Thanks for the blog. This modern control is very useful.
i can not see tab list control in Studio
If you can’t see the tab control, check to make sure you have Modern Controls preview enabled as an upcoming feature.
Hi Matthew really hoping you can help as I don’t know who else to ask!!
basically I’ve got a new power apps and I want a homepage that you can navigate to a form from.. the form in question I have made a tabbed form using modern insert ‘tab list’ I’m super happy with how this turned out but now I’ve realised that in creating this it has made the form be the first page of my app and not my home page..
when I click ‘App’ —> ‘OnStart’ —> Fx = Set(tabData, Table({TabName:”Customer details”, TabValue:1},{TabName:”Transaction Details”, TabValue:2}))
this is obviously why my form is on start of my app however my question is how do I keep the tab formatting I have above but not have it OnStart of my app?
Hi Matthew, thanks for the blog. Is it actually possible to combine the Choices Field from SharePoint AND additional value as “Items” for TabList Control?
Alec,
We can use the Table() function to append new items to a collection:
Table(Choices(‘List Name’.’Choices Field’), {Value: “Tab A”}, {Value: “Tab B”})
I did a quick read here and it appears to be what I’m looking for. My only question is it a big deal to use a different datastore or maybe a REST API? Instead of Sharepoint? I’m fairly new to PowerApps…. Where would I need to make the changes?
Nice control. Do you know of a way to programmatically select a tab? For example, open a screen and go directly to tab #2 of the tablist collection from a button’s onselect event?
Thanks this is really useful. I’ve added a button to reset the form, using ResetForm but I also want it to navigate back to the first tab, I’ve tried a few different things but none seem to work. Any ideas on how I can do this?
This worked great until I used it for SharePoint Choice fields, removing the drop down control, swapping it with the (modern) radio button control. When the form loads, not all the radio buttons are visible (several on different tabs). If someone just clicks and edit/save, without navigating to the other tabs with radio buttons, those controls/cards write a blank (null) value back to SharePoint.
I was able to create a workaround with a timer control to iterate through all of the tabs on screen.visible (500ms each) and then it worked fine. I added a page loading component while it cycled through.