Power Automate Copy Files From Network Drive To SharePoint

Power Automate can copy files from a network drive to a SharePoint document library. Creating the flow to do this is simple. But the tricky part is installing the on-premises data gateway and configuring it properly. After the gateway is setup the machine must stay powered-on so that Power Automate can maintain the connection.
Table of Contents
• Introduction: The Copy Files From Network Drive To SharePoint Automation
• Install The On-Premises Data Gateway For Power Automate
• Configure The On-Premises Data Gateway
• Setup Folders On The Network Drive
• Determine User's The Domain And Username
• Create A File System Connection In Power Automate
• Select A SharePoint Document Library
• Copy Files To From A Local Drive To SharePoint Using Power Automate
• Run The Power Automate Flow To Get Files From A Network Drive
Introduction: The Copy Files From Network Drive To SharePoint Automation
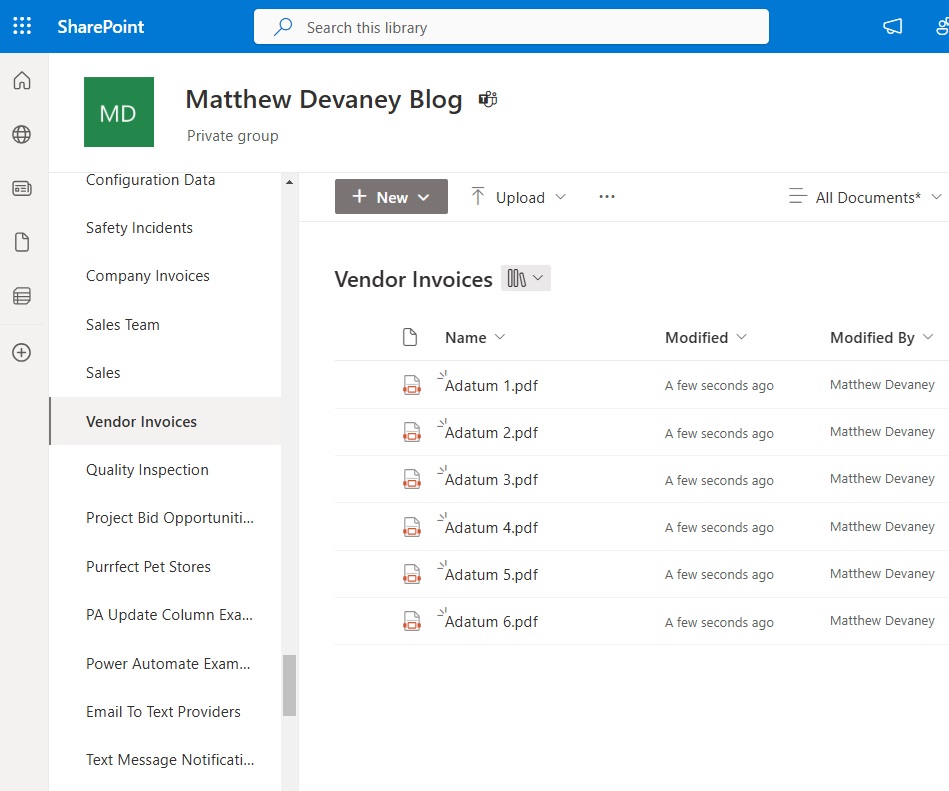
A Power Automate flow is used to get all of the files in a network drive folder and save them to a SharePoint document library.

Once the automation is run the files from the network drive folder appear in the SharePoint library.
Install The On-Premises Data Gateway For Power Automate
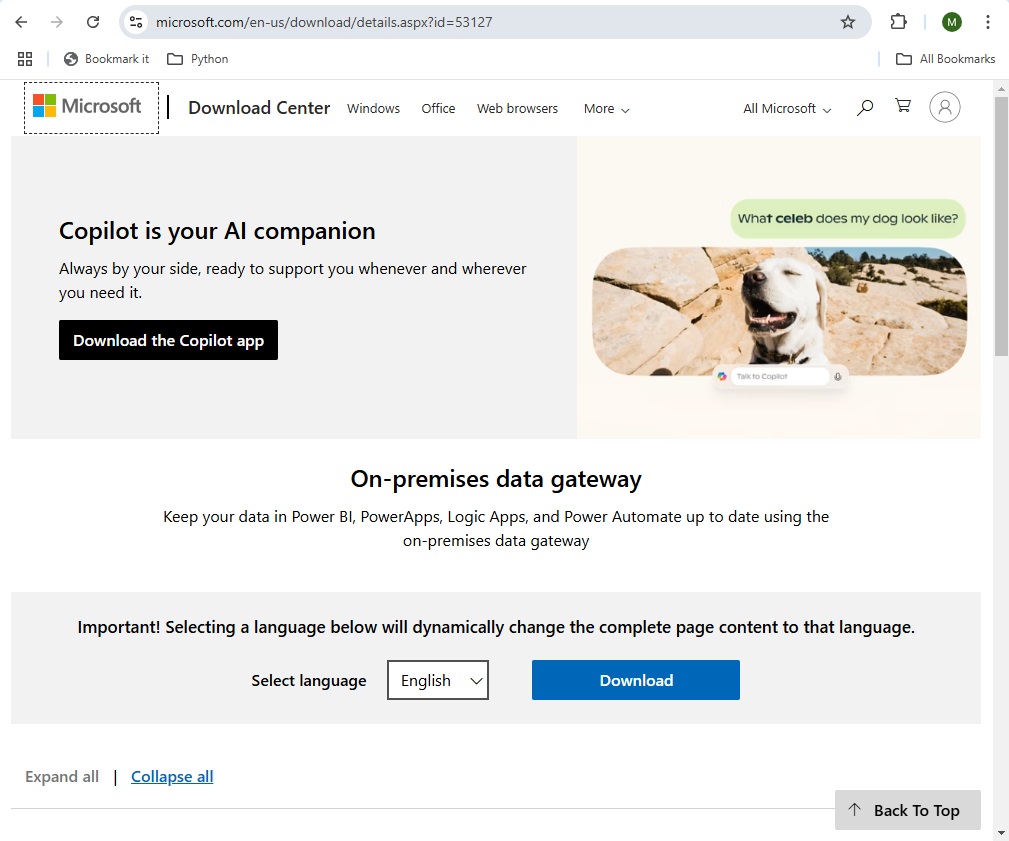
To connect Power Automate to a network drive we must install an on-premises data gateway. Go to the download page and to get the application.
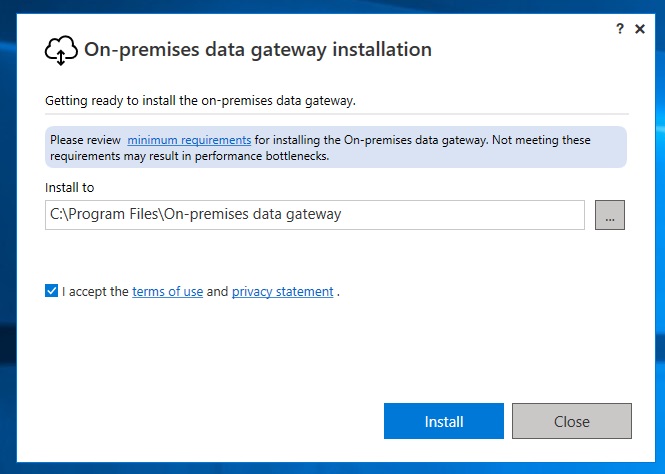
Install the on-premises data way onto the computer where the network drive will be accessed.
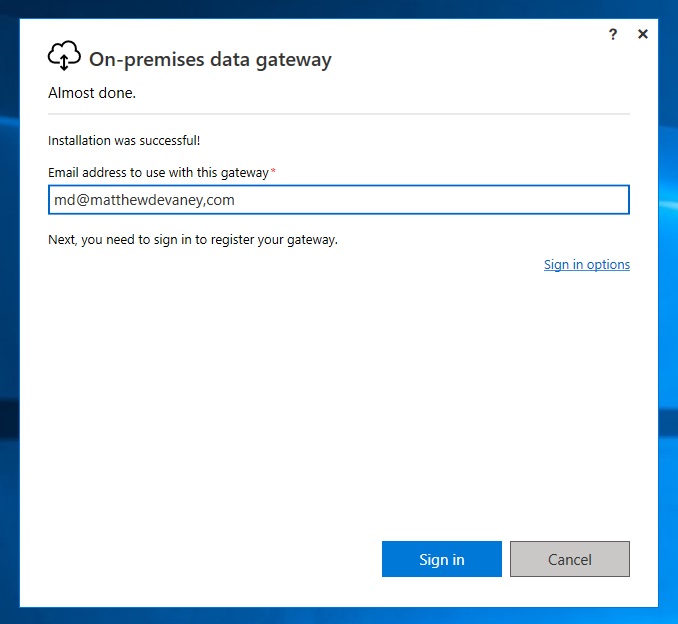
After installation is completed input an email address to use with the gateway. This the user with this email address must have permissions to access the network drive.
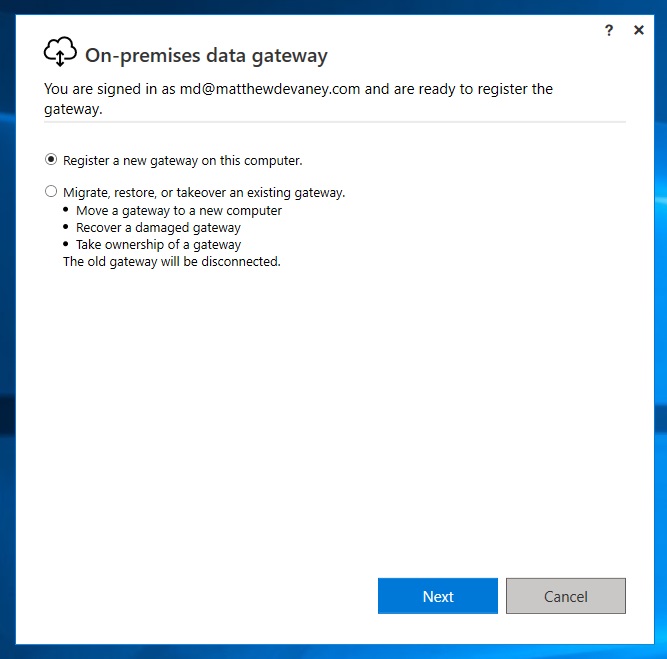
Configure The On-Premises Data Gateway
The gateway is now installed on the machine but there are a few more configuration steps to perform. Choose the option to register a new gateway on the computer.
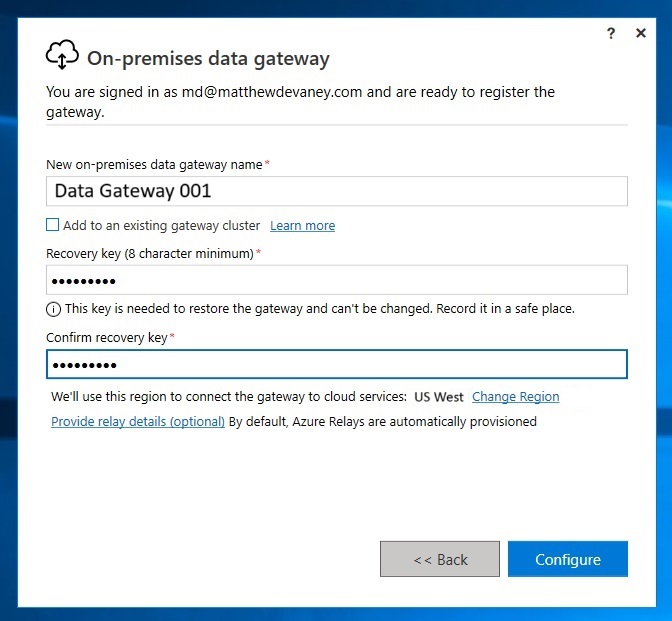
Give the on-premises data gateway a display name and fill-in the recovery key fields. Ensure the gateway region is mapped to the Power Automate region of the environment the automation will run in. and press the Configure button.
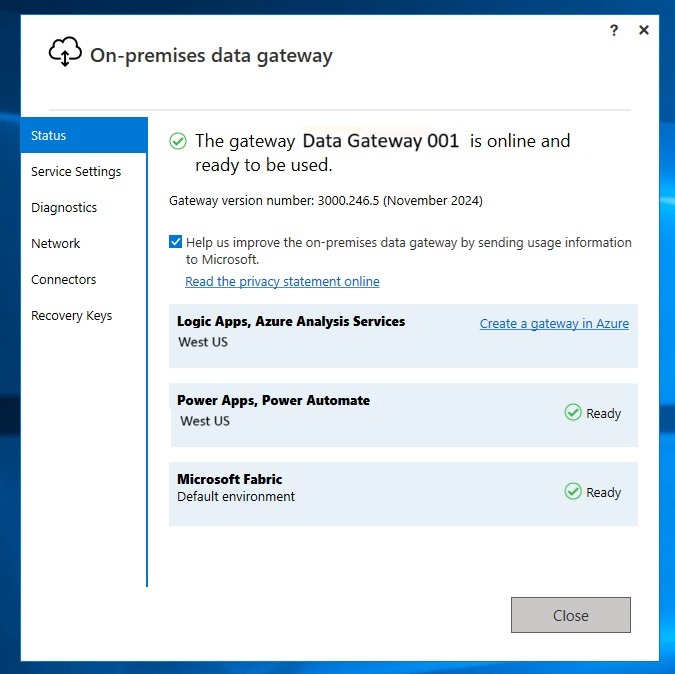
The on-premises data gateway is now ready to be used.
Setup Folders On The Network Drive
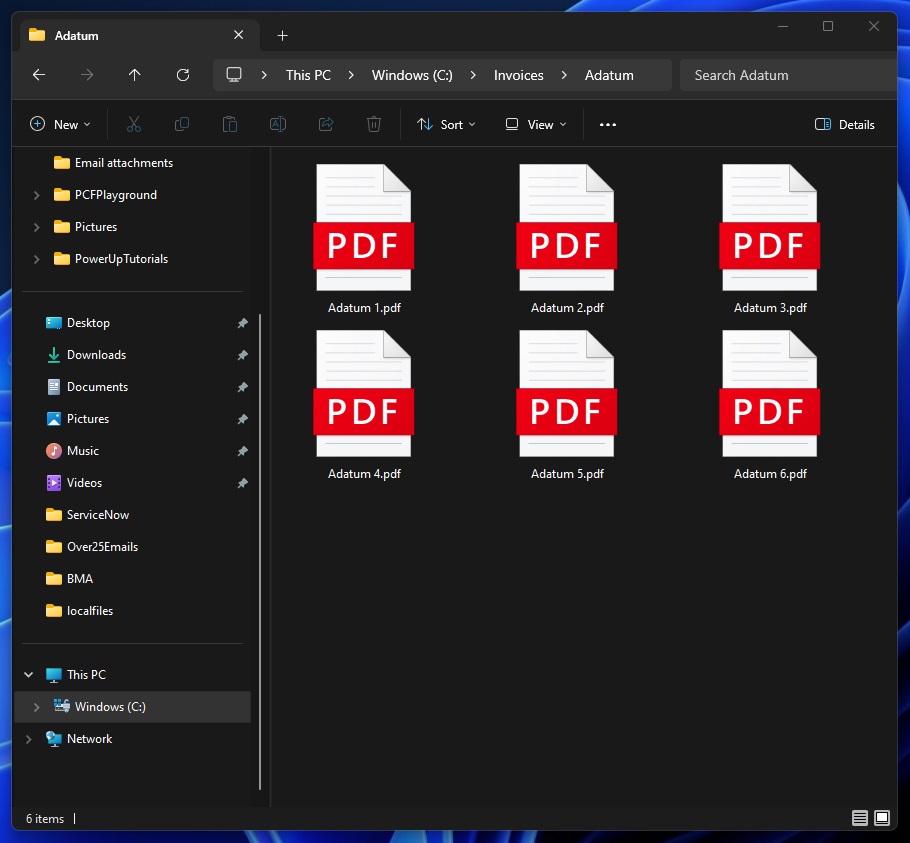
When we get the files from a network drive in Power Automate we will need to input a location. Open Windows Explorer and create two new folders:
- C:\Invoices
- C:\Invoices\Adatum
Later on in the process we will be saving all of the files from network drive folder named C:\Invoices\Adatum to a SharePoint document library.
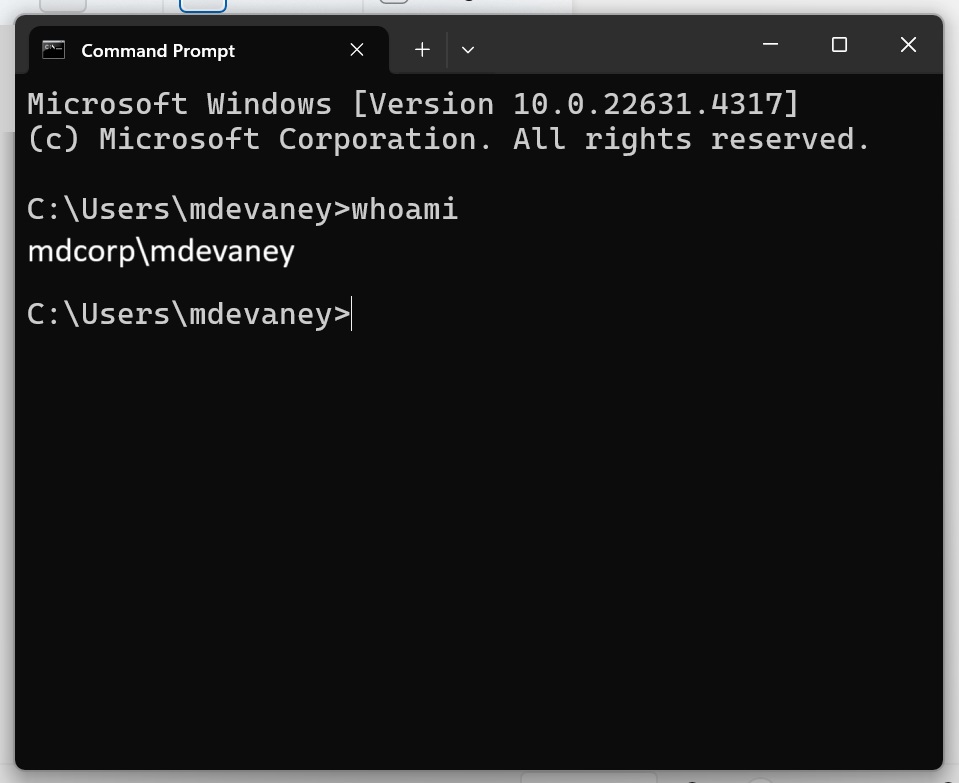
Determine User’s The Domain And Username
The Power Automate File System connector requires a username and domain. To get this information open up the Windows Command Prompt, type whoami, then press Enter. The domain\username appears on the screen. In this example the domain\username is mdcorp\mdevaney.
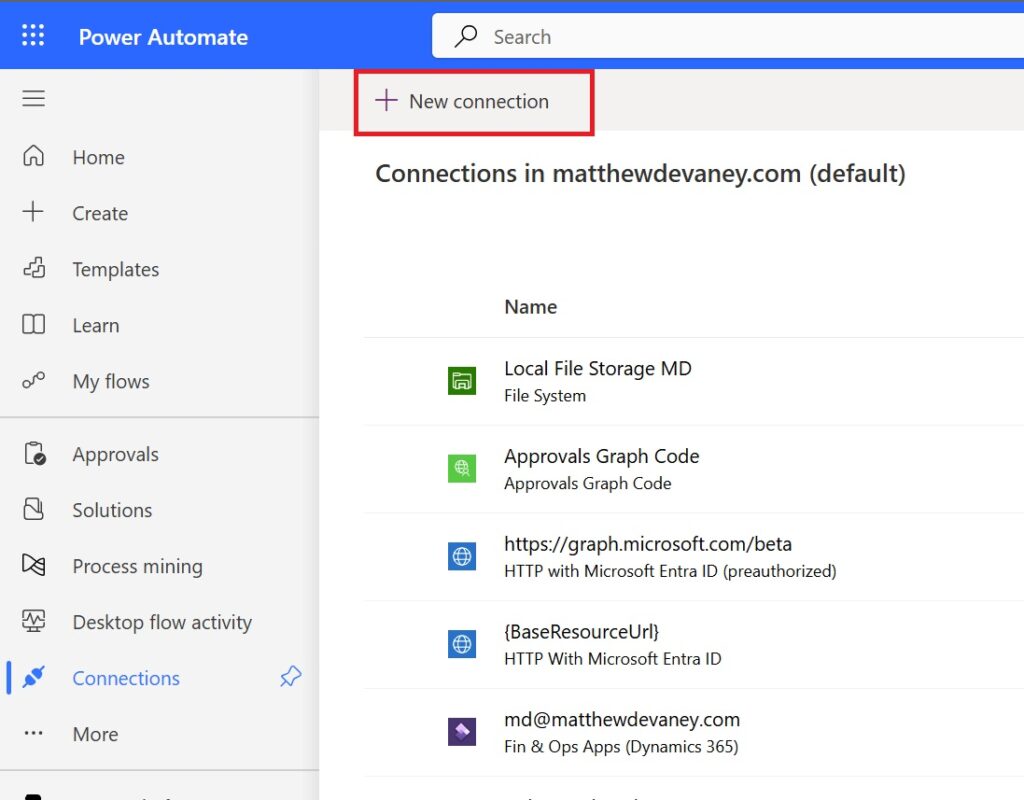
Create A File System Connection In Power Automate
The automation requires a File System connection to save files to the network drive. Open Power Automate and go to the Connections menu. Add a new connection.
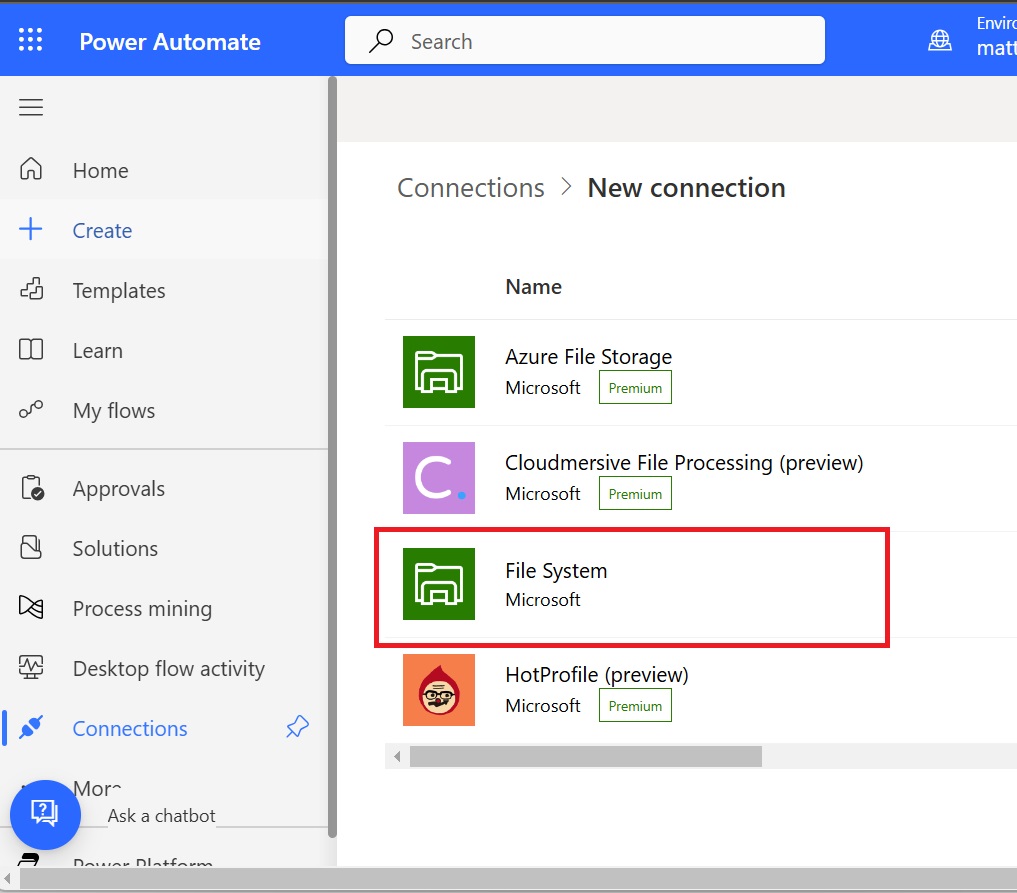
Select the File System connector.
Input the following information in the connection parameters:
- Root folder: C:Invoices
- Authentication Type: Windows
- Username: domain\username
- Password: **********
- Eligible Gateway: Data Gateway 001

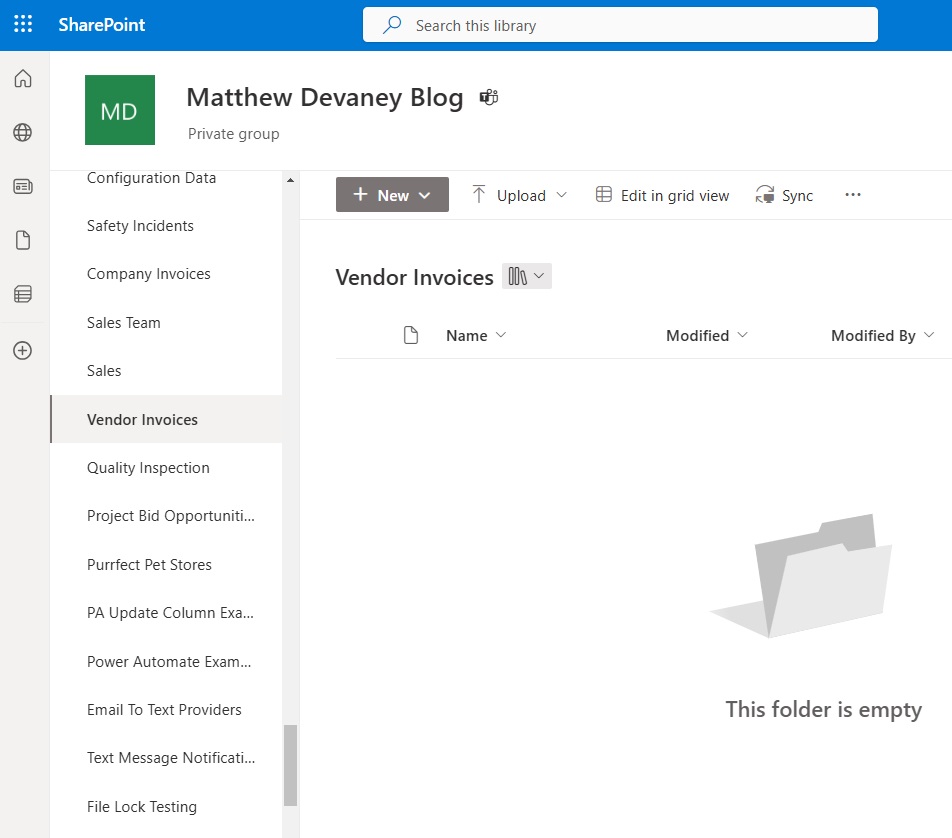
Select A SharePoint Document Library
We want to save a files stored on a network drive to a SharePoint document library . Create a new SharePoint document library named Vendor Invoices.
Copy Files To From A Local Drive To SharePoint Using Power Automate
Now we are ready to build the Power Automate flow. Create a new instant flow and name is Copy Files Network Drive To SharePoint.
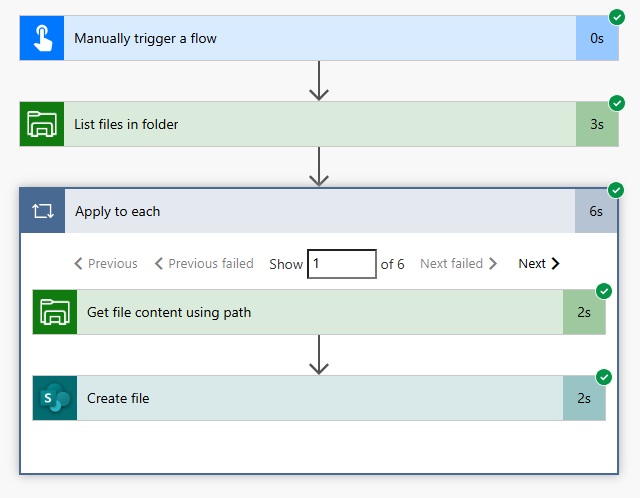
Add a File System – List Files In Folder action to the flow and select C:\Invoices\Adatum in the folder field. Then insert an Apply To Each loop to process file in the folder. Get the file content using the File System – Get file Content using path action. Then add a SharePoint – Create File action and target the Vendor Invoices document library. Supply the filename and file content as dynamic values.
Run The Power Automate Flow To Get Files From A Network Drive
We’re done. Test the flow to ensure it works.
The files from the network drive folder C:\Vendor Invoices\Adatum are now saved to SharePoint.
Did You Enjoy This Article? 😺
Subscribe to get new Power Apps & Power Automate articles sent to your inbox each week for FREE
Questions?
If you have any questions or feedback about Power Automate Copy Files From Network Drive To SharePoint please leave a message in the comments section below. You can post using your email address and are not required to create an account to join the discussion.


Hi Matthew. Another great article. I wonder, could his be setup on a VDI and thus be available pretty much 24/7?
Matt,
Yes, that’s what I would recommend. Much easier than keeping a physical machine on. Virtual machines are much better.
Is it possible to copy file from SharePoint to any on-prem server, if yes then please suggest what steps we need to follow to achieve this.