Send An Approval To A Microsoft 365 Group In Power Automate

An approval can be sent to a Microsoft 365 group in Power Automate. You can use an existing Microsoft 365 group or setup a new one in the Microsoft 365 Admin Center. The only requirement is you must enable external email senders for the group since the approval comes from Microsoft’s domain. Then all members of the Microsoft 365 group can receive an approval request and will able to respond to it.
Table of Contents
• Introduction: The Group Approval Flow
• Create A Microsoft 365 Group In Admin Center
• Add Members To The Microsoft 365 Group
• Enable External Senders For The Microsoft 365 Group
• Send An Approval To The Microsoft 365 Group Using A Flow
• Run The Microsoft 365 Group Approval Flow
Introduction: The Group Approval Flow
A construction company uses Power Automate approvals to get invoices approved for payment. Each approval is sent to a Microsoft 365 group having members who belong to the specific construction project.
Create A Microsoft 365 Group In Admin Center
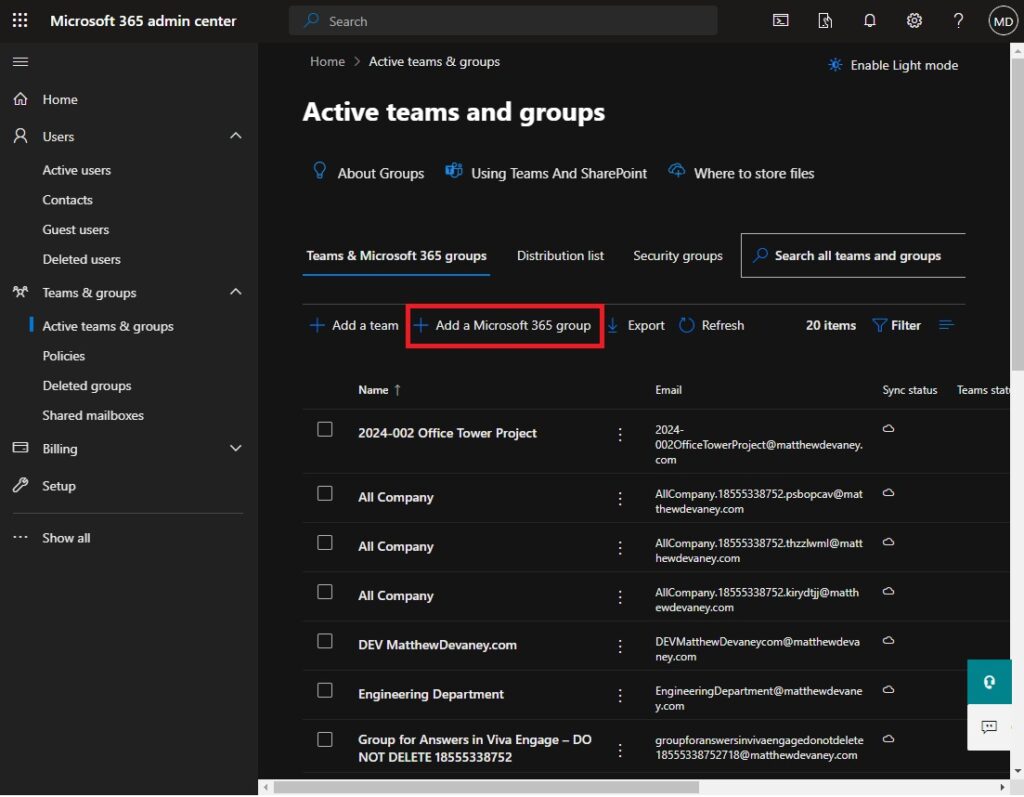
Our goal is build a Power Automate flow that sends an approval to a Microsoft 365 group. We will begin by creating a new Microsoft 365 group from scratch. Go to the Microsoft 365 Admin Center and navigate to the active teams and groups page. Select add a Microsoft 365 group.
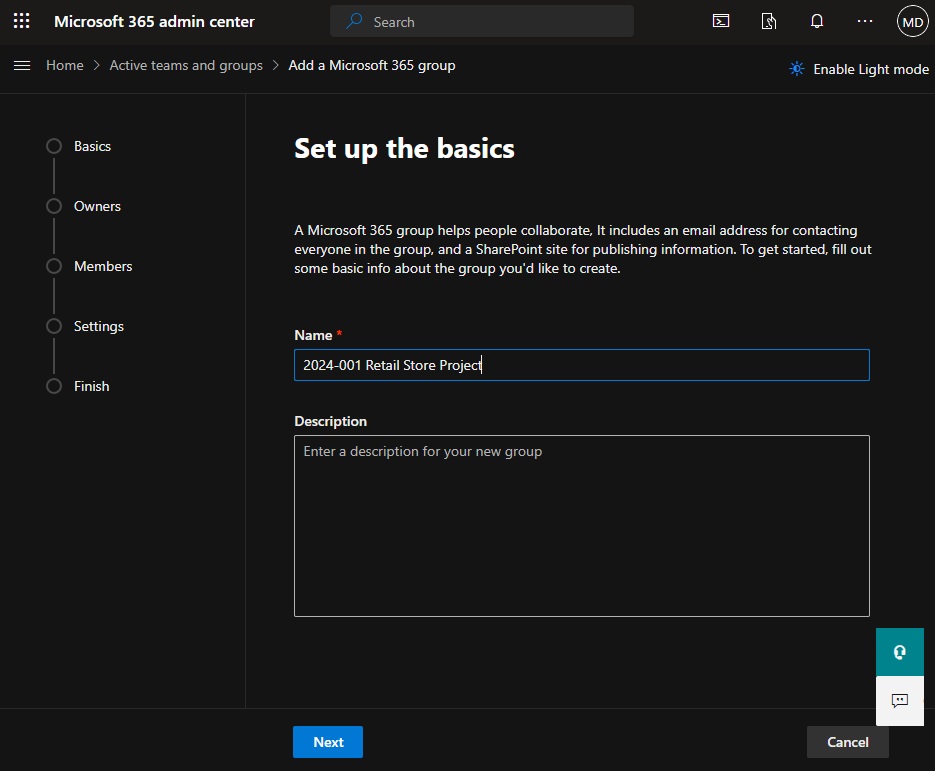
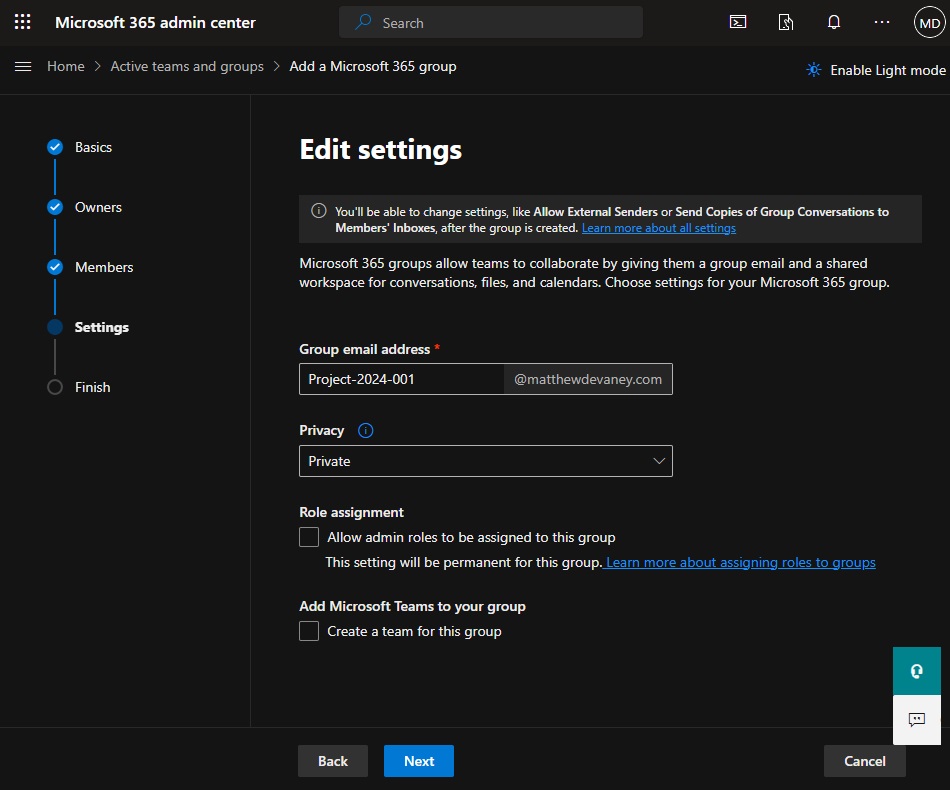
Give the Microsoft 365 Group a name. In this case we will use 2024-001 Retail Store Project. Then go to the next page.
Add Members To The Microsoft 365 Group
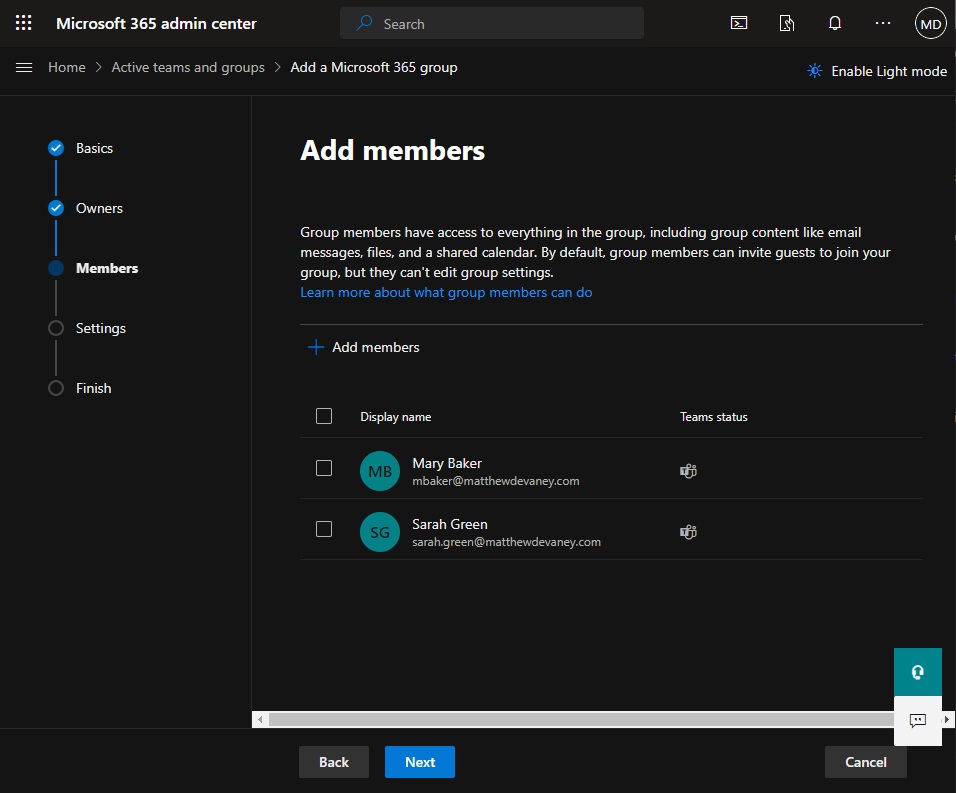
When an approval is sent to a Microsoft 365 group all of its members receive the approval request. Add two or more members to the group and click Next.
Choose an email address for the group. The approval flow action we create later in Power Automate will use this email address to target the group. Also change the privacy to Private so that only group owners can add new members.
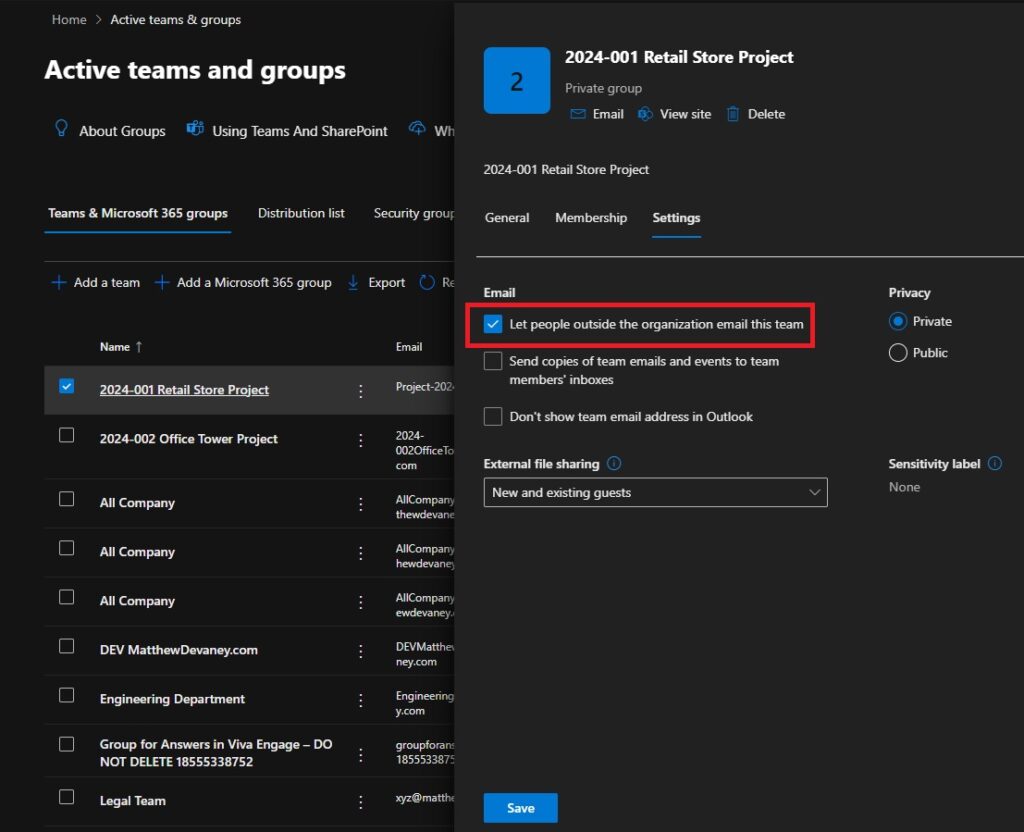
Enable External Senders For The Microsoft 365 Group
A Microsoft 365 group is only allowed to receive email from inside the same company by default. We must change this setting because approvals come from outside of the organization through Microsoft.
Select the new group we just created and go to the settings tab. Check the box that says Let people outside the organization email this team and press the Save button.
Send An Approval To The Microsoft 365 Group Using A Flow
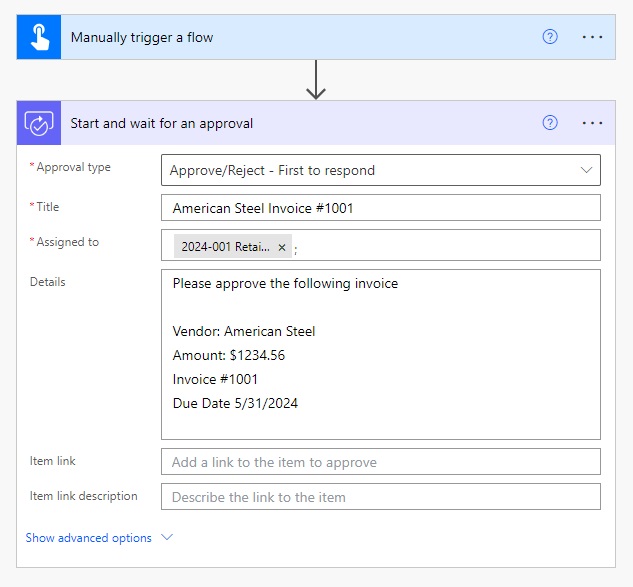
Now that the Microsoft 365 group is setup we can build the Power Automate flow to send an approval. Open Power Automate and create a new instant flow. Then add an Approval – Start and wait for an approval action.
Select one of the two following approval types:
- Approve/Reject – First to respond: only one member of the Microsoft 365 group must approve
- Approve/Reject – Everyone must approve: all members of the Microsoft 365 group must approve.
Then fill-in the assigned to field with the email address for the Microsoft 365 group. In our example the email address is [email protected].
Run The Microsoft 365 Group Approval Flow
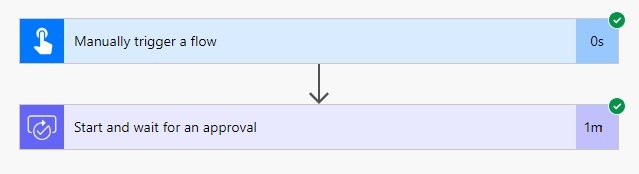
We’re done building the Power Automate flow. Save the flow and give it a test run.
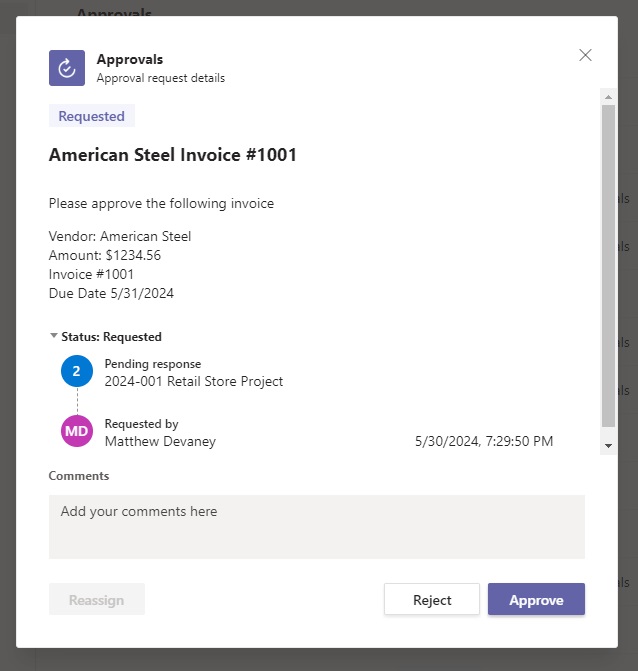
The approval will appear in Approvals Center for all Microsoft 365 group members.
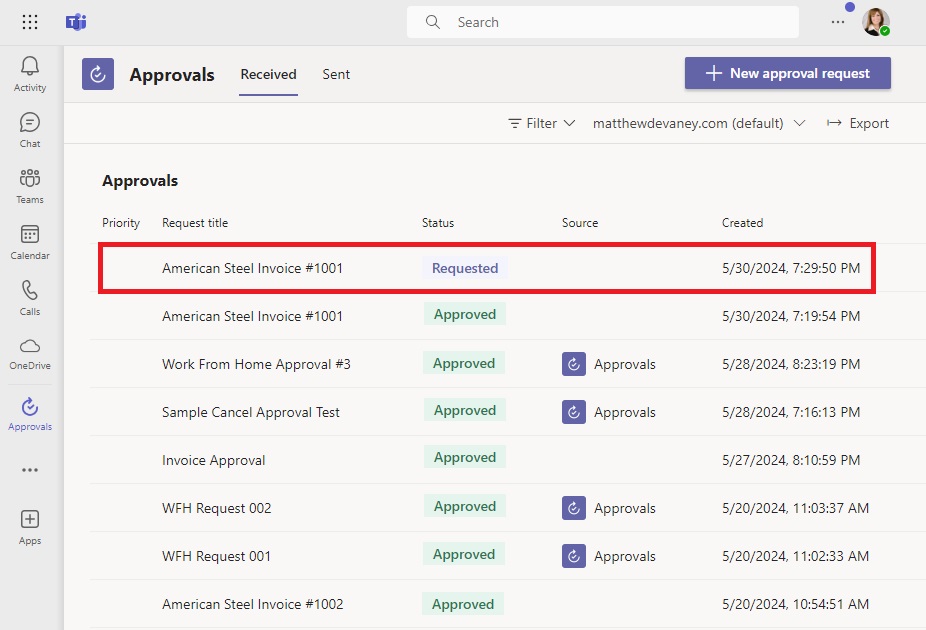
The approval request has a status of pending response from the group.
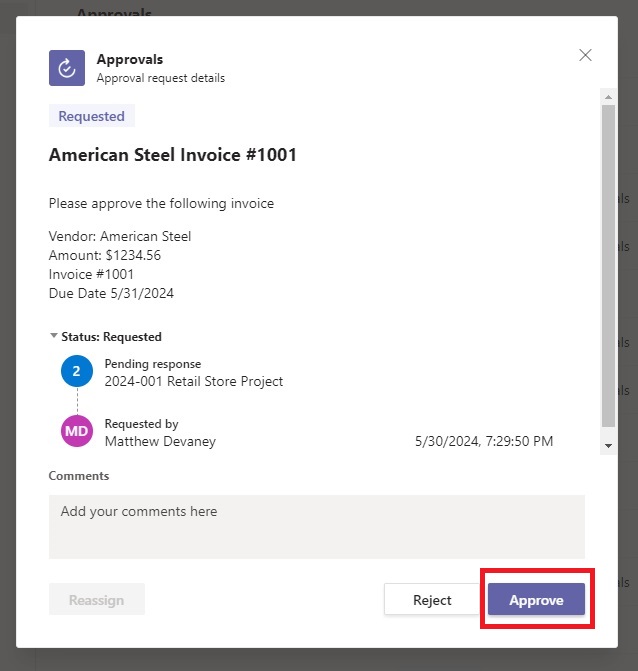
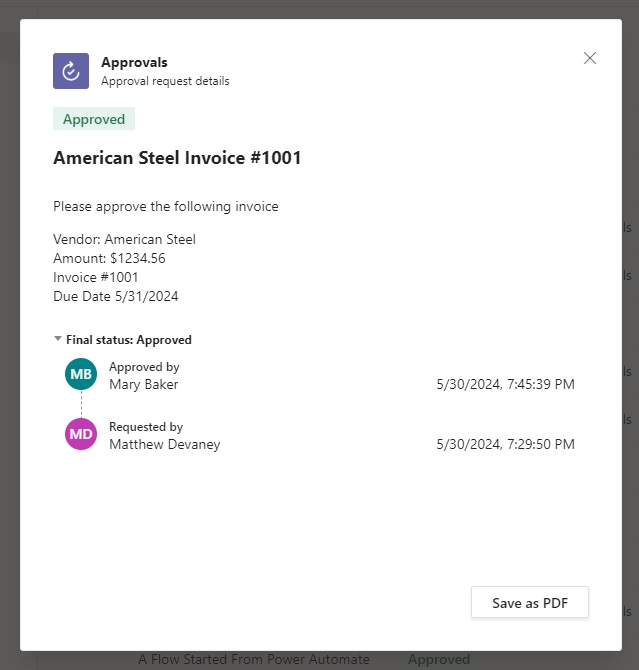
When a group member responds to the approval request it shows the name of the approver in the approved by field instead of the Microsoft 365 group name.
Did You Enjoy This Article? 😺
Subscribe to get new Power Apps & Power Automate articles sent to your inbox each week for FREE
Questions?
If you have any questions or feedback about Send An Approval To A Microsoft 365 Group In Power Automate please leave a message in the comments section below. You can post using your email address and are not required to create an account to join the discussion.


Here for the content, but also the consistent cat pics.
Allie,
I love this comment, lol.
Hello, do you know if there is a way to reassign an approval that was sent to the group? I see even in your screenshot that the “reassign” button is grayed out.
Thank you for all that you do…
Hi Matthew,
Is there a way to change the name in the “requested by” field?
I want my approvals to come from a shared mailbox instead of my name. I tried using the shared mailbox as the requester but it made the flow fail.
Hi Matthew,
Thanks for sharing.
Do you know if users can receive the email notification?
I can only see the approval notifications through Teams or Power Automate Portal.
I would like to know if you have the same error.
Thank You
I solved the issue creating a new Microsoft 365 group of users, it is working very well now, and we can see the notifications both in teams and in Outlook 🙂